How to Implement Face ID and Touch ID Authentication in Swift
In this article, we will explain how to use Face ID and Touch ID for authentication in Swift.
Prepare an iOS App to Use Face ID and Touch ID
First, let's create a simple iOS app for testing, where tapping a button will authenticate with Face ID or Touch ID.
Create a new project in Xcode under [iOS] > [App].
Add a Button to the View Controller in the Main storyboard. The design and placement can be arbitrary. Set its Title to Login with Face ID.
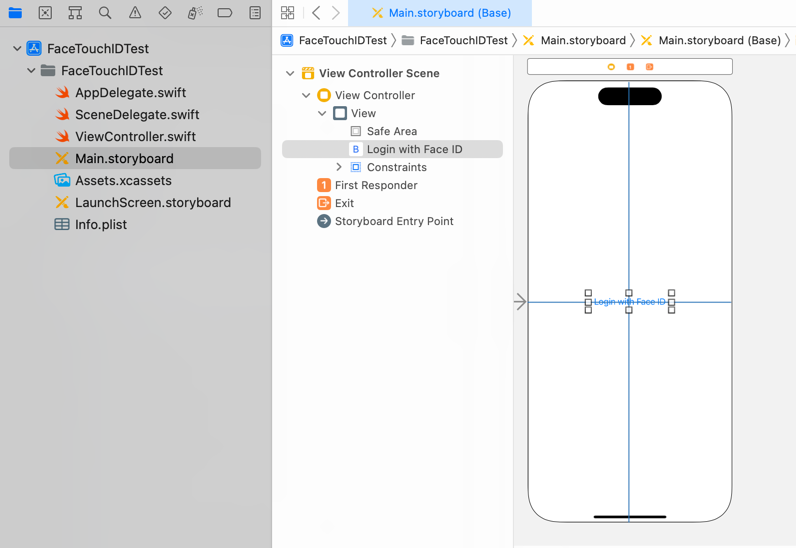
Create a TouchUpInside action from this button named loginButtonTapped.

import UIKit

class ViewController: UIViewController {

    override func viewDidLoad() {
        super.viewDidLoad()
    }

    @IBAction func loginButtonTapped(_ sender: Any) {
    }
}
If you are unsure how to add buttons or create actions, please see "How to Create a Basic iOS App".
How to Authenticate with Face ID and Touch ID in Swift
In this example, we will also allow authentication with a passcode if Face ID or Touch ID is not available.
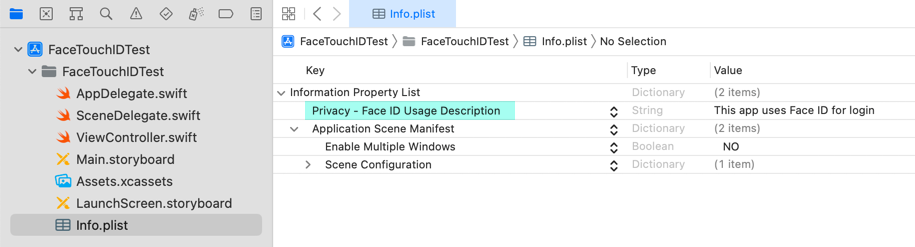
First, add Privacy - Face ID Usage Description to your info.plist file.
Now, let's write the code in Swift to use Face ID and Touch ID for authentication.
We will use the LocalAuthentication framework, so make sure to import it.
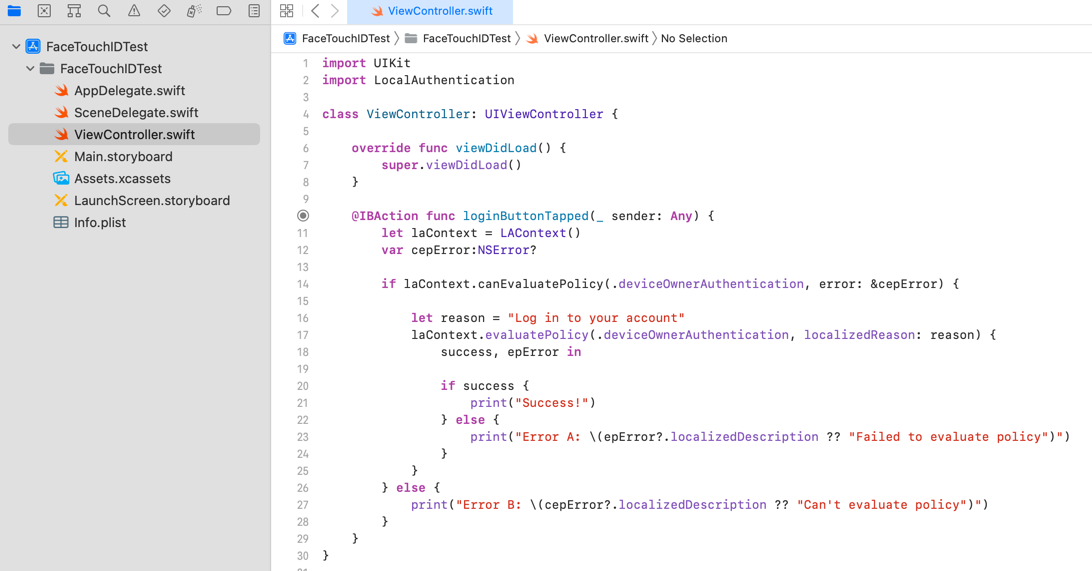
Modify loginButtonTapped() as follows:
import UIKit
import LocalAuthentication

class ViewController: UIViewController {

    override func viewDidLoad() {
        super.viewDidLoad()
    }

    @IBAction func loginButtonTapped(_ sender: Any) {
        let laContext = LAContext()
        var cepError:NSError?

        if laContext.canEvaluatePolicy(.deviceOwnerAuthentication, error: &cepError) {

            let reason = "Log in to your account"
            laContext.evaluatePolicy(.deviceOwnerAuthentication, localizedReason: reason) {
                success, epError in

                if success {
                    print("Success!")
                } else {
                    print("Error A: \(epError?.localizedDescription ?? "Failed to evaluate policy")")
                }
            }
        } else {
            print("Error B: \(cepError?.localizedDescription ?? "Can't evaluate policy")")
        }
    }
}
Let's walk through the loginButtonTapped() code.
Line 11 creates an instance of LAContext, which handles authentication with Face ID and Touch ID.
Line 12 defines a variable to capture any errors.
Line 14 checks if authentication can be evaluated using canEvaluatePolicy(_:error:) with the deviceOwnerAuthentication policy.
If you want to restrict authentication to only Face ID or Touch ID and not allow passcode fallback, use deviceOwnerAuthenticationWithBiometrics.
If the policy can be evaluated, the method returns true. Otherwise, it returns false, and the error details are stored in cepError, which is printed on line 27.
Line 17 calls evaluatePolicy(_:localizedReason:reply:) to evaluate authentication with the deviceOwnerAuthentication policy, which allows Face ID, Touch ID, or passcode.
If Face ID or Touch ID fails or is not supported, the user can authenticate using their passcode instead.
If you want to fail when biometric authentication is not available, use deviceOwnerAuthenticationWithBiometrics instead.
If authentication succeeds, success becomes true, and line 21 prints Success!. In a real app, you would place your login success logic here.
If an error occurs, the error details are passed to epError and printed on line 23.
That's all the code required to authenticate with Face ID and Touch ID in Swift.
Install and Test the iOS App on iPhone
Next, install and test the app on an iPhone or iPad.
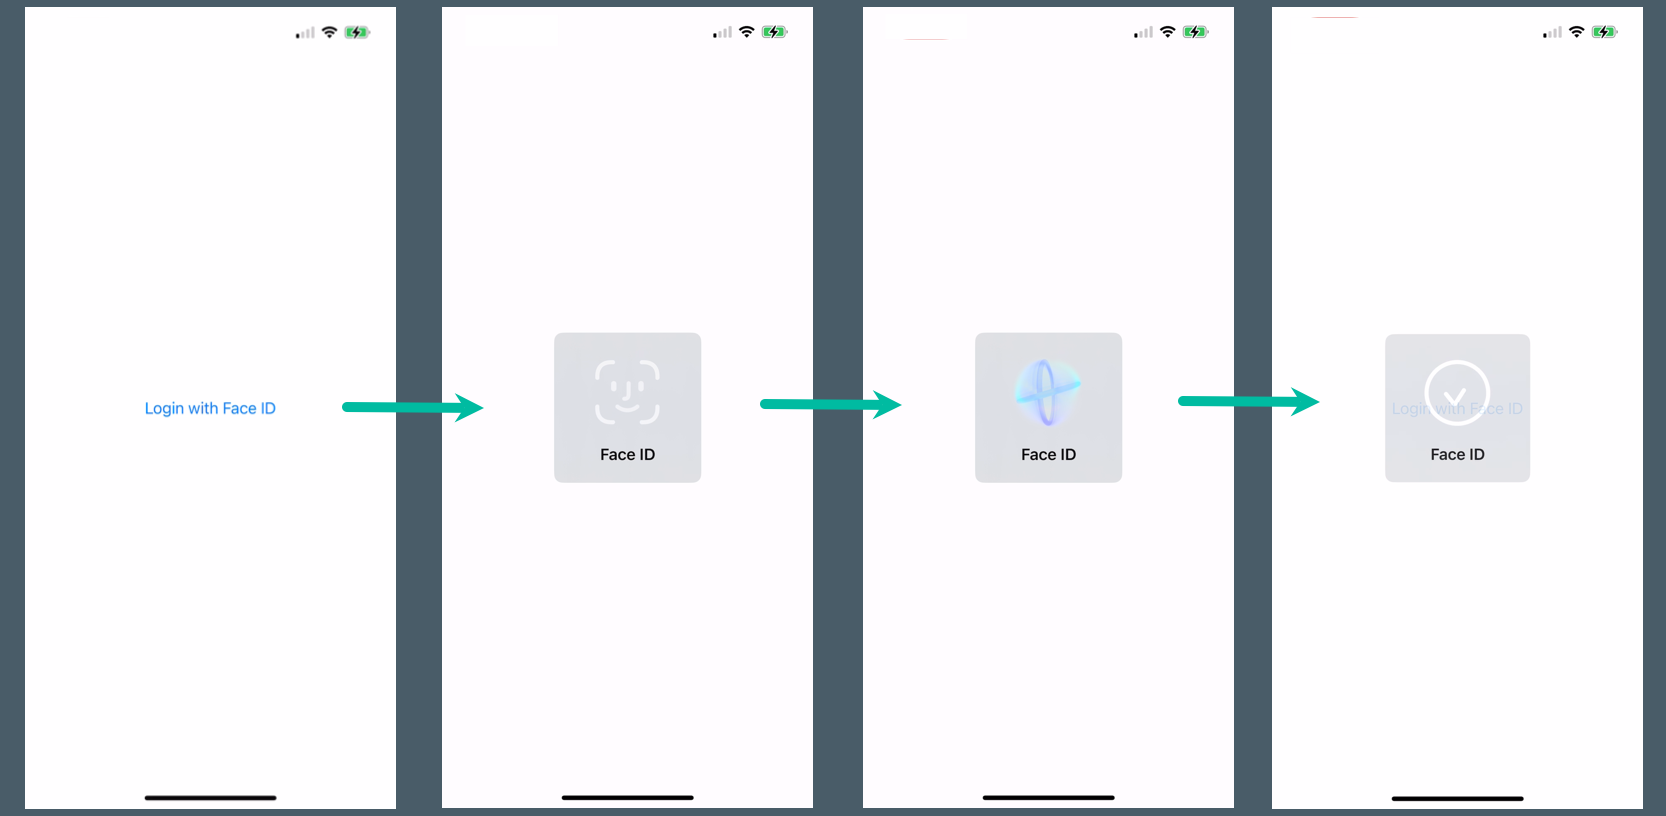
If you run the app on an iPhone that supports Face ID, you will see a screen like this:

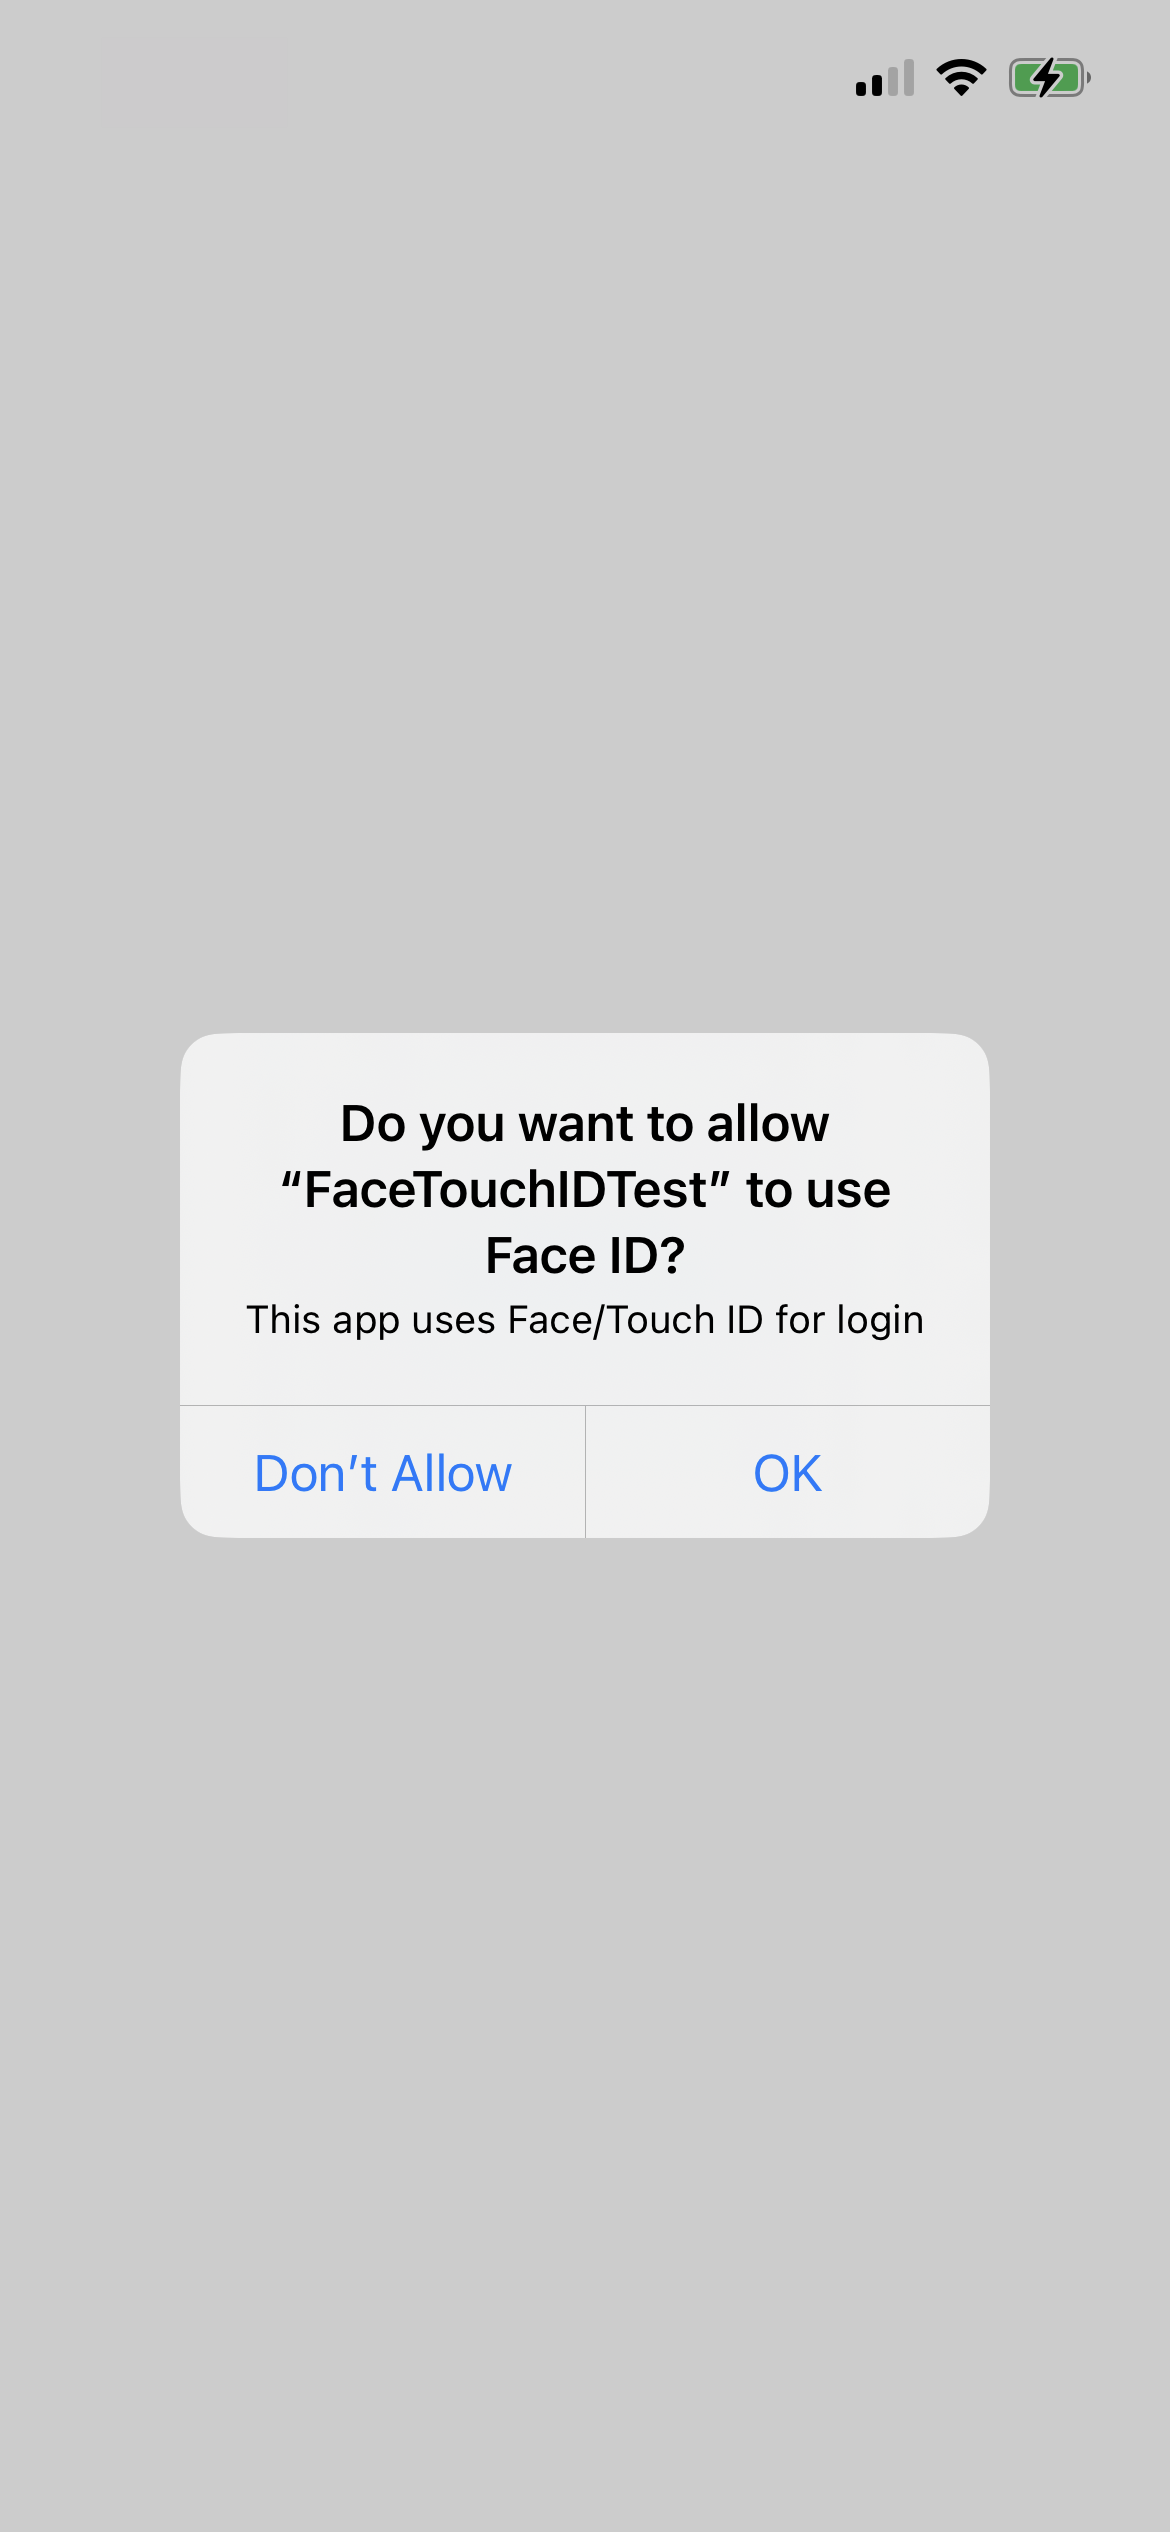
When you tap the Login with Face ID button for the first time, a dialog will appear requesting permission to use Face ID. Tap OK.
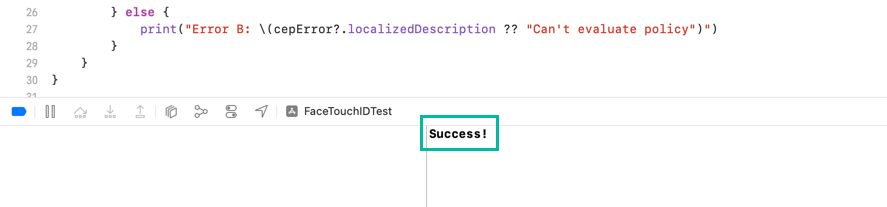
The Face ID authentication will then run, and if successful, Success! will be printed in the Xcode Output console.
In error cases, for example, if the user cancels authentication midway, Error A: Authentication canceled. will be printed.
If you use deviceOwnerAuthenticationWithBiometrics for canEvaluatePolicy and Face ID is not allowed, then Error B: Biometry is not available. will be printed.
If you want to check errors by code instead of localizedDescription, refer to the LAError.Code reference.
If you install this iOS app on a device that does not support Face ID but supports Touch ID, Touch ID authentication will be used, as shown below:


That's how to authenticate with Face ID and Touch ID in Swift.