How to Use WeatherKit to Fetch Weather Data (Swift)
Here, we will explain how to retrieve weather information using WeatherKit in an iOS app.
About WeatherKit
WeatherKit is one of Apple's frameworks that allows you to get weather information from the Apple Weather service.
To use WeatherKit, you need to be enrolled in the paid Apple Developer Program.
For details, see About the Apple Developer Program.
WeatherKit requires iOS 16, iPadOS 16, macOS 13, tvOS 16, or watchOS or later.
Here, we will create a test app for iPhone using iOS 16.
A REST API is also available for platforms that cannot use WeatherKit, such as web apps or Android.
WeatherKit includes up to 500,000 API calls per month for free with the Apple Developer Program. Requests beyond that limit are charged.
Please refer to Apple's WeatherKit page for pricing details.
How to Retrieve Weather Information with WeatherKit
To retrieve weather information with WeatherKit, you must create an App ID with WeatherKit enabled and add the capability to your iOS app. Let's go through the steps.
Create an App ID with the WeatherKit Service Enabled
To create an App ID with the WeatherKit service, you need a Bundle Identifier.
Bundle Identifier (Bundle ID) is an ID used by Apple to identify an app.
The Bundle Identifier must be unique and is usually written in reverse domain style (com.domainname.appname).
First, set the Bundle Identifier for the iOS app that will use WeatherKit.
In Xcode, create a new project under [iOS] > [App].
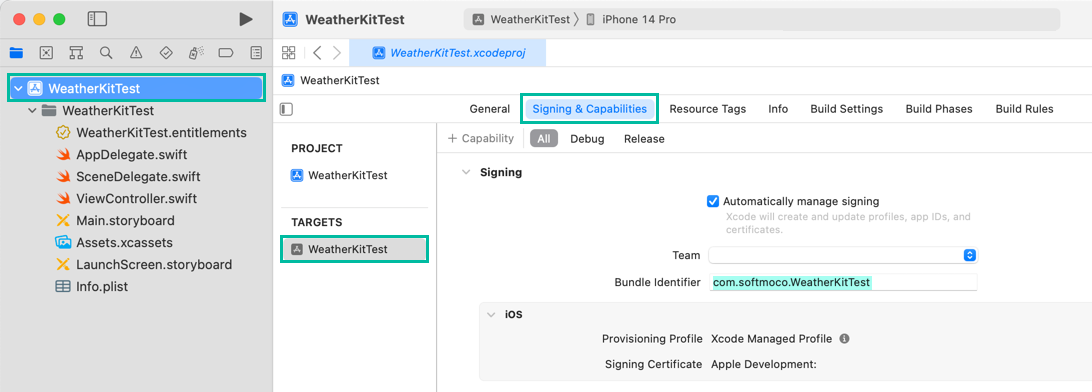
Click the project name at the top of the left navigator area, click the project name under TARGETS, and go to the Signing & Capabilities tab.
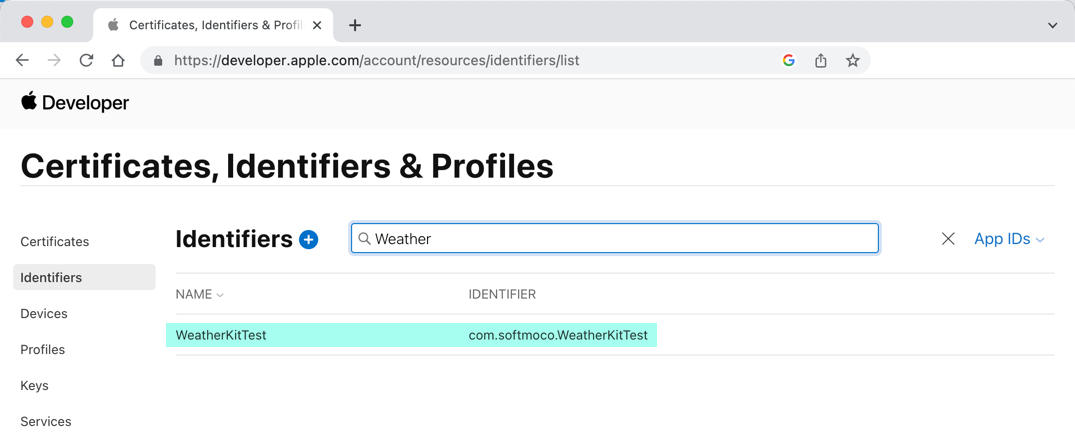
Here, we set the Bundle Identifier to “com.softmoco.WeatherKitTest”.
Next, create an App ID for the iOS app that will use WeatherKit in Apple Developer.
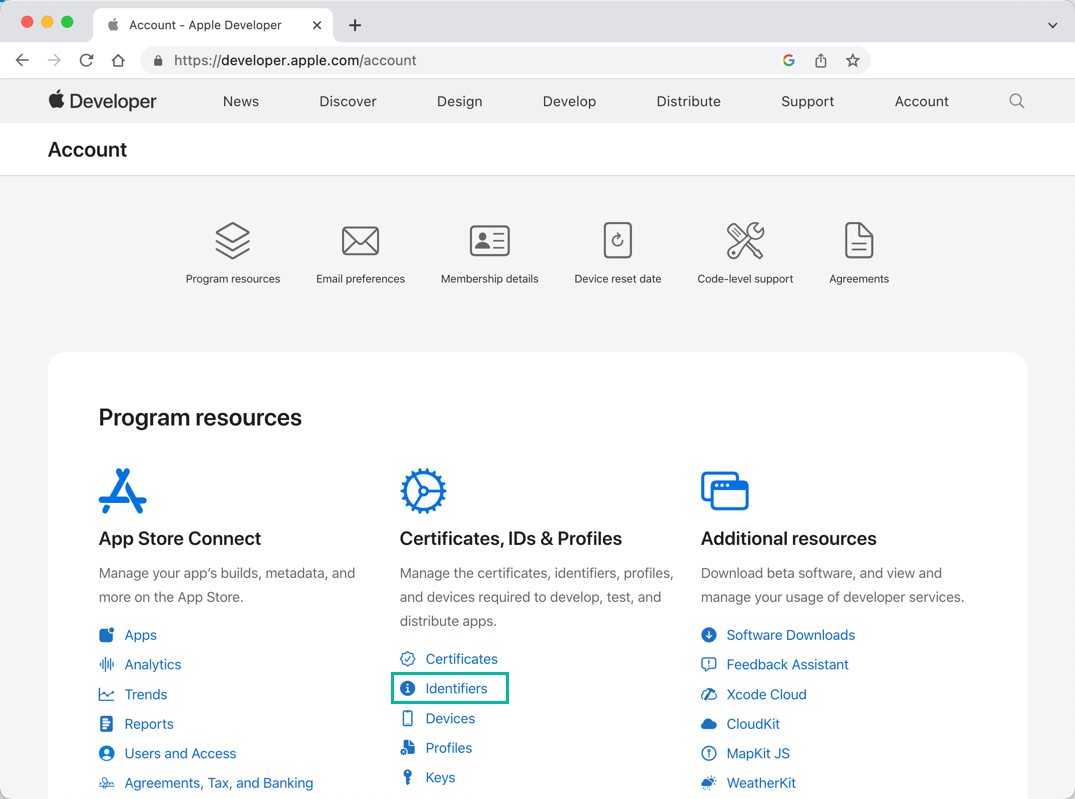
Log in to the Apple Developer site, then click Certificates, Identifiers & Profiles > Identifiers.
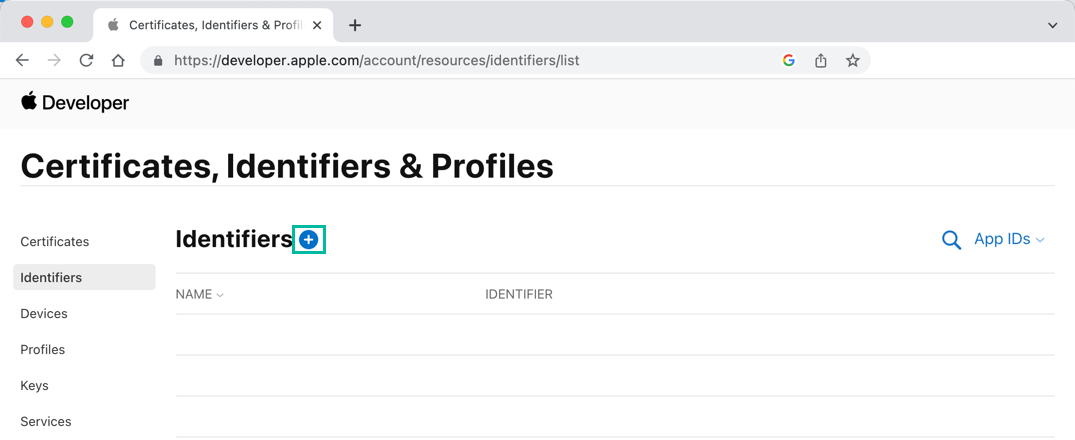
Click the + button next to Identifiers.
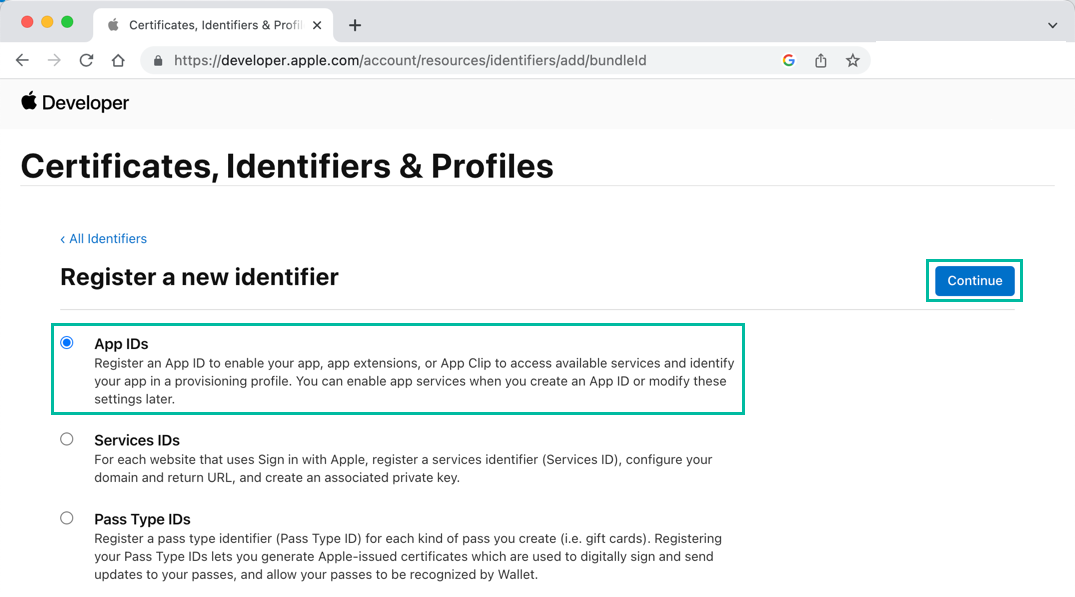
Select [App IDs] and click [Continue].
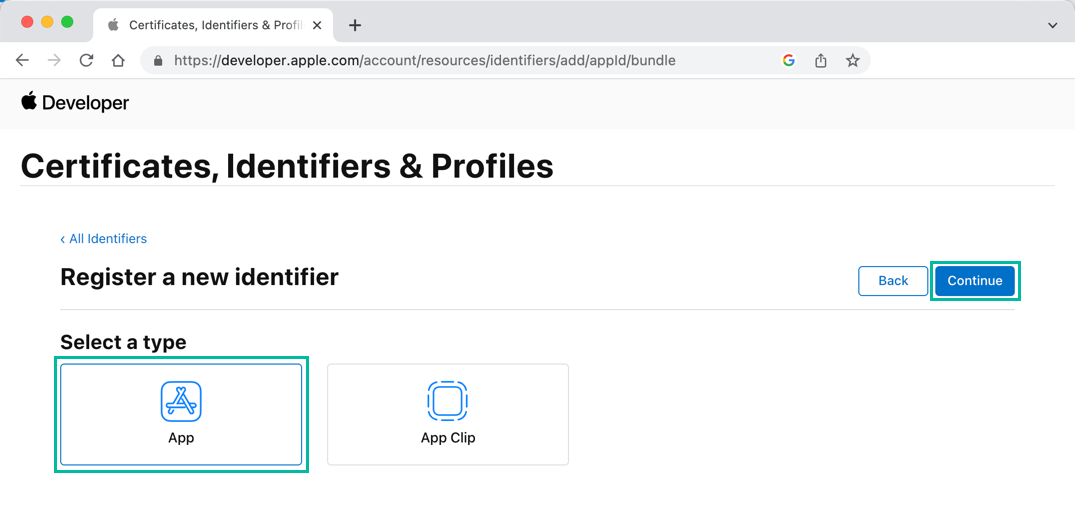
Select [App] and click [Continue].
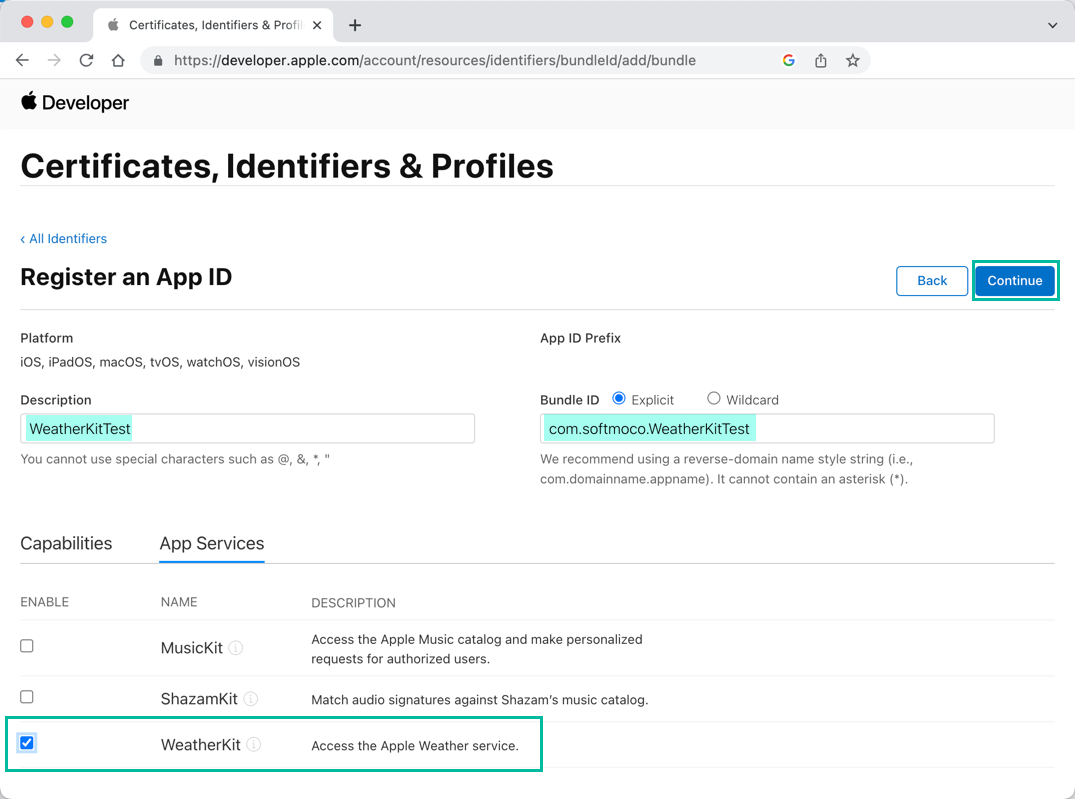
Enter any name in [Description], and for [Bundle ID], select Explicit and enter the same one set in Xcode.
In the App Services section below, select WeatherKit and click [Continue].
A confirmation screen will appear. Review the settings, and if correct, click [Register].
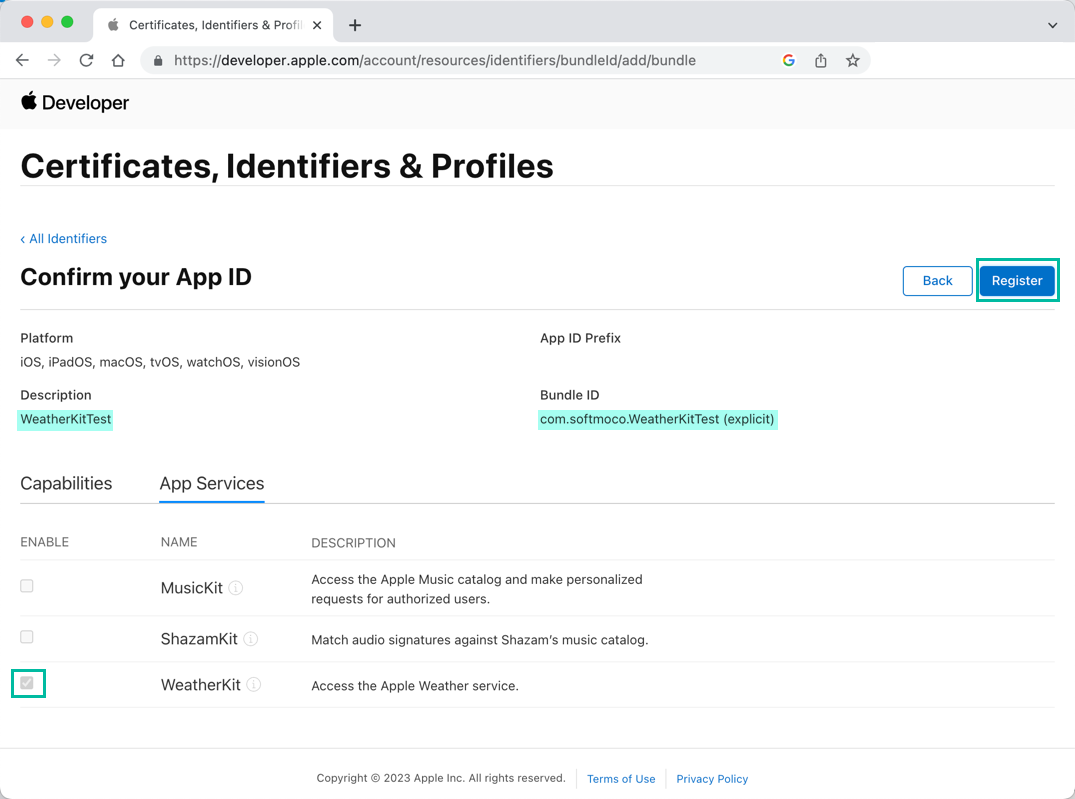
Now, the App ID with WeatherKit enabled for your iOS app has been registered.
It may take about 30 minutes for the WeatherKit service to be fully enabled for the Bundle ID.
Prepare an iOS App to Use WeatherKit
Let's create a simple iOS app that retrieves and displays weather information using WeatherKit.
First, add the WeatherKit capability to your iOS app.
Open the project you created earlier with the Bundle Identifier in Xcode.
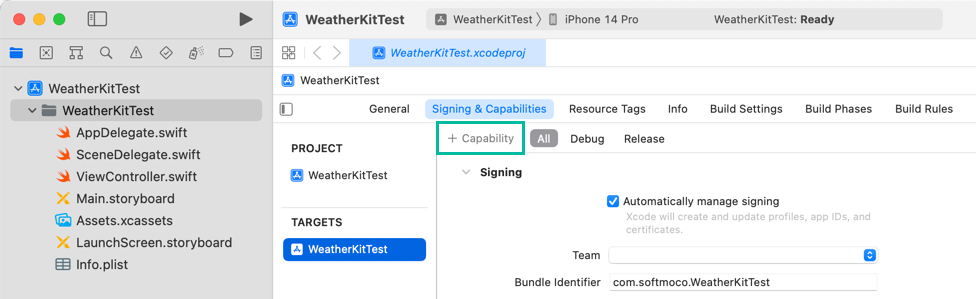
Select the project name at the top of the left navigator area, then select the project name under TARGETS.
Go to the Signing & Capabilities tab and click + Capability.
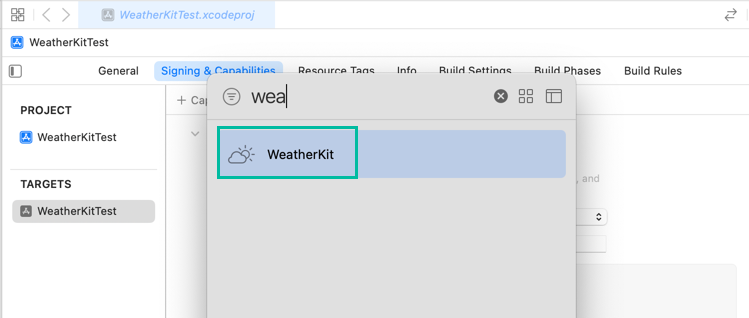
Find WeatherKit in the list of capabilities and double-click to add it.
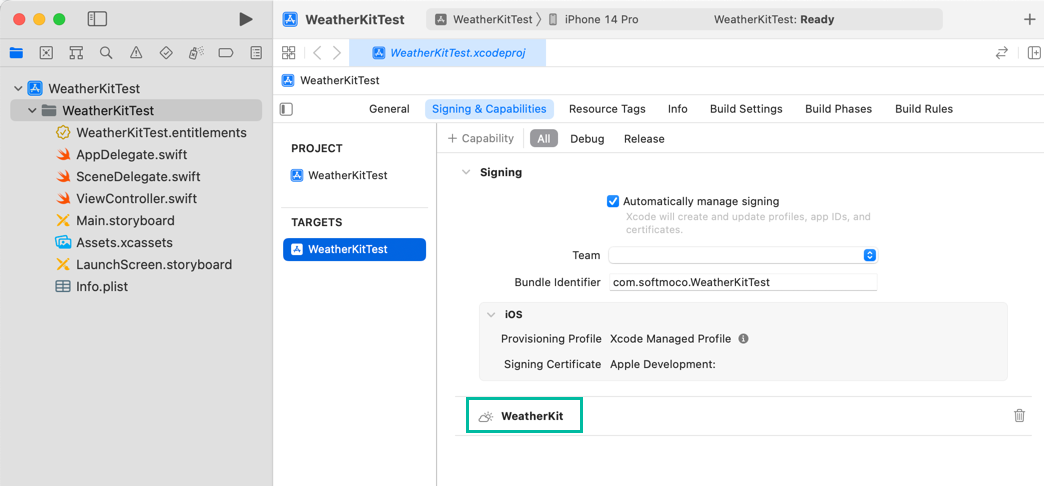
Now, the WeatherKit capability has been added.
Next, create the UI to display the weather information.
In the Main storyboard, add Labels for Location and Temperature, an Image View for the weather symbol, and another Label for Condition.
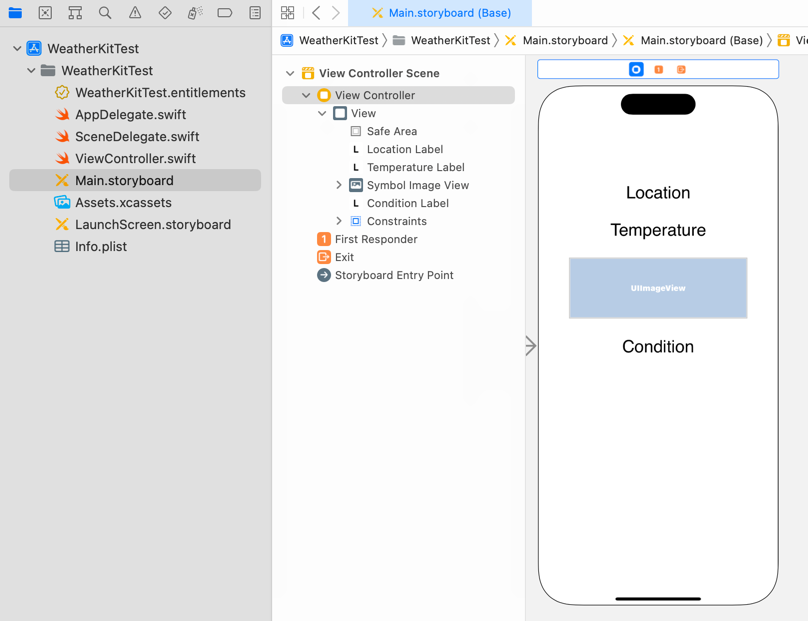
Open ViewController.swift in the Assistant Editor and create outlets for the Labels and Image View with the following names:
If you don't know how to add objects or create outlets, see How to Create a Basic iOS App.
import UIKit

class ViewController: UIViewController {

    @IBOutlet weak var locationLabel: UILabel!
    @IBOutlet weak var temperatureLabel: UILabel!
    @IBOutlet weak var conditionLabel: UILabel!
    @IBOutlet weak var symbolImageView: UIImageView!

    override func viewDidLoad() {
        super.viewDidLoad()
    }
}
Retrieve Weather Information Using WeatherKit
Now let's write the Swift code to retrieve weather information with WeatherKit in an iOS app.
In this example, we'll get the weather for Los Angeles International Airport (LAX).
The latitude and longitude are: latitude: 33.942791, longitude: -118.410042.
If you want to get the weather for the current location, please see How to Get the Current Location in an iOS App.
Here's a sample code that retrieves and displays the weather for Los Angeles using WeatherKit:
import UIKit
import CoreLocation
import WeatherKit

class ViewController: UIViewController {

    let weatherService = WeatherService()

    @IBOutlet weak var locationLabel: UILabel!
    @IBOutlet weak var temperatureLabel: UILabel!
    @IBOutlet weak var conditionLabel: UILabel!
    @IBOutlet weak var symbolImageView: UIImageView!

    override func viewDidLoad() {
        super.viewDidLoad()

        temperatureLabel.text = ""
        conditionLabel.text = ""

        locationLabel.text = "Los Angeles, CA"
        let loc = CLLocation(latitude:33.942791, longitude: -118.410042)

        Task {
            let weather = try? await weatherService.weather(for: loc)
            if let weather = weather {
                let tempF = weather.currentWeather.temperature
                let tempC = tempF.converted(to: .celsius)
                temperatureLabel.text = "\(tempF.formatted()) / \(tempC.formatted(.measurement(usage: .asProvided)))"

                conditionLabel.text = weather.currentWeather.condition.rawValue
                symbolImageView.image = UIImage(systemName: weather.currentWeather.symbolName)
            }
        }
    }
}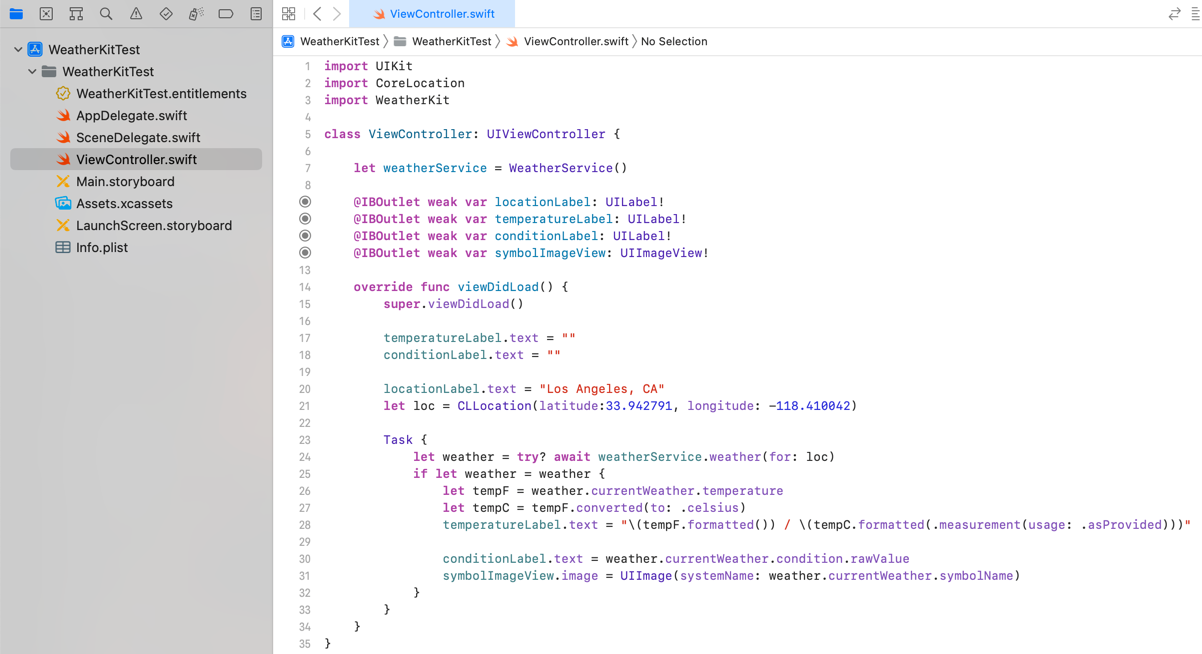
Lines 2–3 import CoreLocation and WeatherKit to use CLLocation and WeatherKit.
Line 7 creates a WeatherService object.
Line 20 sets the Location label to “Los Angeles, CA” and generates a CLLocation object from latitude and longitude.
Line 24 retrieves weather information from WeatherService for the specified location.
Here we use CurrentWeather, but you can also get dailyForecast, hourlyForecast, and minuteForecast data.
If the return value weather is not nil, line 26 retrieves the current temperature.
The formatted() function converts the temperature into a string using the default formatting style.
In my environment, since the locale is en_US, it formats in °F by default.
Line 27 converts the temperature to Celsius, and line 28 displays both Fahrenheit and Celsius in the temperatureLabel.
Line 30 sets conditionLabel.text to the rawValue of the WeatherCondition enum from currentWeather.condition.
Line 31 generates a UIImage object from the symbol name in currentWeather.symbolName and displays it in symbolImageView.
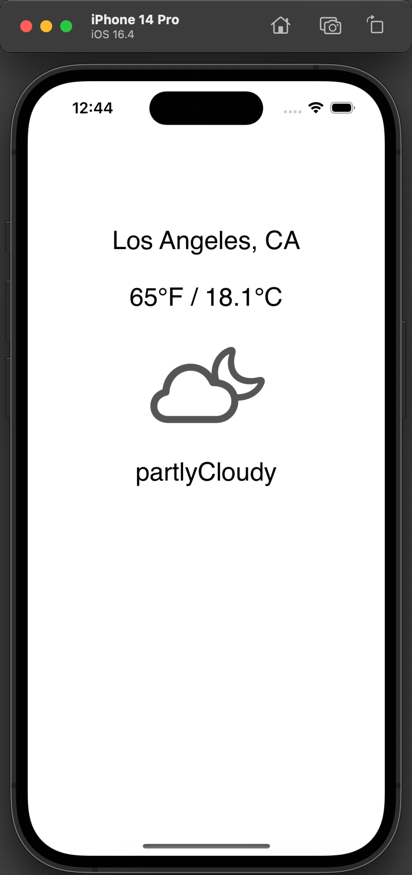
When you build, install, and run this on the simulator, the current weather will be retrieved and displayed on screen as shown below:
That's how to retrieve weather information using WeatherKit in an iOS app.