How to Create a Basic iOS App (Beginner Guide)
In this article, we'll explain the basics of creating an iOS app in Xcode for beginners.
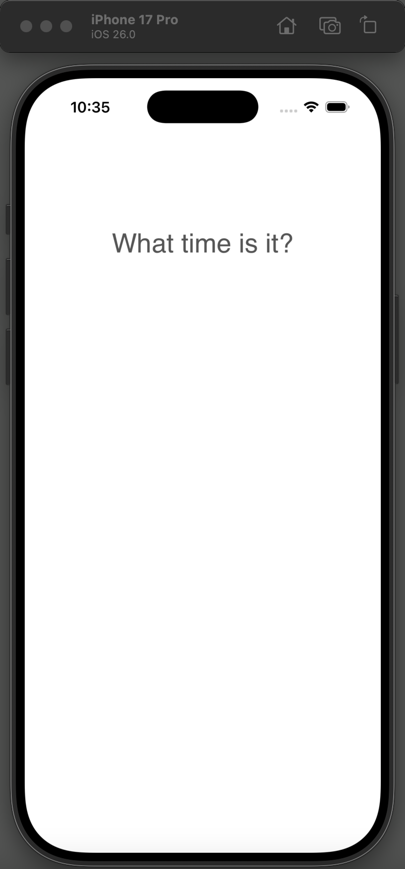
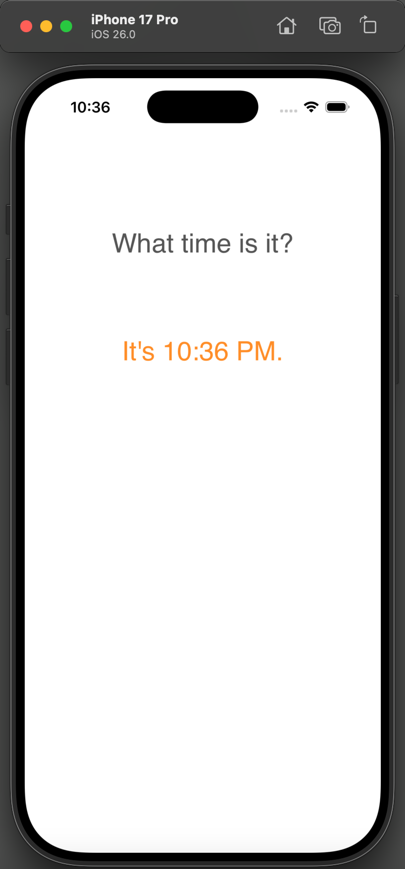
Let's create a simple app where tapping a button labeled "What is the current time?" displays the current time, such as "It's 9:06 PM".
Create a New Project
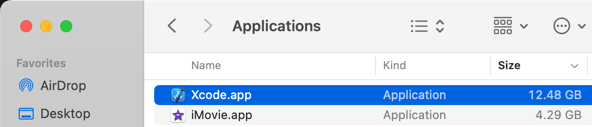
Launch Xcode from Applications.
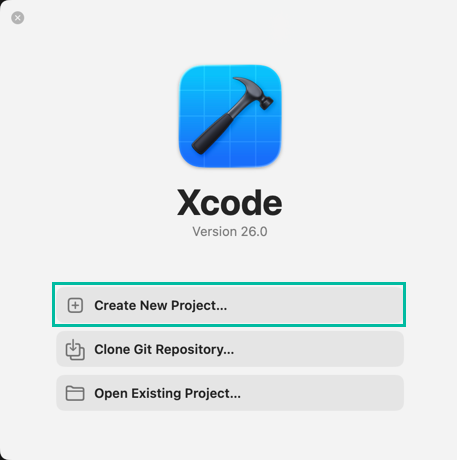
The Welcome screen will appear. Since we'll create a new Xcode project, select [Create New Project].
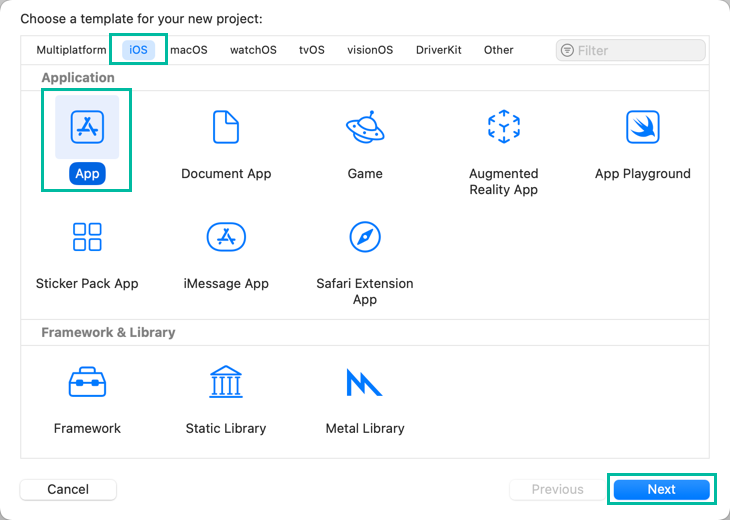
Choose a template. For this tutorial, we'll make a simple iOS app, so select [iOS] > [App] and click [Next].
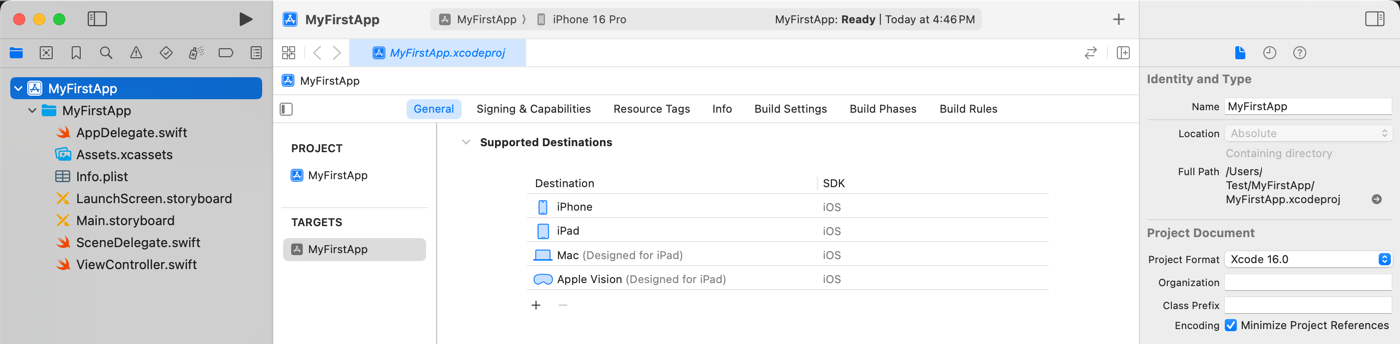
Configure your project options as shown below and click [Next].

- Product Name: MyFirstApp
- Team: If it's not automatically selected, set it to None.
- Organization Identifier: You can enter anything. If unsure, just set it to com.test.
- Interface: Storyboard
- Language: Swift
- Testing System: None
- Storage: None
* As long as [Interface] is set to Storyboard and [Language] is set to Swift, the other values don't matter for this tutorial.
* In older versions of Xcode, [Interface] may not be available. Instead, you may see [Devices]. In that case, select Universal.
* Organization Identifier is important when submitting apps to the App Store, but for learning and testing on the simulator or your own device, any value will do.
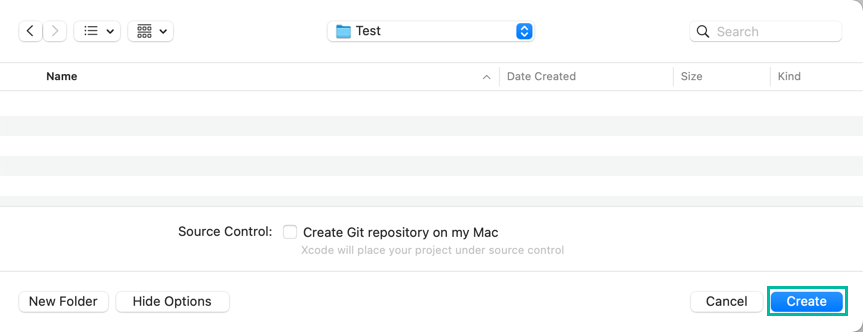
Next, choose a location to save the project, then click [Create].
The new project will be created in the specified location, and project details will be displayed as shown below.
Add a Button and Label in the Storyboard
Next, let's add a button labeled “What time is it?” and a label to display the current time.
In the Project Navigator, select Main.storyboard. A blank screen will appear in the editor area.
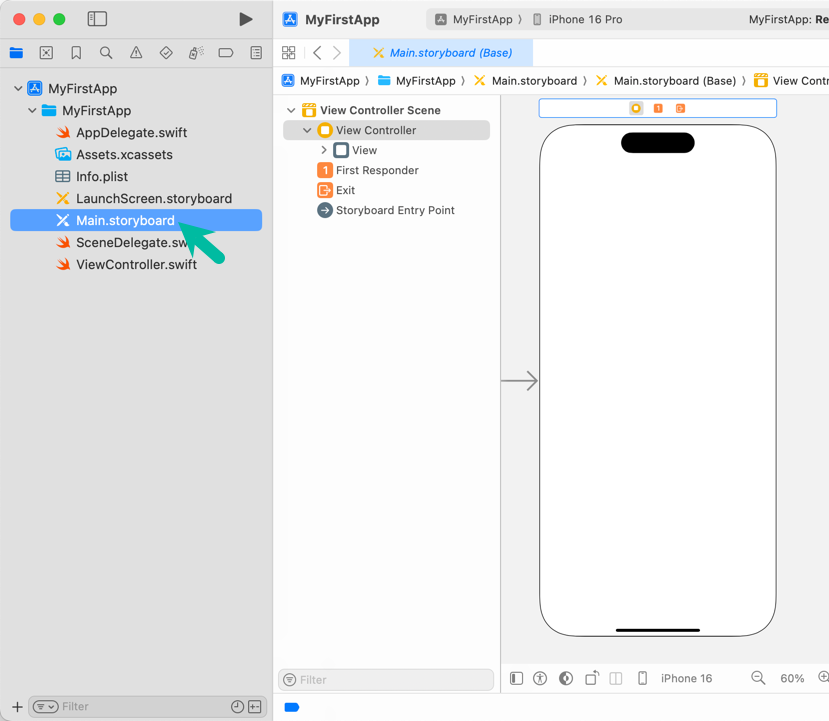
The upper-left section is called the Outline View, where you'll see items like View Controller Scene > View Controller > View.
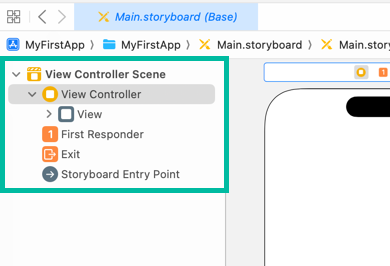
- Scene: Represents the app's UI in storyboard form
- View Controller: Controls the behavior and data flow of a View
- View: The UI object that is displayed to the user
Objects you add will appear in the Outline View in a hierarchy, and you can select them there as well.
Add a Button and Label
Let's add the button and label.
From the menu, go to View > Show Library to open the Object Library popup.
If the object library is not displayed, please refer to "How to display the object library".
Search for Button in the Object Library, then drag and drop it onto the View.
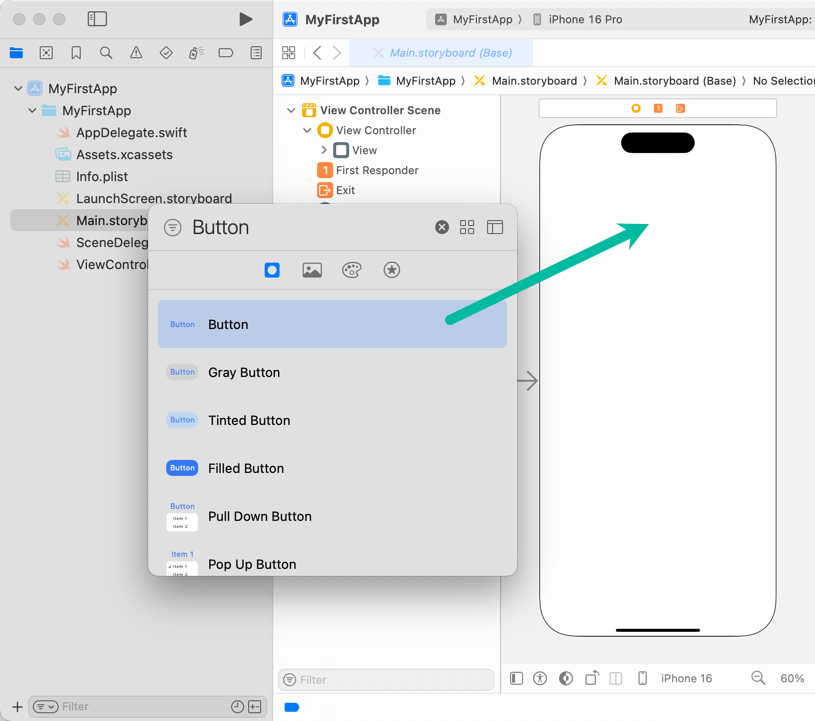
Double-click the button and change the text to “What time is it?”
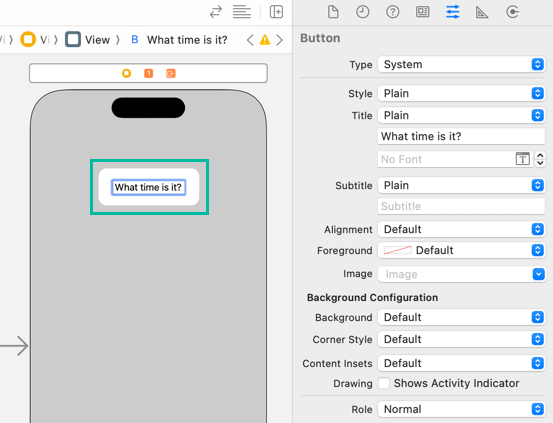
You can also change the button's text by selecting the button, opening the Attributes Inspector in the right Utilities area, and editing the Title field.
Click the “T” icon next to Font in the Attributes Inspector and change the font as shown.

Then set Foreground to Dark Gray Color.

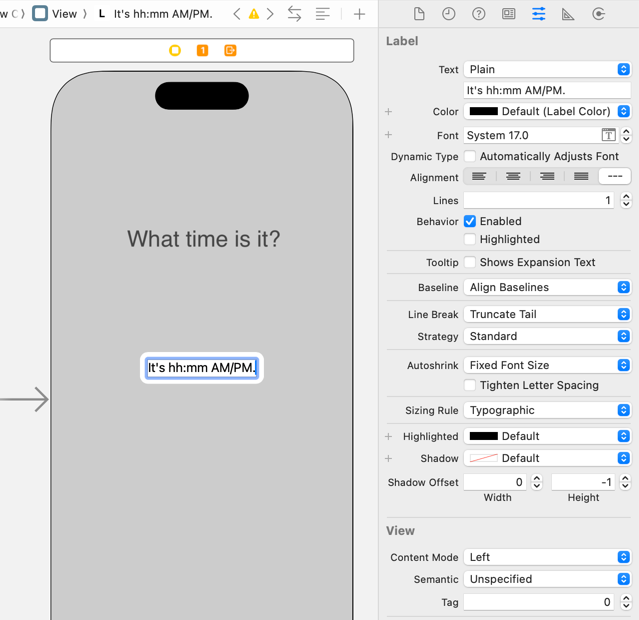
Similarly, search for Label in the Object Library, drag the Label onto the canvas, and place it below the button.
Double-click the label and enter “It's hh:mm AM/PM.”
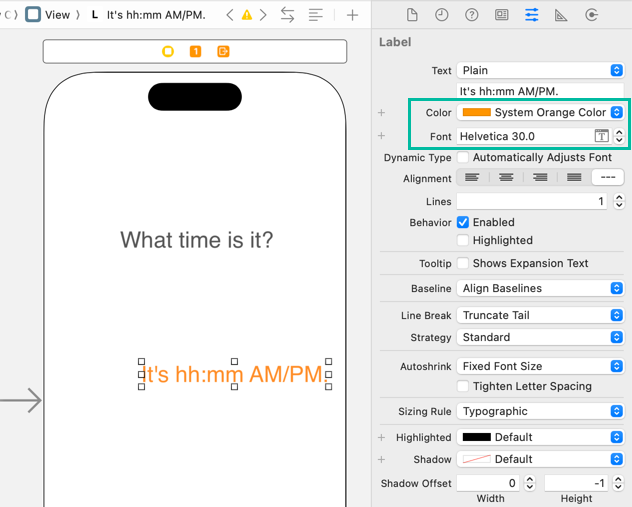
Change the font to match the button and set the Color to System Orange Color.
Add Constraints
Next, let's add constraints.
Constraints are rules you apply to positioned objects. They define how an object is sized and positioned relative to other objects.
By setting constraints properly, your UI elements will stay in the intended positions even when the screen size or orientation changes.
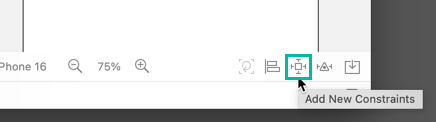
Select the “What time is it?” button and click the [Add New Constraints] button at the bottom-right of the editor area.
Enter 100 for the Top value and click [Add Constraints].
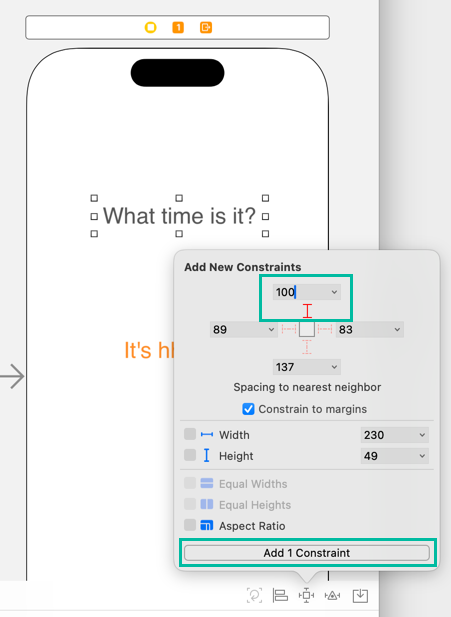
Then click the adjacent [Add New Alignment Constraints] button, check Horizontally in Container, and click [Add Constraints].

Now the “What time is it?” button is constrained to be 100 points from the top margin and centered horizontally.
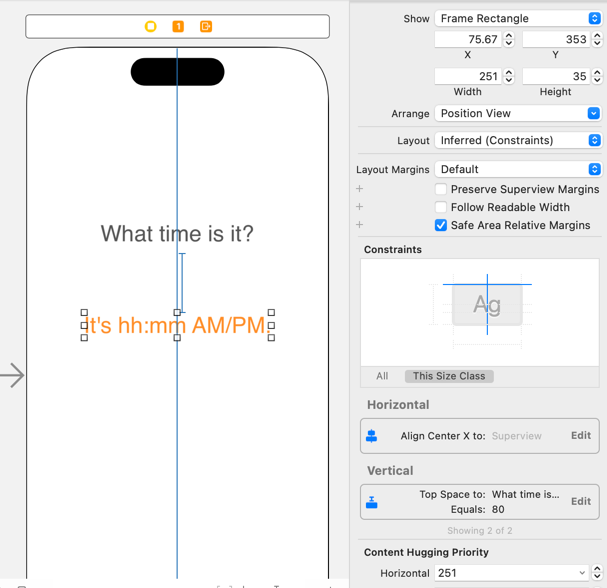
Using the same method, select the label and set constraints so it appears centered horizontally and 80 points below the button.
Create Outlets and Actions
Outlets are references to storyboard objects, allowing you to manipulate them from source code.
Actions are methods that run in response to events triggered by user interactions. Different objects provide different events.
In this tutorial, we'll create an outlet for the label and update the label's text to the current time when the button is tapped.
In the storyboard, with an object under View Controller selected (the button or label is fine), open the Assistant Editor via Editor > Assistant.
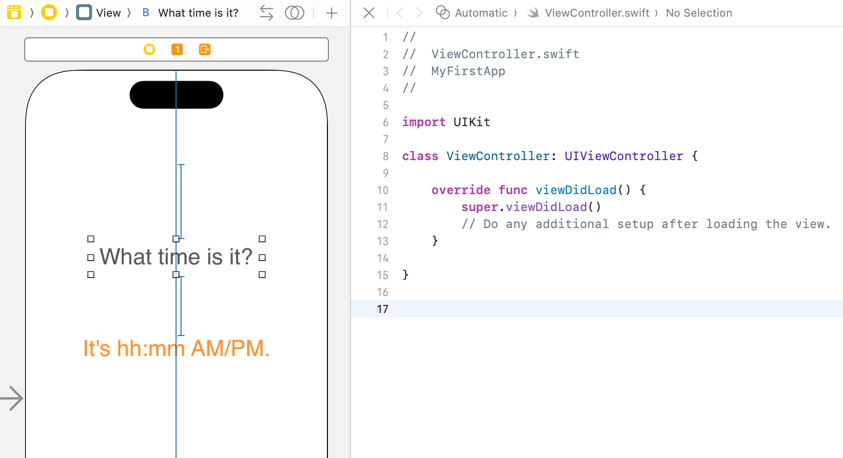
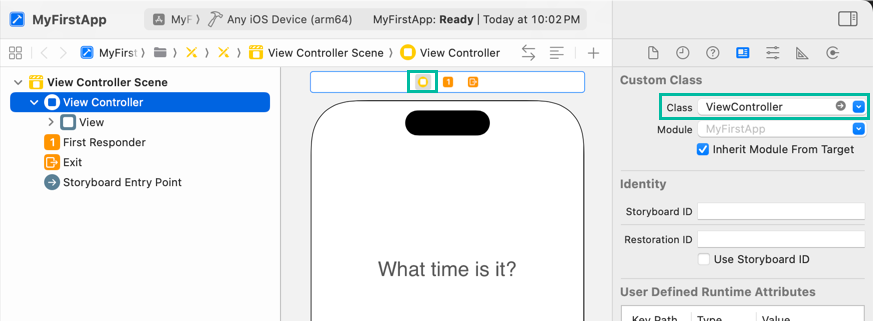
The view controller that manages the view you placed the button/label on is a class named ViewController, defined in ViewController.swift.
Make sure the file opened in the Assistant Editor is ViewController.swift.
If ViewController.swift doesn't appear in the Assistant Editor, try saving your project and restarting Xcode; that often resolves it.
Control-drag the label you placed earlier to somewhere below class ViewController … in ViewController.swift. A popup will appear.
Enter answerLabel for Name and click [Connect]. The other values can remain at their defaults.
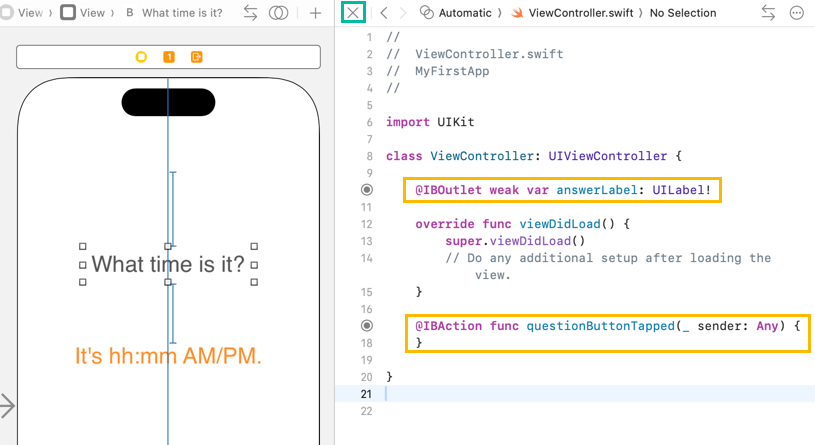
Now you've created the outlet for the label.
Next, we'll add code that runs when the button is tapped by creating an Action triggered by the Touch Up Inside event.
Similarly, Control-drag the button you placed earlier to somewhere lower in ViewController.swift. You'll see a popup like this:
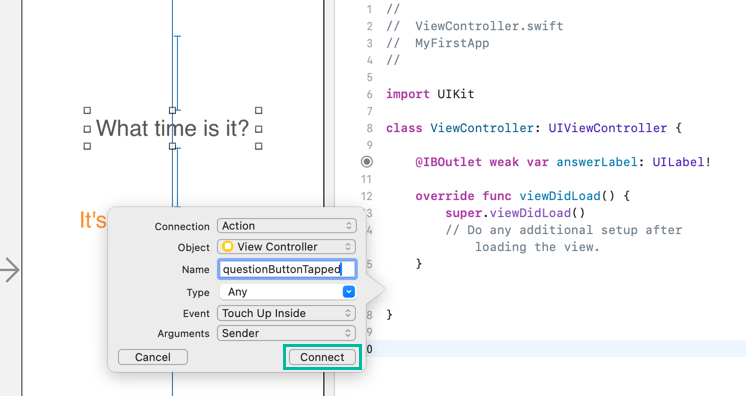
Enter questionButtonTapped for Name, ensure Connection is Action and Event is Touch Up Inside, then click [Connect].
Now you've created the action that runs when the button is tapped.
Click the in the top-left of the Assistant Editor to close it.
Program in Swift
Now let's write some Swift code.
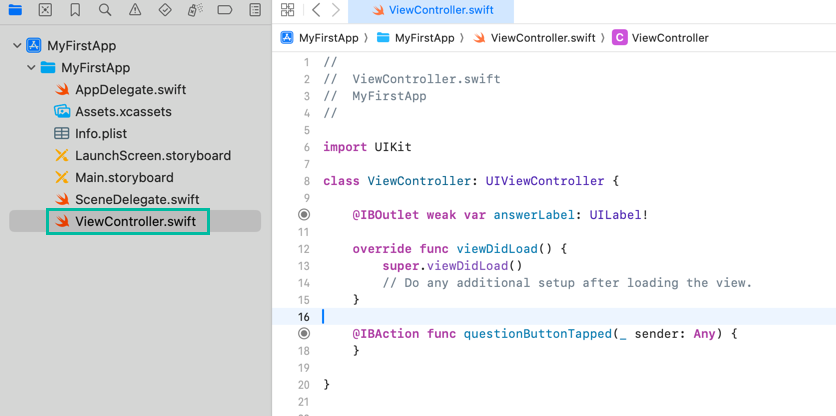
In the Project Navigator on the left, select ViewController.swift to display the source code in the editor.
viewDidLoad() is called when the controller's view is loaded into memory.
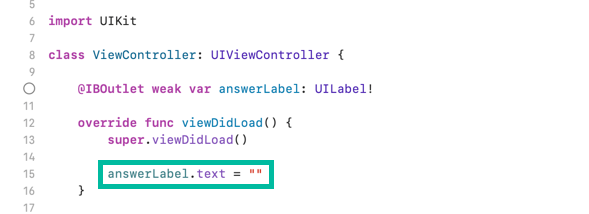
Add the following line near the bottom of viewDidLoad() so the “It's hh:mm AM/PM.” text is cleared when the view loads.
answerLabel.text = ""
Then add the following code inside the questionButtonTapped method.
let date = Date()
let formatter = DateFormatter()
formatter.dateFormat = "h:mm a"

answerLabel.text = "It's \(formatter.string(from: date))."
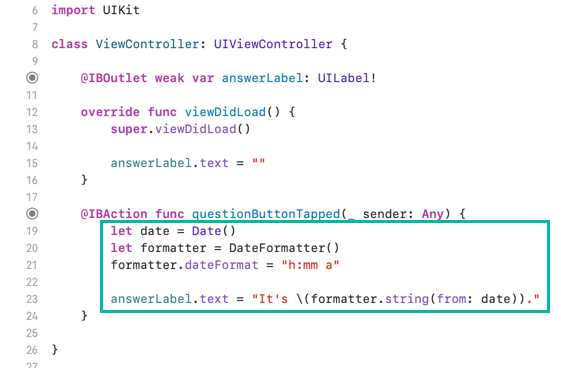
First, we create a Date object initialized to the current date and time.
Then we use DateFormatter to convert date to formatted string.
DateFormatter is a class designed to convert between Date and String, with customizable formatting options.
You can specify the format using the dateFormat property, and then call the string method to get the formatted String.
Here, we use "h:mm a" for dateFormat property and pass the date to string method.
Finally, we set answerLabel.text to the string evaluated and converted from "It's \(formatter.string(from: date))."
For more details about DateFormatter, please refer to “Convert Date to a Formatted String in Swift”.
Build and Run on the Simulator
Let's build and run the app in the simulator.
Click the button on the left of the toolbar. The selected simulator will launch, install the app, and run it.

The simulator might take a little time to launch at first. Keeping it open makes subsequent runs faster.
When the app launches, tap the “What time is it?” button and you'll see the current time displayed.
You can also select a physical iPhone connected to your Mac instead of the simulator to install and run the app.
In that case, you'll need to set a Team under Signing. For details, see “How to Install and Run an App on iPhone”.
That's it! You've built a simple iOS app in Swift using Xcode.