How to Add a Checkbox to a Table View Cell (Swift)
In the article How to Create a Checkbox in Swift, we explained how to add a checkbox to a View Controller in Swift.
Here, we will explain how to add and use a checkbox inside a Table View Cell.
Prepare to Use a Table View
First, prepare to use a Table View and a Table View Cell.
The steps are exactly the same as in “How to Use a Table View.” If you have already done that, open that project and continue to the next step.
If you haven't, please refer to How to Use a Table View, sections 3-1 through 3-4, to get the Table View and Table View Cell ready.
Prepare the Item Data to Display
This time, we will define a struct called Item to store the data, and display it in each Table View Cell.
Each cell will display three pieces of information: selection state (checkbox), item name, and color.
Create a struct named Item that can store itemID, itemName, color, and selected.
Create the Item Struct
From the menu bar, select File > New > File from Template…, choose iOS Swift File, click Next, and generate a file named Item.swift.
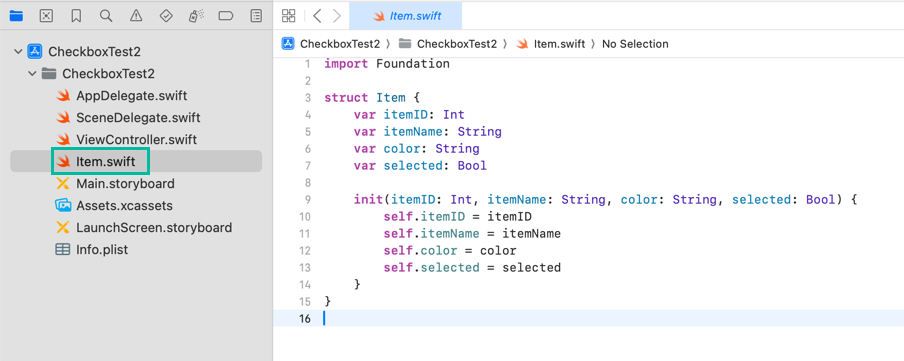
Then open Item.swift and add the following code:
struct Item {
    var itemID: Int
    var itemName: String
    var color: String
    var selected: Bool

    init(itemID: Int, itemName: String, color: String, selected: Bool) {
        self.itemID = itemID
        self.itemName = itemName
        self.color = color
        self.selected = selected
    }
}
Create an Array of Item Data
Next, create an array of Item structs to display in the Table View.
Open ViewController.swift and add the following code:
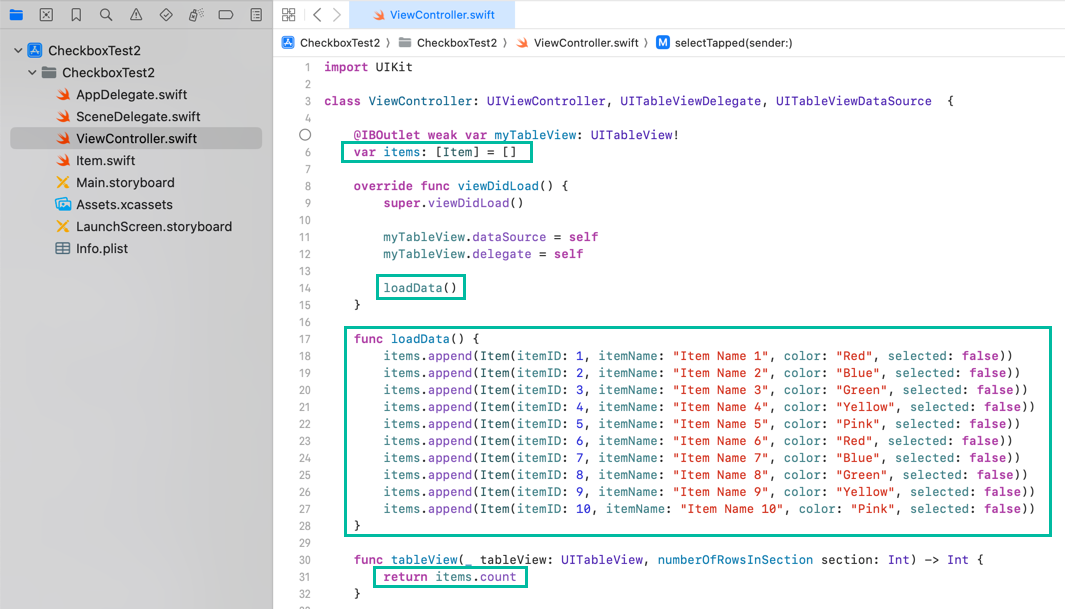
First, define an array of Item named items at the top:
var items: [Item] = []Create a method called loadData() to construct each Item and append it to items.
func loadData() {
    items.append(Item(itemID: 1, itemName: "Item Name 1", color: "Red", selected: false))
    items.append(Item(itemID: 2, itemName: "Item Name 2", color: "Blue", selected: false))
    items.append(Item(itemID: 3, itemName: "Item Name 3", color: "Green", selected: false))
    items.append(Item(itemID: 4, itemName: "Item Name 4", color: "Yellow", selected: false))
    items.append(Item(itemID: 5, itemName: "Item Name 5", color: "Pink", selected: false))
    items.append(Item(itemID: 6, itemName: "Item Name 6", color: "Red", selected: false))
    items.append(Item(itemID: 7, itemName: "Item Name 7", color: "Blue", selected: false))
    items.append(Item(itemID: 8, itemName: "Item Name 8", color: "Green", selected: false))
    items.append(Item(itemID: 9, itemName: "Item Name 9", color: "Yellow", selected: false))
    items.append(Item(itemID: 10, itemName: "Item Name 10", color: "Pink", selected: false))
}
Then, near the bottom of viewDidLoad(), call loadData() to generate the data.
loadData()In tableView(_:numberOfRowsInSection:), return items.count.
return items.count
Prepare to Use the Checkbox
Prepare to use a checkbox inside the Table View Cell.
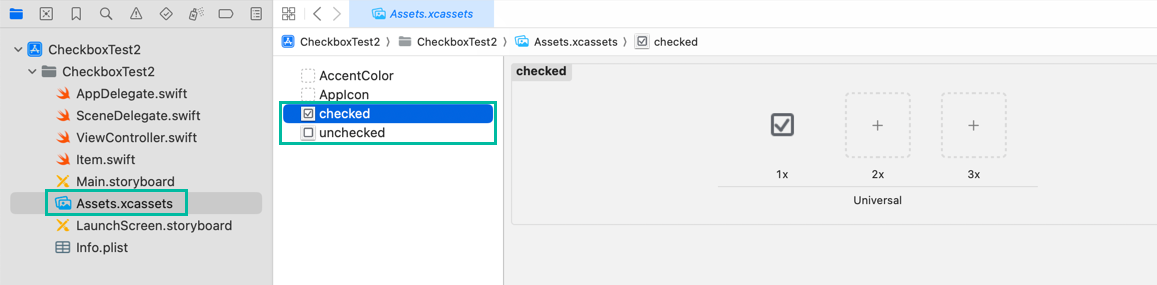
Get two images: one for the unchecked state and one for the checked state, as shown below.


Drag and drop both images into Assets.xcassets.
Next, create a CheckboxButton class based on UIButton.
From the menu, select File > New > File from Template… and create a Swift file named CheckboxButton.swift.
Add the following code to CheckboxButton.swift:
import UIKit

final class CheckboxButton: UIButton {

    let checkedImage = UIImage(named: "checked")! as UIImage
    let uncheckedImage = UIImage(named: "unchecked")! as UIImage

    var isChecked: Bool = false {
        didSet{
            if isChecked {
                self.setImage(checkedImage, for: .normal)
            } else {
                self.setImage(uncheckedImage, for: .normal)
            }
        }
    }
}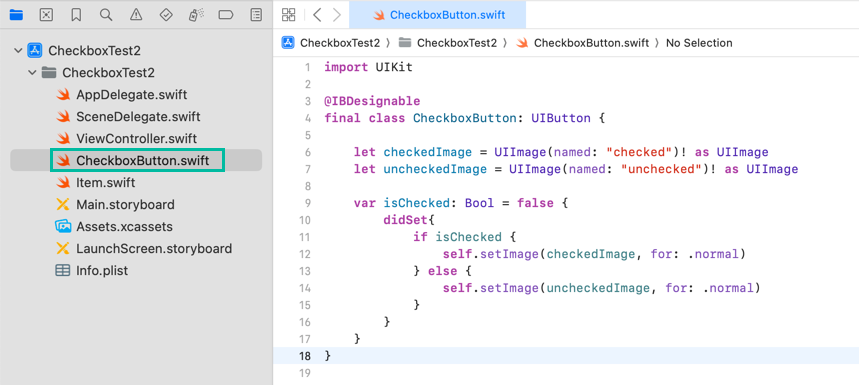
We define UIImage instances from the assets checked and unchecked.
We add an isChecked property that sets the button's image to checkedImage when true and to uncheckedImage when false.
How to Add a Checkbox to a Table View Cell
Create the ItemTableViewCell Class
First, create a custom UITableViewCell class.
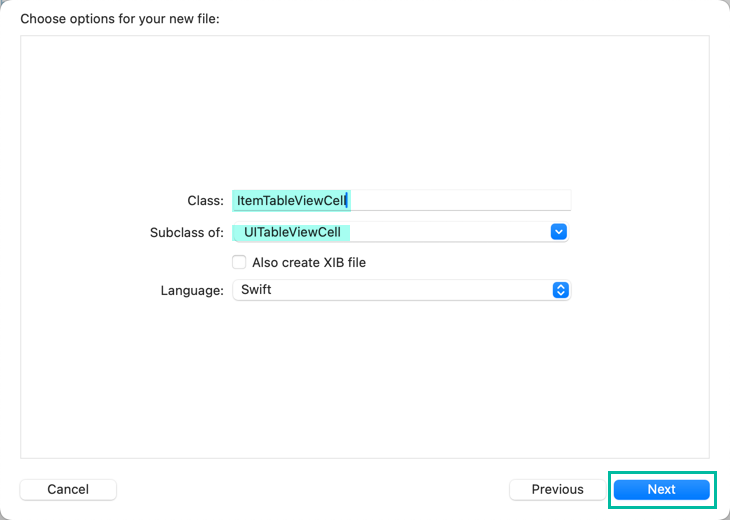
From the menu bar, select File > New > File from Template…, choose iOS Cocoa Touch Class, click Next, set Class to ItemTableViewCell, and Subclass of to UITableViewCell, then generate the file.

Set the Table View Cell Class
Configure the Table View Cell that will display the Item information.
Next, set the cell's class to ItemTableViewCell.
In the Project Navigator, select Main.storyboard.
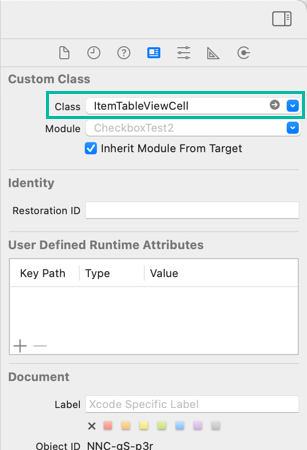
With the Table View Cell selected, open the Identity inspector in the right-side utilities area.
In the Custom Class section, choose ItemTableViewCell from the Class dropdown list.
Place Objects in the Table View Cell
Place the checkbox and labels (and other objects) inside the Table View Cell.
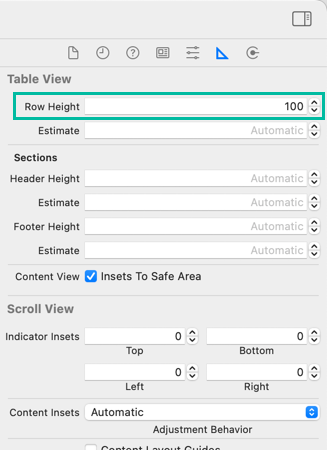
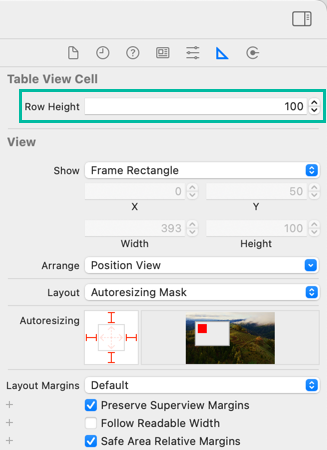
First, set the row height of the Table View and the Table View Cell to 100.
Select the Table View and open the Size inspector.
Set the Table View's Row Height at the top to 100.
With the Table View Cell selected, also set the cell's Row Height to 100 in the Size inspector.
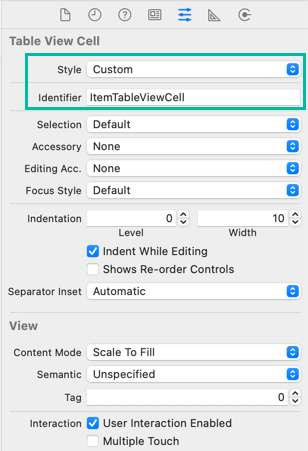
Next, with the Table View Cell selected, open the Attributes inspector, change Style to Custom, and set Identifier to ItemTableViewCell.
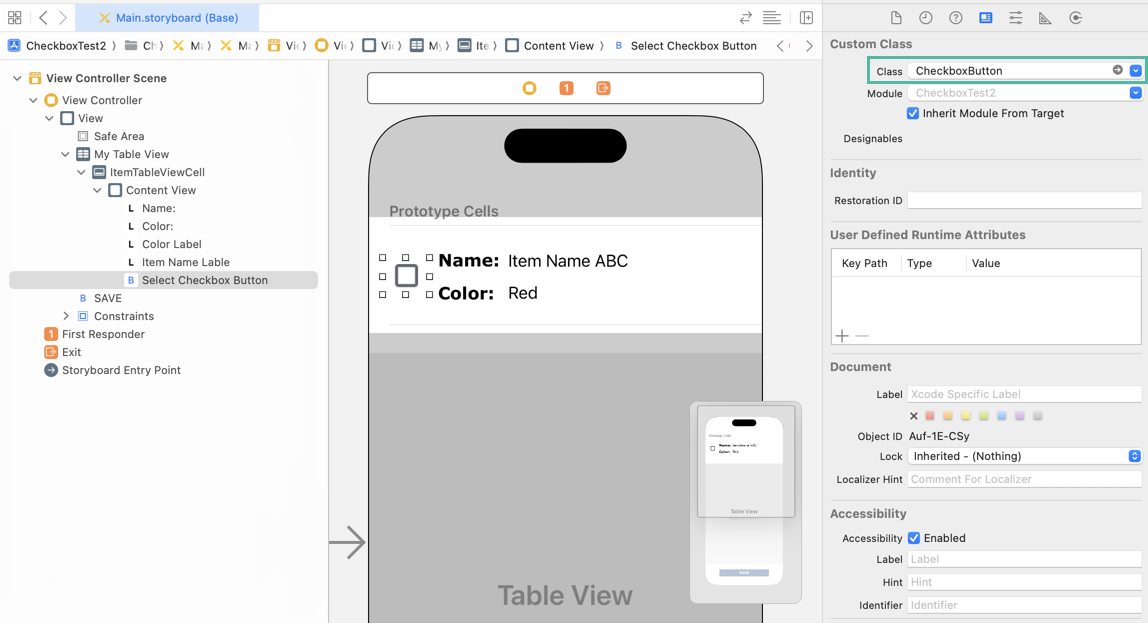
Now place the objects in the Table View Cell. Add a button on the left side, set its Image to unchecked, and remove the title text.
Set the button's class to CheckboxButton.
To the right, add two sets of labels: headers and values for Item Name and Color.
Adjust fonts and layout as you like.
Generate Outlets for the Table View Cell
Next, generate the outlets for the Table View Cell.
In the storyboard, with the objects inside ItemTableViewCell selected (such as the checkbox and labels), open the Assistant Editor via Editor > Assistant or via Adjust Editor Options → Assistant.
Ensure the file opened is ItemTableViewCell.swift. If not, click “Automatic” and switch it to ItemTableViewCell.swift.
Then, create the following three outlets from the checkbox button and the value labels for Item Name and Color:

@IBOutlet weak var itemNameLabel: UILabel!
@IBOutlet weak var colorLabel: UILabel!
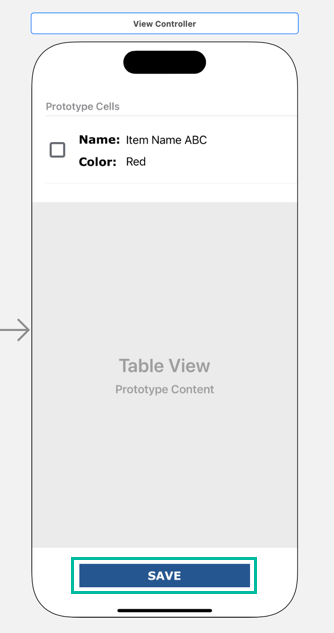
@IBOutlet weak var selectCheckboxButton: CheckboxButton!To check which checkboxes are selected, add a SAVE button below the Table View and create a saveTapped TouchUpInside action in ViewController.swift.
@IBAction func saveTapped(_ sender: Any) {
}
This completes the setup required to use the custom Table View Cell.
Display and Update Checkbox Data in the Table View
Now, let's display the data in the custom Table View Cell.
Add the following code to tableView(_:cellForRowAt:) and also add the selectTapped() method.
func tableView(_ tableView: UITableView, cellForRowAt indexPath: IndexPath) -> UITableViewCell {
    guard let cell = myTableView.dequeueReusableCell(withIdentifier: "ItemTableViewCell", for: indexPath) as? ItemTableViewCell else {
        fatalError("Dequeue failed: ItemTableViewCell.")
    }

    cell.selectionStyle = .none

    cell.itemNameLabel.text = items[indexPath.row].itemName
    cell.colorLabel.text = items[indexPath.row].color
    cell.selectCheckboxButton.isChecked = items[indexPath.row].selected

    cell.selectCheckboxButton.addTarget(self, action: #selector(selectTapped(sender:)), for: .touchUpInside)
    cell.selectCheckboxButton.tag = indexPath.row

    return cell
}

@objc func selectTapped(sender: CheckboxButton){
    let row = sender.tag as Int
    sender.isChecked = !items[row].selected
    items[row].selected = !items[row].selected
}
First, we cast the dequeued UITableViewCell to ItemTableViewCell using guard let and call fatalError if it fails.
Then we set the itemName, color, and selected values from the Item at indexPath.row to itemNameLabel.text, colorLabel.text, and selectCheckboxButton.isChecked.
Next, we use addTarget() on selectCheckboxButton so that the selectTapped() method is executed when the checkbox button's touchUpInside event occurs.
Inside selectTapped(), we store indexPath.row in the button's tag so we can tell which row was tapped.
In selectTapped(), we retrieve the row number from the tag, toggle the selected value of the Item at that row, and set sender.isChecked to switch the checkbox image ON/OFF.
We also toggle the selected value of the Item at that row.
Finally, add the following code to saveTapped() so that when the SAVE button is tapped, the selected Item Names are printed.
@IBAction func saveTapped(_ sender: Any) {
    for item in items {
        if item.selected {
            print("\(item.itemName) selected")
        }
    }
    print("-----------------------------------")
}
This completes the code required to display data in the custom Table View Cell.
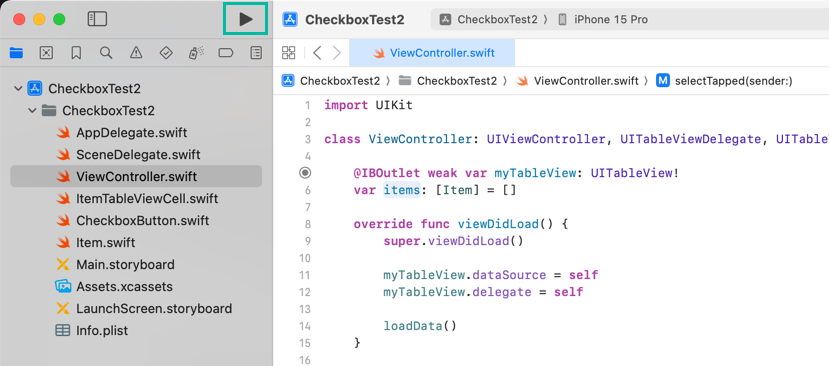
For reference, here is the full code for ViewController.swift.
import UIKit

class ViewController: UIViewController, UITableViewDelegate, UITableViewDataSource  {

    @IBOutlet weak var myTableView: UITableView!
    var items: [Item] = []

    override func viewDidLoad() {
        super.viewDidLoad()

        myTableView.dataSource = self
        myTableView.delegate = self

        loadData()
    }

    func loadData() {
        items.append(Item(itemID: 1, itemName: "Item Name 1", color: "Red", selected: false))
        items.append(Item(itemID: 2, itemName: "Item Name 2", color: "Blue", selected: false))
        items.append(Item(itemID: 3, itemName: "Item Name 3", color: "Green", selected: false))
        items.append(Item(itemID: 4, itemName: "Item Name 4", color: "Yellow", selected: false))
        items.append(Item(itemID: 5, itemName: "Item Name 5", color: "Pink", selected: false))
        items.append(Item(itemID: 6, itemName: "Item Name 6", color: "Red", selected: false))
        items.append(Item(itemID: 7, itemName: "Item Name 7", color: "Blue", selected: false))
        items.append(Item(itemID: 8, itemName: "Item Name 8", color: "Green", selected: false))
        items.append(Item(itemID: 9, itemName: "Item Name 9", color: "Yellow", selected: false))
        items.append(Item(itemID: 10, itemName: "Item Name 10", color: "Pink", selected: false))
    }

    func tableView(_ tableView: UITableView, numberOfRowsInSection section: Int) -> Int {
        return items.count
    }

    func tableView(_ tableView: UITableView, cellForRowAt indexPath: IndexPath) -> UITableViewCell {
        guard let cell = myTableView.dequeueReusableCell(withIdentifier: "ItemTableViewCell", for: indexPath) as? ItemTableViewCell else {
            fatalError("Dequeue failed: ItemTableViewCell.")
        }

        cell.selectionStyle = .none

        cell.itemNameLabel.text = items[indexPath.row].itemName
        cell.colorLabel.text = items[indexPath.row].color
        cell.selectCheckboxButton.isChecked = items[indexPath.row].selected

        cell.selectCheckboxButton.addTarget(self, action: #selector(selectTapped(sender:)), for: .touchUpInside)
        cell.selectCheckboxButton.tag = indexPath.row

        return cell
    }

    @objc func selectTapped(sender: CheckboxButton){
        let row = sender.tag as Int
        sender.isChecked = !items[row].selected
        items[row].selected = !items[row].selected
    }

    @IBAction func saveTapped(_ sender: Any) {
        for item in items {
            if item.selected {
                print("\(item.itemName) selected")
            }
        }
        print("-----------------------------------")
    }
}
Test the iOS App in the Simulator
Now, build and run the iOS app you created to verify its behavior.
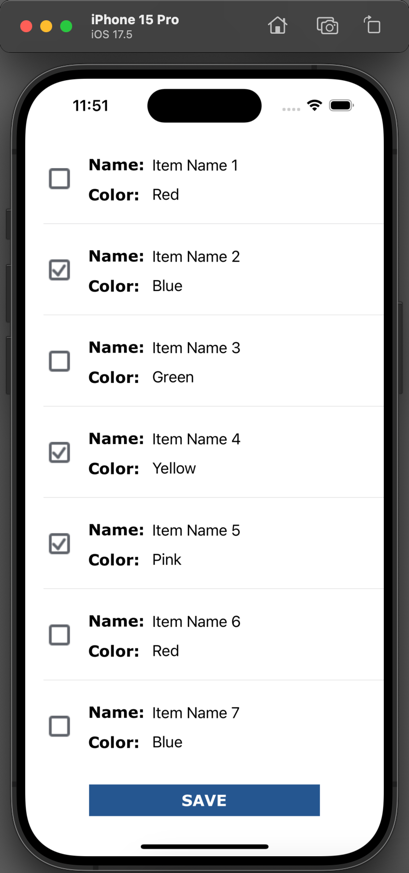
Once the screen appears, check any items you like and tap the SAVE button.
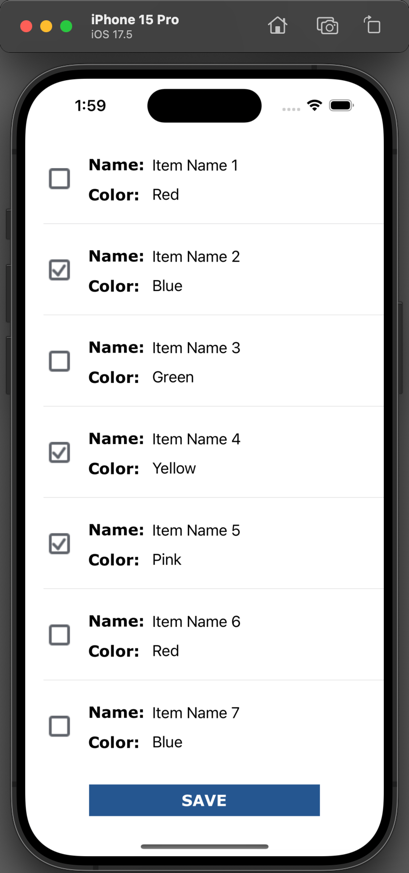
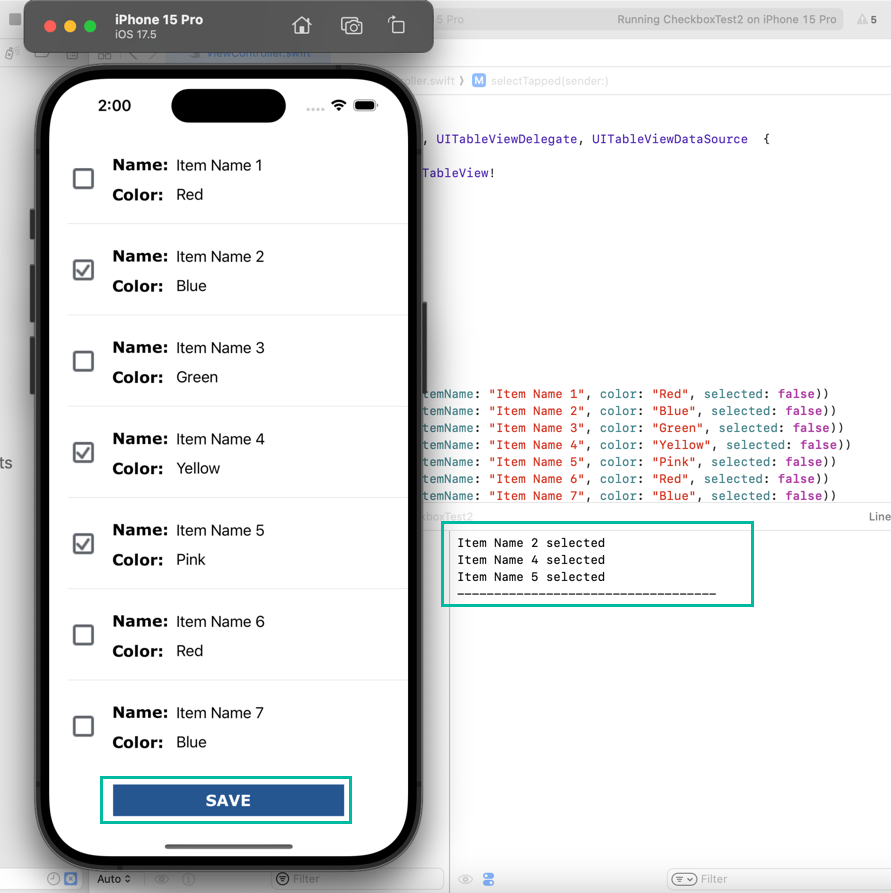
You can see that the Item Names selected via the checkboxes are correctly retrieved.
That's all for how to add and use a checkbox in a Table View Cell.