How to Select Multiple Photos from the Photo Library (Swift)
In this article, we will explain how to use PHPickerViewController in Swift to select multiple images from the Photo Library.
Create a Test iOS App
First, let's create a test iOS app that selects multiple images from the Photo Library.
If you are not sure how to create a new app, add a button, or create an action, please refer to How to Create a Basic iOS App.
Create a new project in Xcode under [iOS] > [App].
For simplicity, add three labels to display file names, three image views to display selected images, and one button labeled "Select from Photo Library" to the View Controller in the Main storyboard.
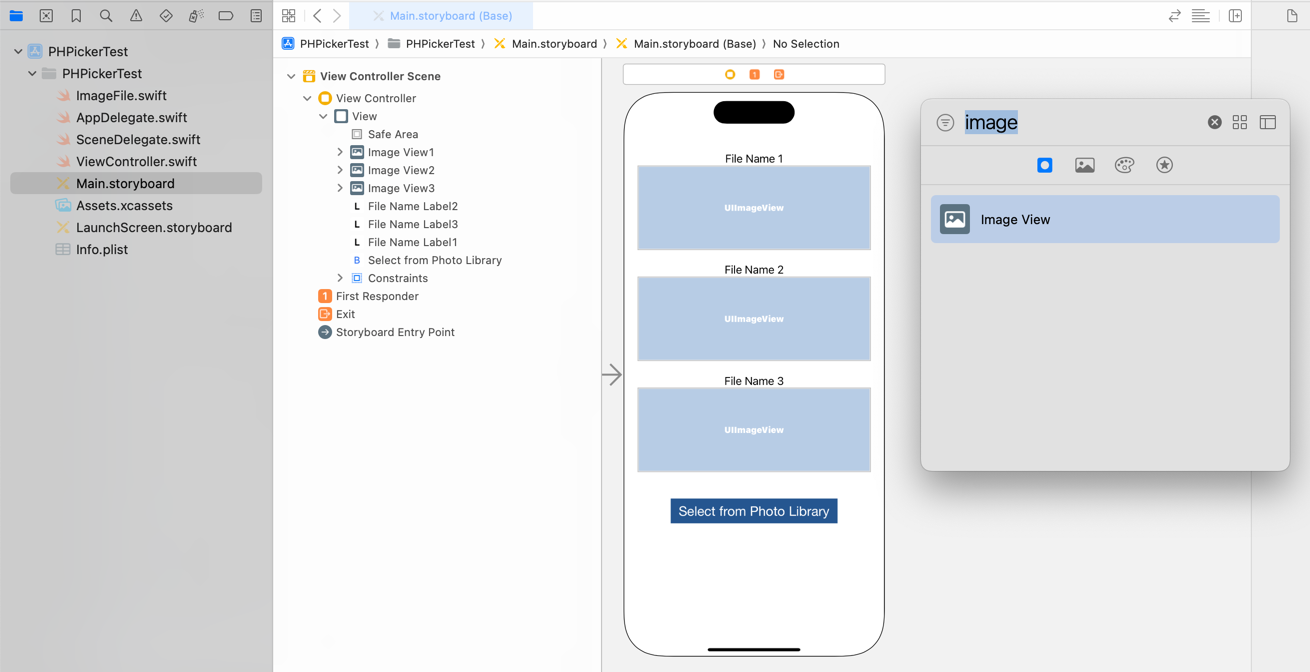
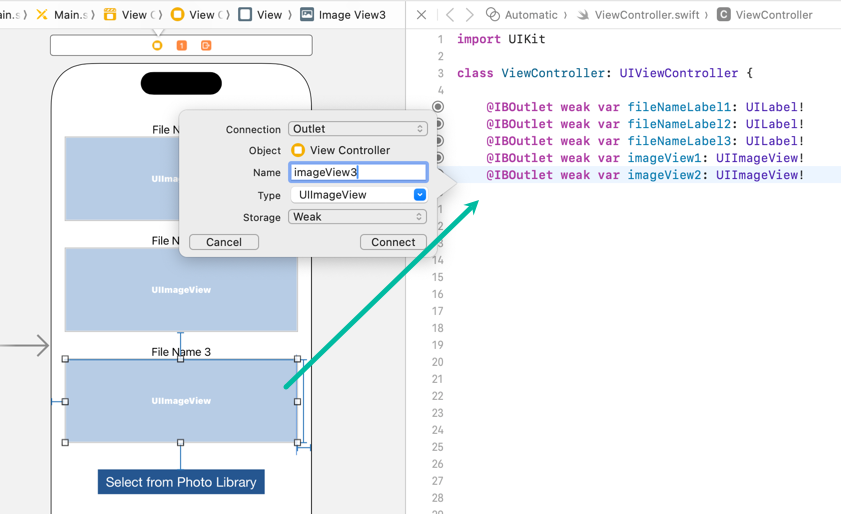
Create outlets for the labels and image views: fileNameLabel1, fileNameLabel2, fileNameLabel3, imageView1, imageView2, and imageView3.
import UIKit
class ViewController: UIViewController {
@IBOutlet weak var fileNameLabel1: UILabel!
@IBOutlet weak var fileNameLabel2: UILabel!
@IBOutlet weak var fileNameLabel3: UILabel!
@IBOutlet weak var imageView1: UIImageView!
@IBOutlet weak var imageView2: UIImageView!
@IBOutlet weak var imageView3: UIImageView!
override func viewDidLoad() {
}
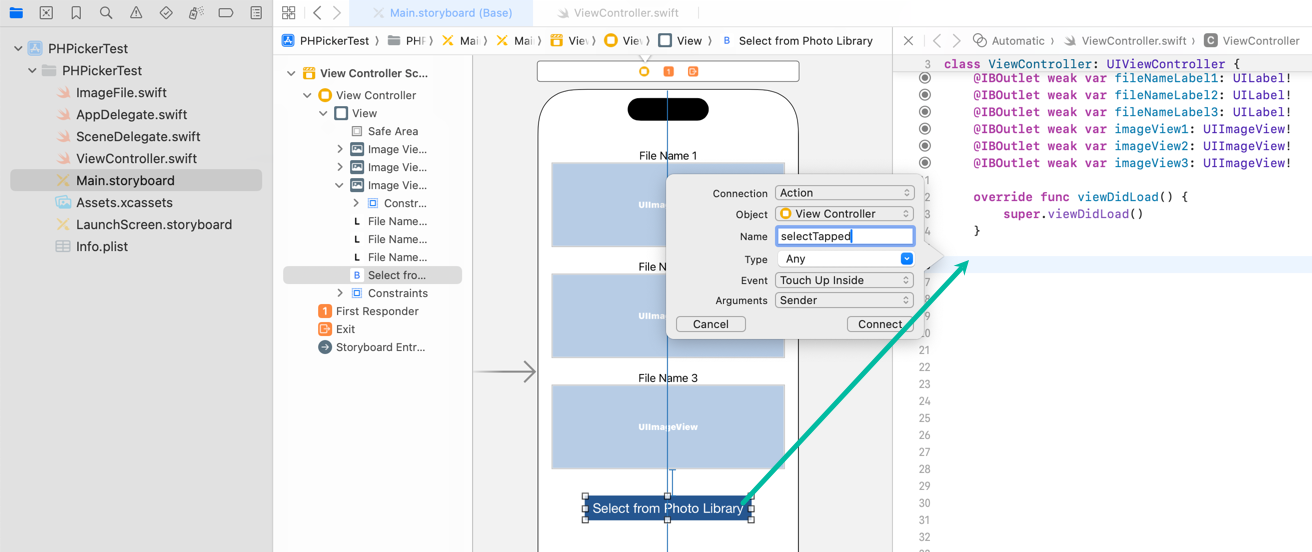
}Create an action named selectTapped for the "Select from Photo Library" button's touchUpInside event.
import UIKit
class ViewController: UIViewController {
@IBOutlet weak var fileNameLabel1: UILabel!
@IBOutlet weak var fileNameLabel2: UILabel!
@IBOutlet weak var fileNameLabel3: UILabel!
@IBOutlet weak var imageView1: UIImageView!
@IBOutlet weak var imageView2: UIImageView!
@IBOutlet weak var imageView3: UIImageView!
override func viewDidLoad() {
}
@IBAction func selectTapped(_ sender: Any) {
}
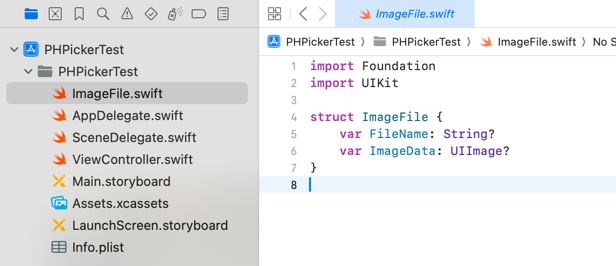
}Add a file named ImageFile.swift and define a struct named ImageFile as follows.
This will be used to store information about the selected files.
import Foundation
import UIKit

struct ImageFile {
    var FileName: String?
    var ImageData: UIImage?
}
How to Select Multiple Images from the Photo Library in Swift
Now, let's write the code in Swift to select multiple images from the Photo Library.
Here, we will use PHPickerViewController.
PHPickerViewController provides the UI and functionality to select images from the Photo Library.
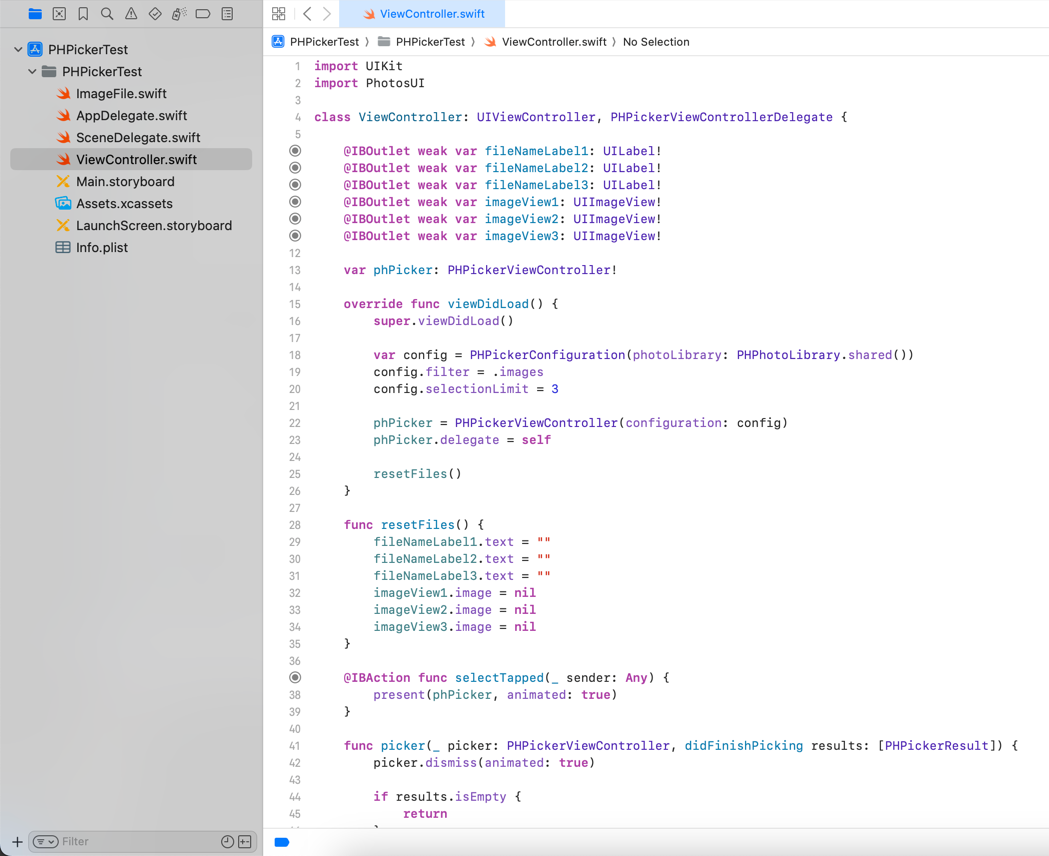
Update ViewController.swift as follows:
import UIKit
import PhotosUI

class ViewController: UIViewController, PHPickerViewControllerDelegate {

    @IBOutlet weak var fileNameLabel1: UILabel!
    @IBOutlet weak var fileNameLabel2: UILabel!
    @IBOutlet weak var fileNameLabel3: UILabel!
    @IBOutlet weak var imageView1: UIImageView!
    @IBOutlet weak var imageView2: UIImageView!
    @IBOutlet weak var imageView3: UIImageView!

    var phPicker: PHPickerViewController!

    override func viewDidLoad() {
        super.viewDidLoad()

        var config = PHPickerConfiguration(photoLibrary: PHPhotoLibrary.shared())
        config.filter = .images
        config.selectionLimit = 3

        phPicker = PHPickerViewController(configuration: config)
        phPicker.delegate = self

        resetFiles()
    }

    func resetFiles() {
        fileNameLabel1.text = ""
        fileNameLabel2.text = ""
        fileNameLabel3.text = ""
        imageView1.image = nil
        imageView2.image = nil
        imageView3.image = nil
    }

    @IBAction func selectTapped(_ sender: Any) {
        present(phPicker, animated: true)
    }

    func picker(_ picker: PHPickerViewController, didFinishPicking results: [PHPickerResult]) {
        picker.dismiss(animated: true)

        if results.isEmpty {
            return
        }

        var selectedOrder = [String]()
        var dictImages = [String:ImageFile]()

        let group = DispatchGroup()
        for result in results {
            let id = result.assetIdentifier ?? ""
            selectedOrder.append(id)

            group.enter()
            let provider = result.itemProvider
            if provider.canLoadObject(ofClass: UIImage.self) {
                provider.loadObject(ofClass: UIImage.self) { image, _ in
                    if let img = image as? UIImage {
                        dictImages[id] = ImageFile(FileName: provider.suggestedName, ImageData: img)
                    }
                    group.leave()
                }
            } else {
                group.leave()
            }
        }

        group.notify(queue: .main) {
            var images = [ImageFile]()
            for id in selectedOrder {
                if dictImages[id] != nil {
                    images.append(dictImages[id]!)
                }
            }
            self.displayFiles(images: images)
        }
    }

    func displayFiles(images: [ImageFile]) {
        resetFiles()

        for (i, image) in images.enumerated() {
            if i == 0 {
                fileNameLabel1.text = image.FileName
                imageView1.image = image.ImageData
            } else if i == 1 {
                fileNameLabel2.text = image.FileName
                imageView2.image = image.ImageData
            } else if i == 2 {
                fileNameLabel3.text = image.FileName
                imageView3.image = image.ImageData
            }
        }
    }
}
Let's go through the code step by step.
First, since we're using PHPickerViewController, we import PhotosUI on line 2 and add PHPickerViewControllerDelegate on line 4.
On line 13, we define a PHPickerViewController named phPicker.
In viewDidLoad() (lines 18–23), we configure PHPickerViewController.
We define a PHPickerConfiguration, set filter = .images to select only image files, and set selectionLimit = 3.
The default value for selectionLimit is 1. If you don't want to limit the number of items, set it to 0.
We then create phPicker with this config, and set its delegate to self so that picker(_:didFinishPicking:) is called when images are selected.
resetFiles() simply clears the labels and image views.
In selectTapped() (lines 37–39), present(phPicker, animated: true) shows the photo picker when the button is tapped.
When Add or Cancel is tapped, picker(_:didFinishPicking:) is called.
Line 42 dismisses the picker.
The results contain the selected assets. If Cancel was tapped, results will be empty, so we return immediately.
This code preserves the order in which images are selected.
We loop through the assets in results and use itemProvider.loadObject to extract the images.
The order in which loadObject's completionHandler is called is not guaranteed to match the selection order.
To preserve order, we use DispatchGroup. notify() is executed only after all enter() calls are matched by leave().
We store the asset IDs in selectedOrder and build the final array in notify() using the stored dictionary dictImages.
If you don't need to preserve the selection order, you can skip using DispatchGroup and simply process loadObject directly.
displayFiles() displays the ImageFile data in the labels and image views in the selection order.
This completes the Swift code for selecting multiple images from the Photo Library.
Test the iOS App in the Simulator
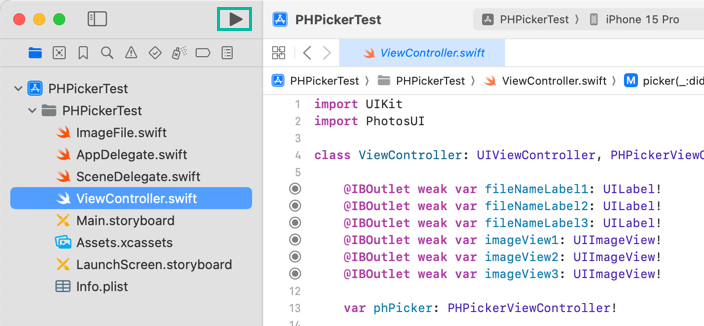
Now let's build and run the iOS app.
Click the button on the left side of the toolbar. The selected simulator will launch, and the app will be installed and executed.
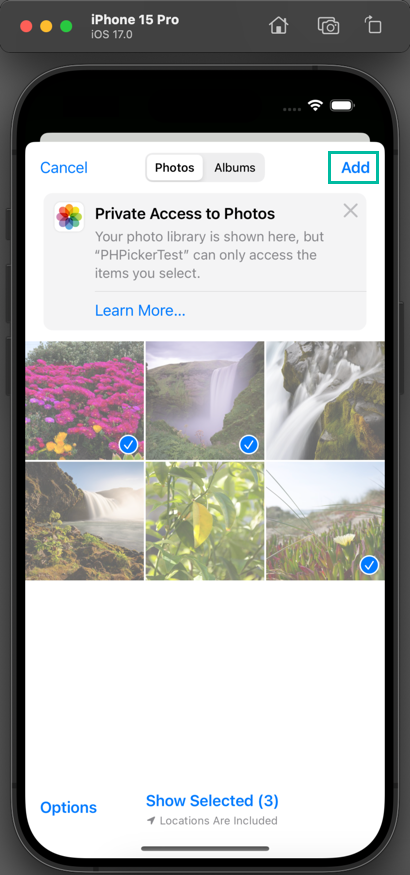
Tap the "Select from Photo Library" button.
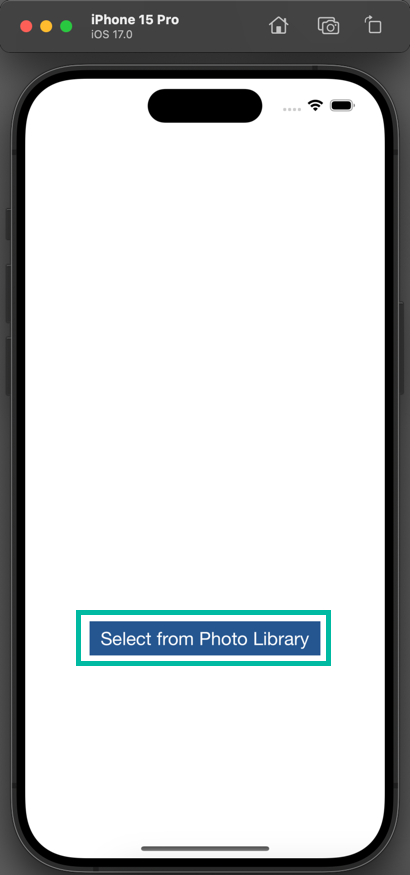
The photo picker screen will be displayed.
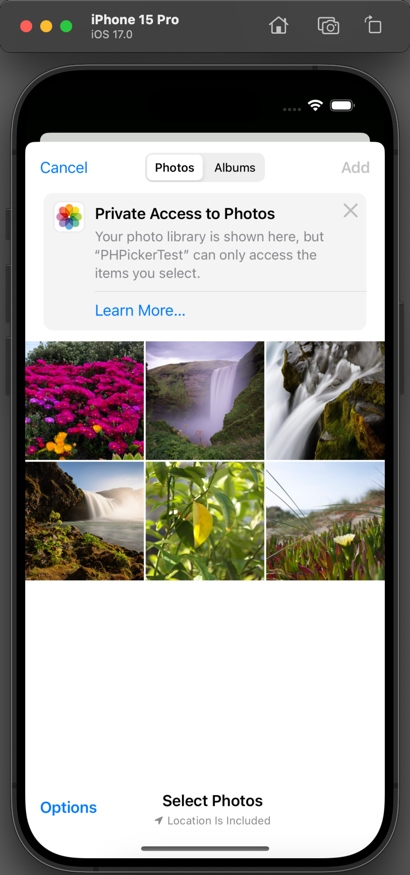
Select three photos and tap the Add button.
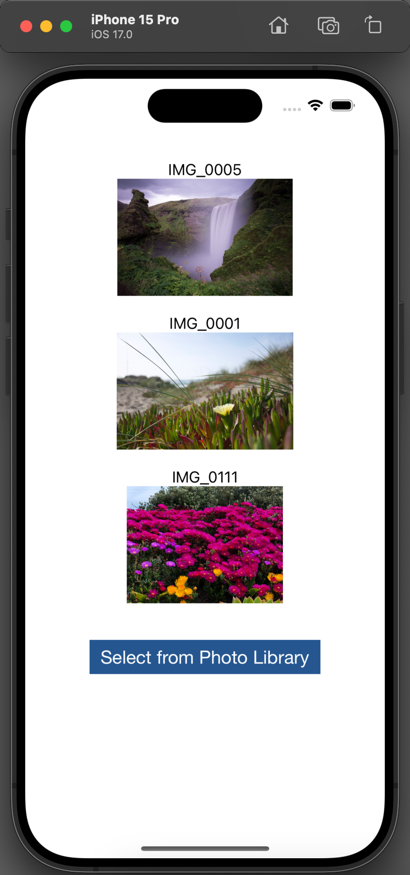
The picker will close, and the selected images and file names will be displayed on the main screen in the order they were chosen.
That's how to use PHPickerViewController in Swift to select multiple images from the Photo Library.