How to Install and Run an App on iPhone from Xcode
In the previous tutorial, How to Create a Basic iOS App, we built an app where tapping the "What time is it?" button displayed the current time.
Now let's install and run that app on a real device such as an iPhone or iPad.
In this example, we will install it on an iPhone, but the steps are exactly the same for an iPad.
Set Up Project Signing
To install and run the app on a real device, you need to enable code signing.
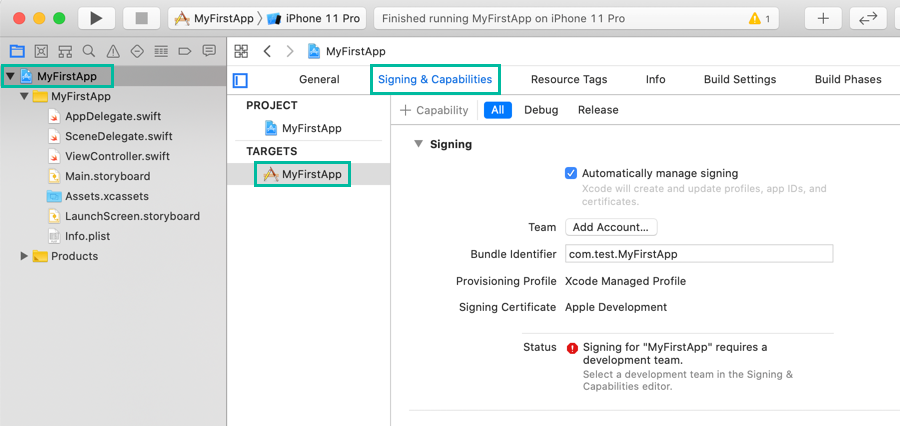
Select your project in the Navigator area, then select your target, and open Signing & Capabilities.
Set Your Apple ID Account as the Team
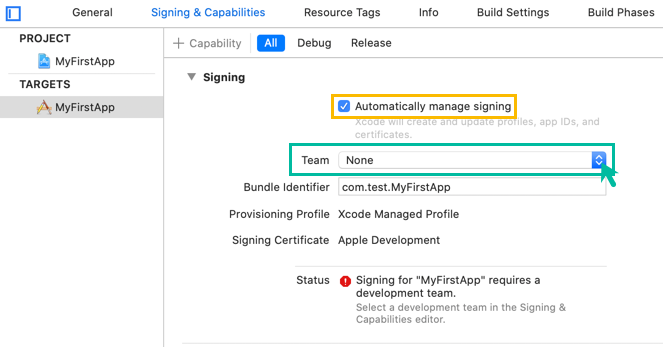
First, make sure that Automatically manage signing is checked.
If you have already registered your Apple ID account in Xcode, a list will appear under Team. Simply select your account from that list.
Register Your Apple ID Account in Xcode
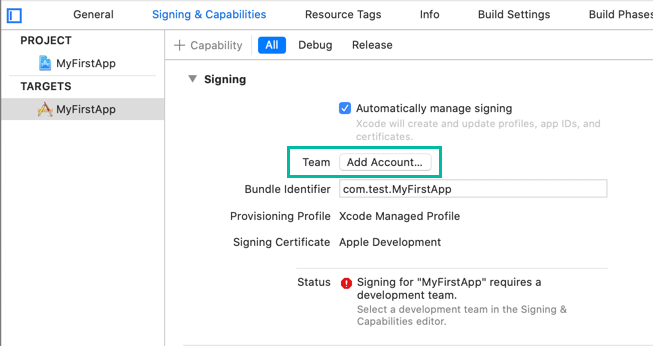
If your Apple ID account is not yet registered in Xcode, click the Add Account button and register it.
A screen like the one below will appear. If you already have an Apple ID, sign in with it.
If you don't have an Apple ID, click the Create Apple ID button, create an account, and register it.
You can install apps on a real device using a Personal Team without enrolling in the paid Apple Developer Program.
For more details about the Apple Developer Program, see:
About the Apple Developer Program

After registering your account, go back to the Signing & Capabilities screen and you will be able to select your registered account under Team. Make sure to select it.
What if You Encounter a License Error?
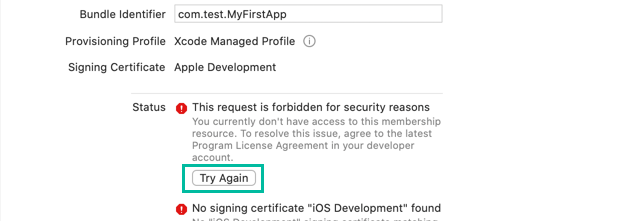
If you see an error like the one below, you need to agree to the latest Program License Agreement.
You currently don't have access to this membership resource. To resolve this issue, agree to the latest Program License Agreement in your developer account.
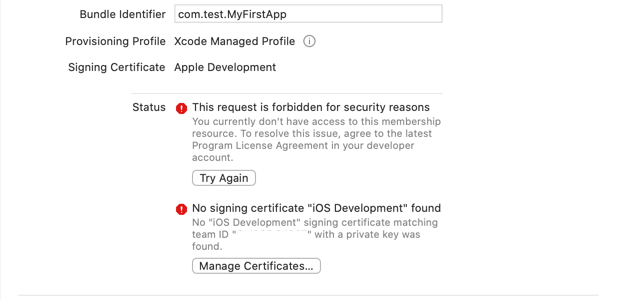
Log in to the Apple Developer website and agree to the new license agreement.

After that, return to the Signing & Capabilities screen and click the Try Again button. This should resolve the error.
Run the App on iPhone
Next, connect the iPhone where you want to install the app to your Mac.
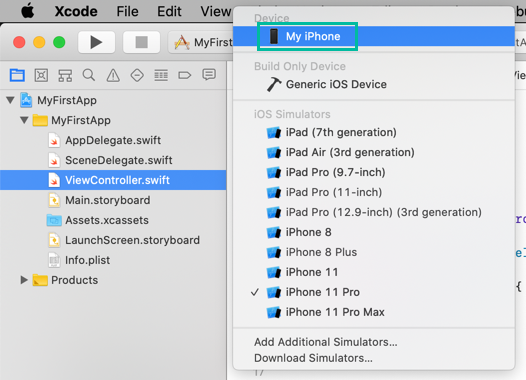
Then, in the Xcode toolbar at the top, click the scheme selector. The connected iPhone should appear—select it.

If “(Developer mode disabled)” appears next to the device and you cannot install the app, see How to Enable Developer Mode on iPhone to enable Developer Mode.
With that done, click the button. The program will build, and once the build succeeds, the app will be installed and launched on your iPhone.


That's it! You have now installed and run your app on an iPhone using Xcode.