How to Save and Retrieve Images in the Document Directory (Swift)
In this article, we will explain how to save and load image files in the device's Document Directory using Swift.
In the previous article, How to Take a Photo with the Camera, we created an app where tapping the Take Photo button launched the camera, captured a photo, and displayed it on the screen.
This time, we will extend that app by adding three buttons: Save Photo, Clear Photo, and Load Photo, to implement functionality for saving and loading image files in the device's Document Directory.
Add Buttons and Actions to the Photo App
First, let's add three buttons to the camera photo app and create actions for them.
If you haven't created the photo app yet, please see How to Take a Photo with the Camera first.
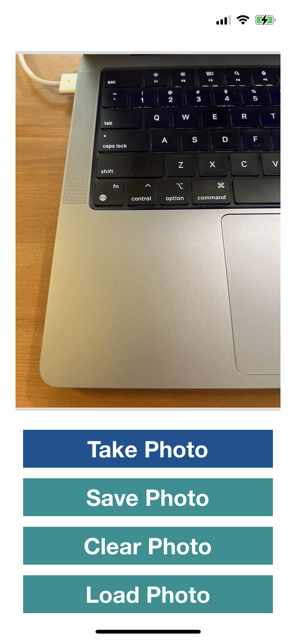
Open the project and, below the Take Photo button in the Main storyboard's View Controller, add three buttons: Save Photo, Clear Photo, and Load Photo.
Here, they are placed inside a Stack View, but layout and color can be anything you like.
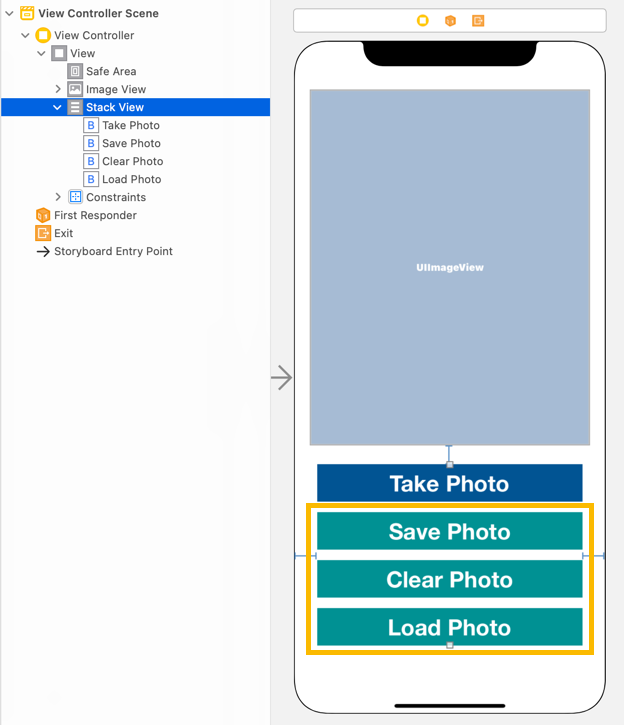
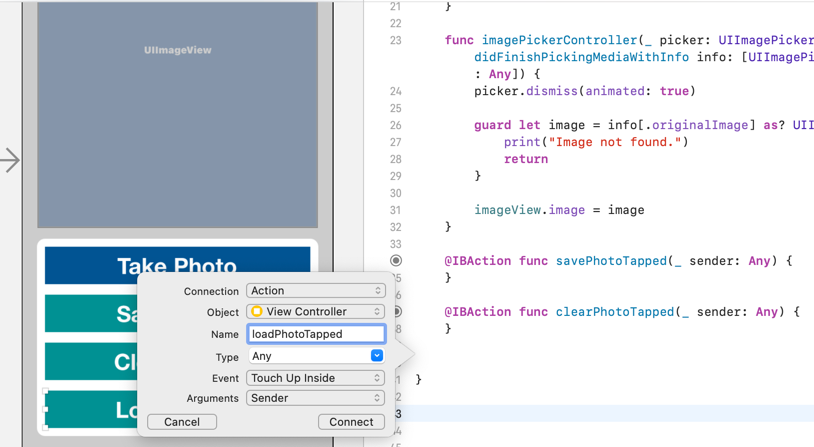
From the Save Photo, Clear Photo, and Load Photo buttons, create TouchUpInside actions named savePhotoTapped, clearPhotoTapped, and loadPhotoTapped.
@IBAction func savePhotoTapped(_ sender: Any) {
}

@IBAction func clearPhotoTapped(_ sender: Any) {
}

@IBAction func loadPhotoTapped(_ sender: Any) {
}
When the Clear Photo button is tapped, we want to clear the image in the UIImageView, so add the following line:
imageView is the outlet for the UIImageView.
@IBAction func clearPhotoTapped(_ sender: Any) {
    imageView.image = nil
}
How to Save an Image File to the Document Directory in Swift
In Swift, you can save the photo displayed in a UIImageView to the user's Document Directory.
We'll add code to save the UIImageView's image when the Save Photo button is tapped.
Add getFileURL() to ViewController.swift and update the savePhotoTapped() method like this:
func getFileURL(fileName: String) -> URL {
    let docDir = FileManager.default.urls(for: .documentDirectory, in: .userDomainMask).first!
    return docDir.appendingPathComponent(fileName)
}

@IBAction func savePhotoTapped(_ sender: Any) {
    guard let imageData = imageView.image?.jpegData(compressionQuality: 1.0) else {
        return
    }

    do {
        try imageData.write(to: getFileURL(fileName: "IMG12345.jpg"))
        print("Image saved.")
    } catch {
        print("Failed to save the image:", error)
    }
}
getFileURL() takes a file name and returns the file URL inside the Document Directory.
In line 2, FileManager.default.urls() gets the URL of the specified common directory for the domain.
Here, with arguments for: .documentDirectory, in: .userDomainMask, we obtain the user's Document Directory URL.
userDomainMask refers to the user's home directory, where user files can be saved.
Since urls() returns an array, we take the first one.
In line 3, appendingPathComponent() adds the file name to the path and returns the URL.
Now let's explain the savePhotoTapped() code.
In line 7, guard let retrieves JPEG data from the UIImageView outlet. If it fails, it returns.
compressionQuality can be between 0.0 ~ 1.0, where 0.0 = highest compression/lowest quality and 1.0 = no compression/highest quality.
In line 12, the write() method of Data is used to save the image data into the user's Document Directory.
Here, the file name is fixed to IMG12345.jpg.
That's all for saving an image file to the user's Document Directory.
How to Load an Image File from the Document Directory in Swift
Next, let's load an image file that was saved in the user's Document Directory.
When the Load Photo button is tapped, we'll load the saved image file and display it in the UIImageView.
Update the loadPhotoTapped() method in ViewController.swift like this:
@IBAction func loadPhotoTapped(_ sender: Any) {
    let path = getFileURL(fileName: "IMG12345.jpg").path

    if FileManager.default.fileExists(atPath: path) {
        if let imageData = UIImage(contentsOfFile: path) {
            imageView.image = imageData
        }
        else {
            print("Failed to load the image.")
        }
    }
    else {
        print("Image file not found.")
    }
}
In line 2, we get the path of the previously saved image file IMG12345.jpg.
In line 4, FileManager.default.fileExists() checks if the file exists. If it does, UIImage(contentsOfFile: path) creates a UIImage object from the file.
In line 6, if imageData is not nil, it is assigned to imageView.image and displayed in the UIImageView.
Now we have code to save an image to the user's Document Directory and then load and display it in a UIImageView.
Here's the complete ViewController.swift. The newly added code is lines 34 ~ 70.
For info.plist settings and other details, see How to Take a Photo with the Camera.
import UIKit

class ViewController: UIViewController, UIImagePickerControllerDelegate, UINavigationControllerDelegate {

    @IBOutlet weak var imageView: UIImageView!

    override func viewDidLoad() {
        super.viewDidLoad()
    }

    @IBAction func takePhotoTapped(_ sender: Any) {
        if UIImagePickerController.isSourceTypeAvailable(.camera) {
            let imagePicker = UIImagePickerController()
            imagePicker.sourceType = .camera
            imagePicker.delegate = self
            self.present(imagePicker, animated: true, completion: nil)
        }
        else {
            print("Camera not available.")
        }
    }

    func imagePickerController(_ picker: UIImagePickerController, didFinishPickingMediaWithInfo info: [UIImagePickerController.InfoKey : Any]) {
        picker.dismiss(animated: true)

        guard let image = info[.originalImage] as? UIImage else {
            print("Image not found.")
            return
        }

        imageView.image = image
    }

    func getFileURL(fileName: String) -> URL {
        let docDir = FileManager.default.urls(for: .documentDirectory, in: .userDomainMask).first!
        return docDir.appendingPathComponent(fileName)
    }

    @IBAction func savePhotoTapped(_ sender: Any) {
        guard let imageData = imageView.image?.jpegData(compressionQuality: 1.0) else {
            return
        }

        do {
            try imageData.write(to: getFileURL(fileName: "IMG12345.jpg"))
            print("Image saved.")
        } catch {
            print("Failed to save the image:", error)
        }
    }

    @IBAction func clearPhotoTapped(_ sender: Any) {
        imageView.image = nil
    }

    @IBAction func loadPhotoTapped(_ sender: Any) {
        let path = getFileURL(fileName: "IMG12345.jpg").path

        if FileManager.default.fileExists(atPath: path) {
            if let imageData = UIImage(contentsOfFile: path) {
                imageView.image = imageData
            }
            else {
                print("Failed to load the image.")
            }
        }
        else {
            print("Image file not found.")
        }
    }
}
Install and Test the iOS App on iPhone
Since taking a photo cannot be tested in the Simulator, install the app on an iPhone to test it.
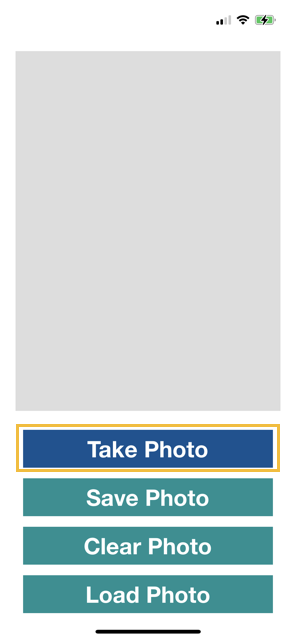
When you run the app on your iPhone, you'll see the following screen. Tap the Take Photo button.
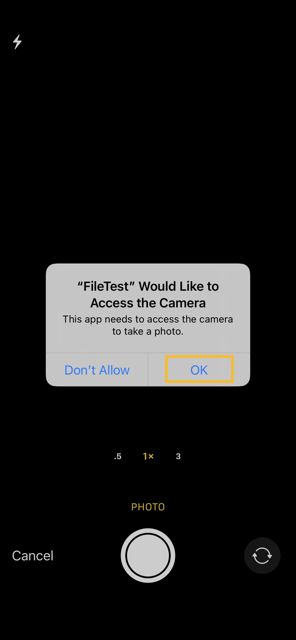
The first time you run the app, a dialog will ask for camera permission. Tap OK.
The camera will open, and you can take a photo.
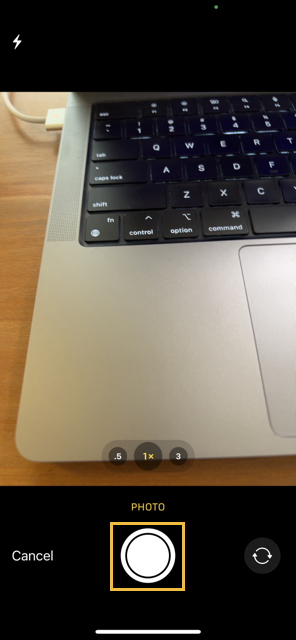
If you're satisfied with the photo, tap Use Photo. If not, tap Retake.
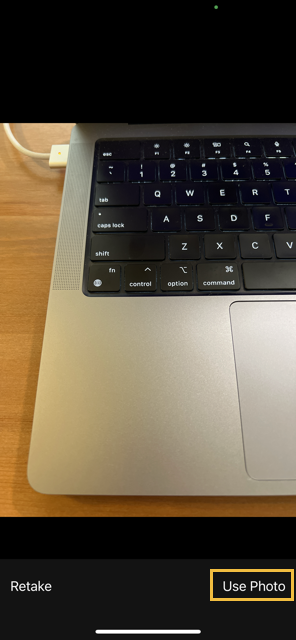
When you tap Use Photo, the camera closes and the photo is displayed on the main screen. Now tap Save Photo to save it.
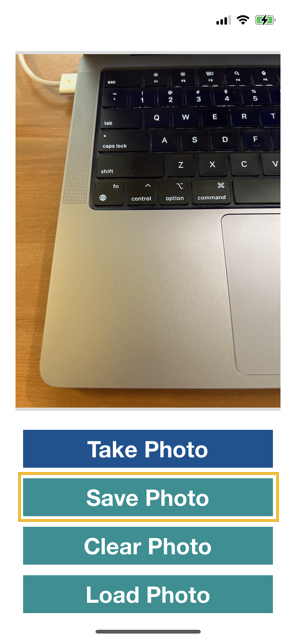
You should see Image saved. printed in the Xcode output window.
Tap Clear Photo to remove the image from the UIImageView.

Tap Load Photo to load and display the image saved in the user's Document Directory.
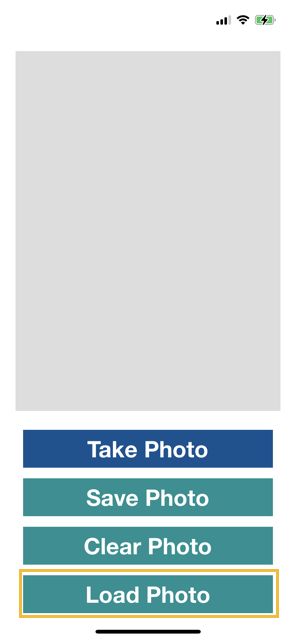
Since the image is saved on the device, even if you close and reopen the app, tapping Load Photo will display the saved photo.
That's it! You've learned how to save and load image files in the device's Document Directory using Swift.