How to Create a Radio Button in Swift
UIKit, which is commonly used in Swift to build iOS apps, does not include a built-in radio button.
In this article, we'll walk through how to create radio buttons in Swift.
Create a Test iOS App
First, let's create a simple iOS app for testing radio buttons and retrieving selected values.
In Xcode, create a new project with [iOS] → [App].
If you're not sure how to create a new app, add buttons, or create actions, check out How to Create a Basic iOS App.
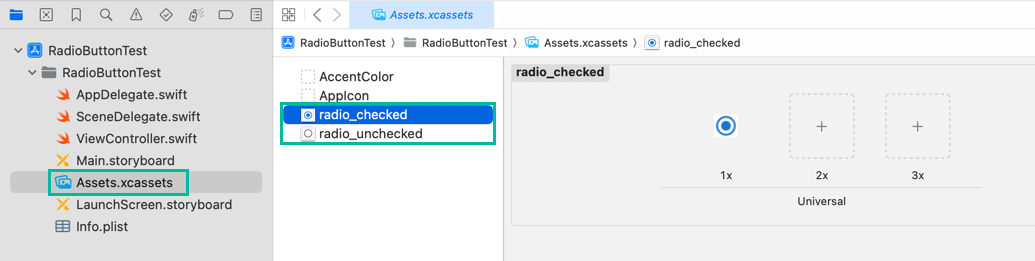
Prepare two images — one for the unchecked state and one for the checked state, as shown below.


Drag and drop both images into your Assets.xcassets.
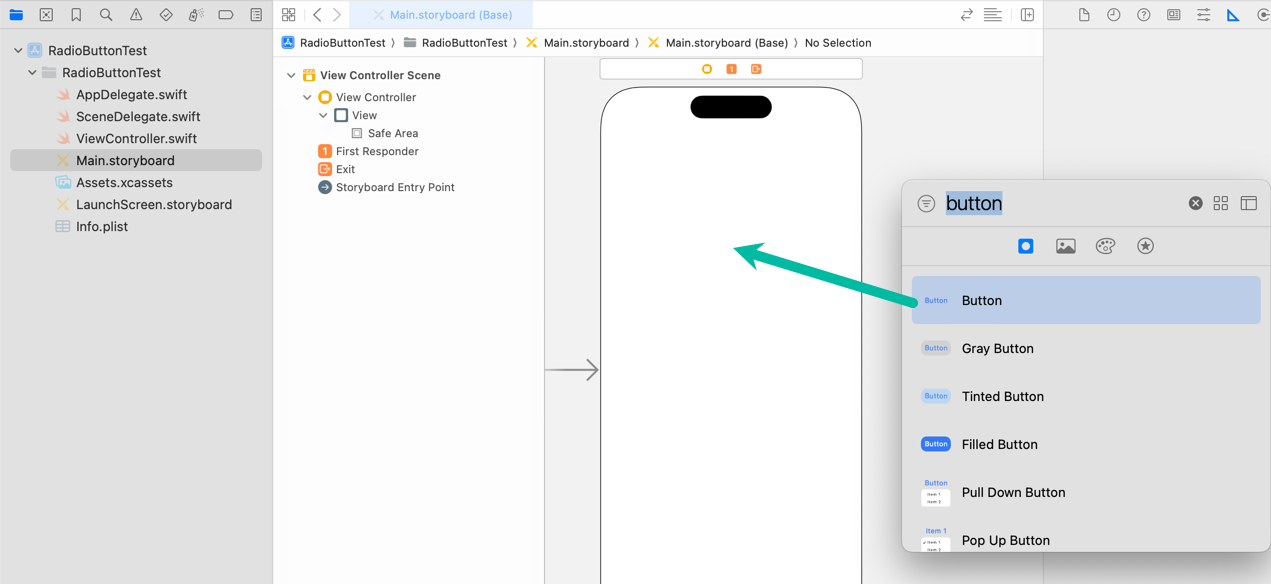
Next, add a UIButton to your View Controller in the Main storyboard.
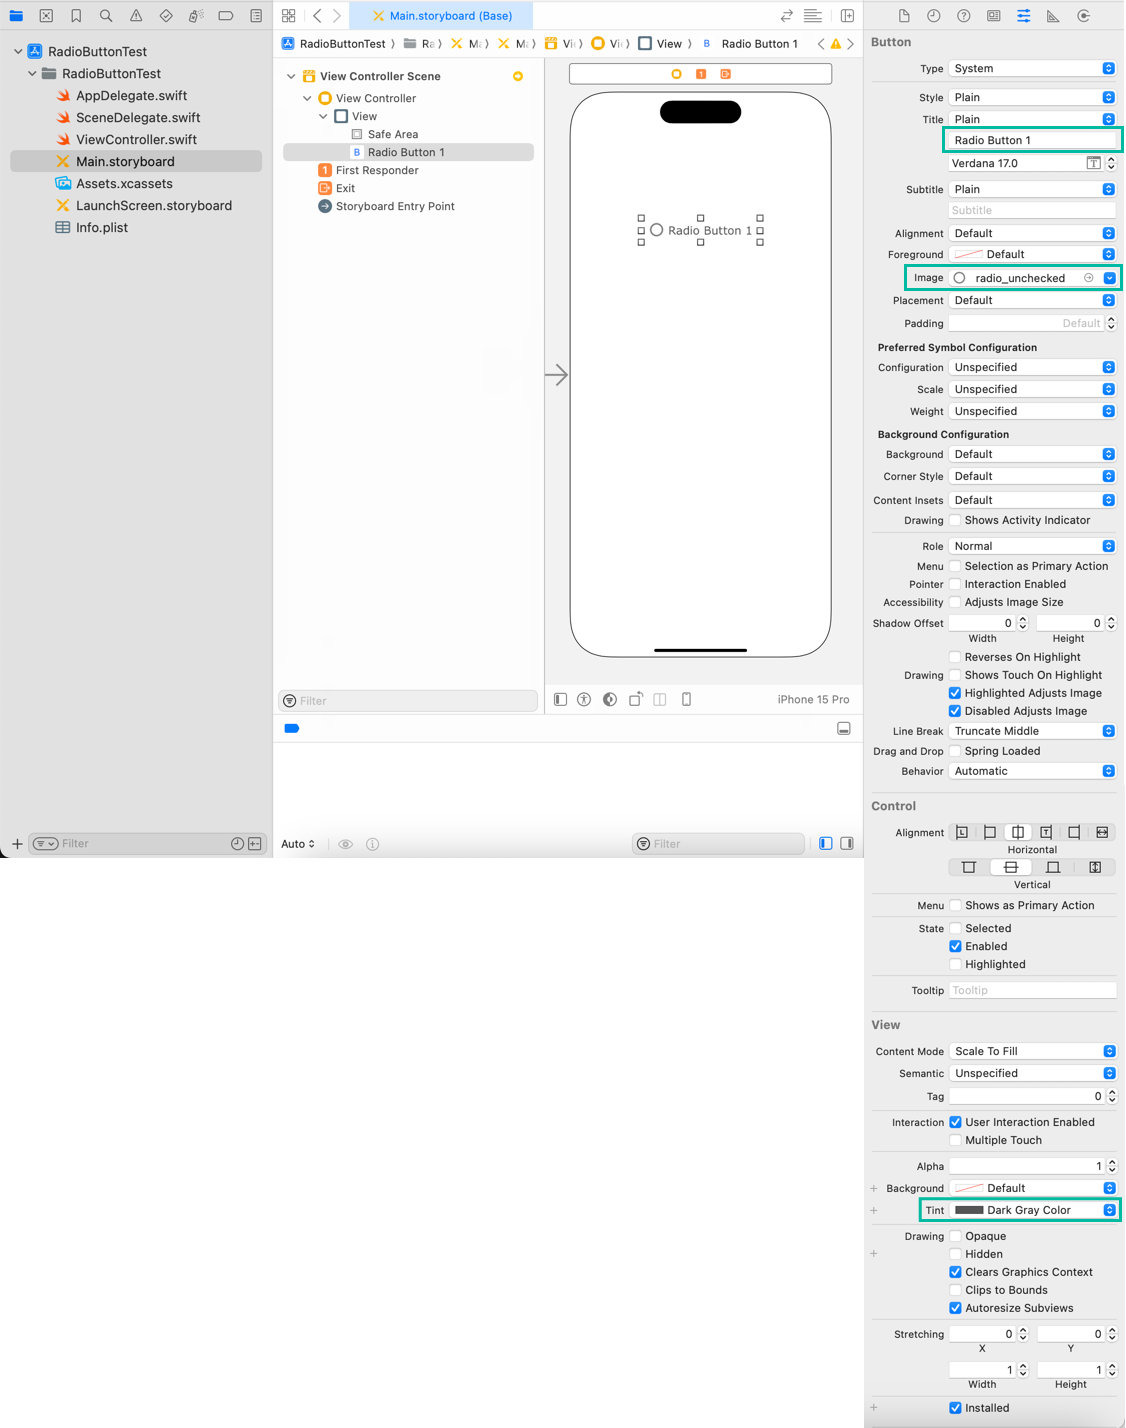
Set the button's Title to “Radio Button 1”, Image to radio_unchecked, change the text color to dark gray, and adjust the font if you like.
Feel free to customize the color, position, or font style to your liking.
Copy and paste the button to create “Radio Button 2” and “Radio Button 3”.
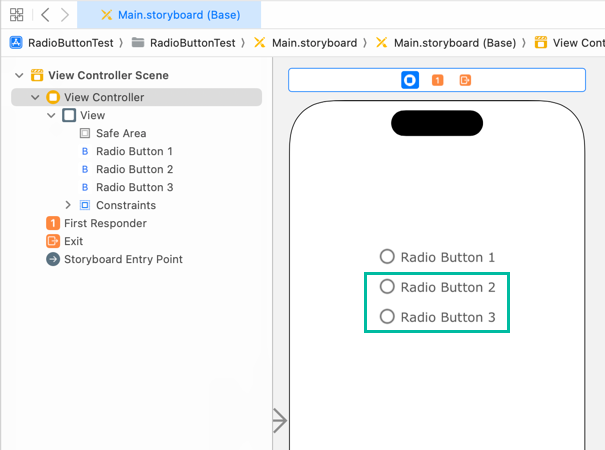
Add a SAVE button that will be used to display which radio button is selected.

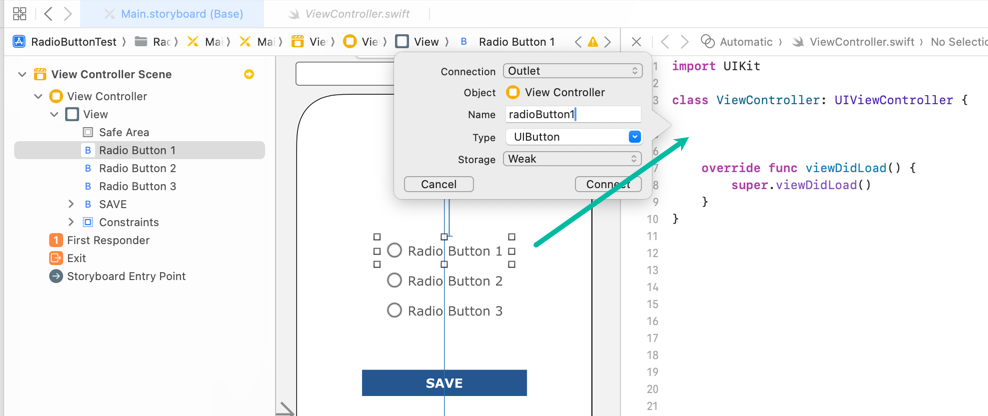
Create outlets from the buttons and name them radioButton1, radioButton2, and radioButton3.
import UIKit
class ViewController: UIViewController {
@IBOutlet weak var radioButton1: UIButton!
@IBOutlet weak var radioButton2: UIButton!
@IBOutlet weak var radioButton3: UIButton!
override func viewDidLoad() {
super.viewDidLoad()
}
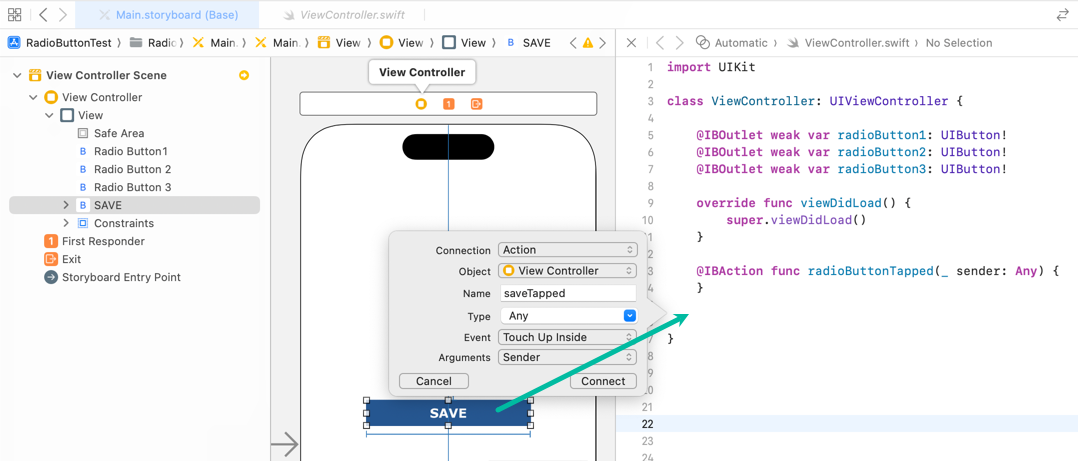
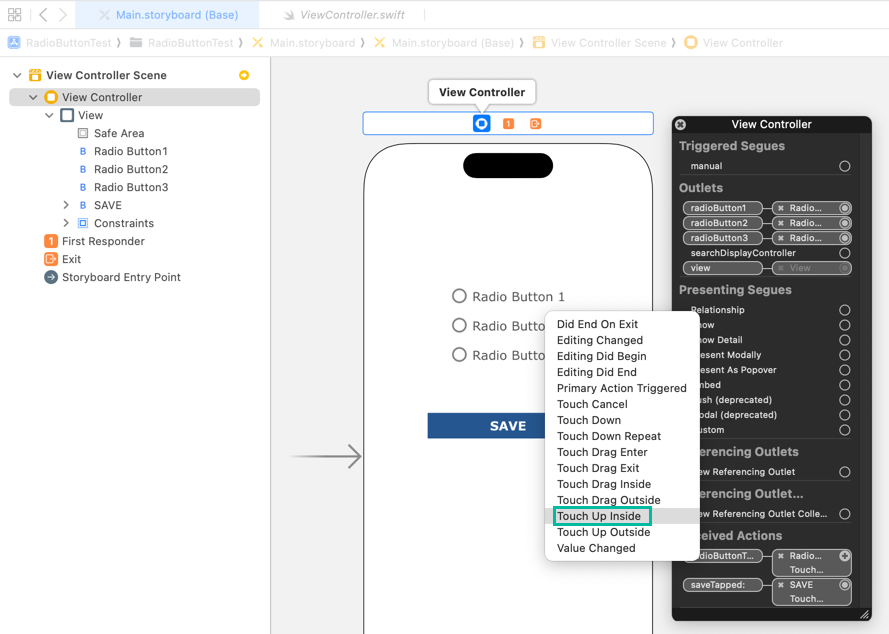
}Create a Touch Up Inside action named radioButtonTapped from Radio Button 1, and another one named saveTapped from the SAVE button.
import UIKit
class ViewController: UIViewController {
@IBOutlet weak var radioButton1: UIButton!
@IBOutlet weak var radioButton2: UIButton!
@IBOutlet weak var radioButton3: UIButton!
override func viewDidLoad() {
super.viewDidLoad()
}
@IBAction func radioButtonTapped(_ sender: Any) {
}
@IBAction func saveTapped(_ sender: Any) {
}
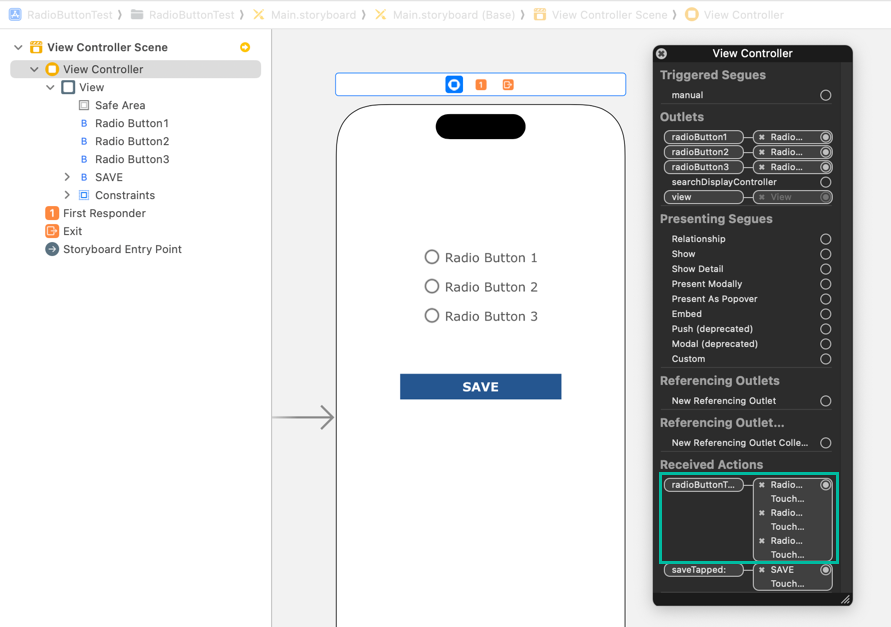
}Right-click the green icon of the View Controller and drag from radioButtonTapped to radioButton2 and select “TouchUpInside”.
Repeat the same for radioButton3.
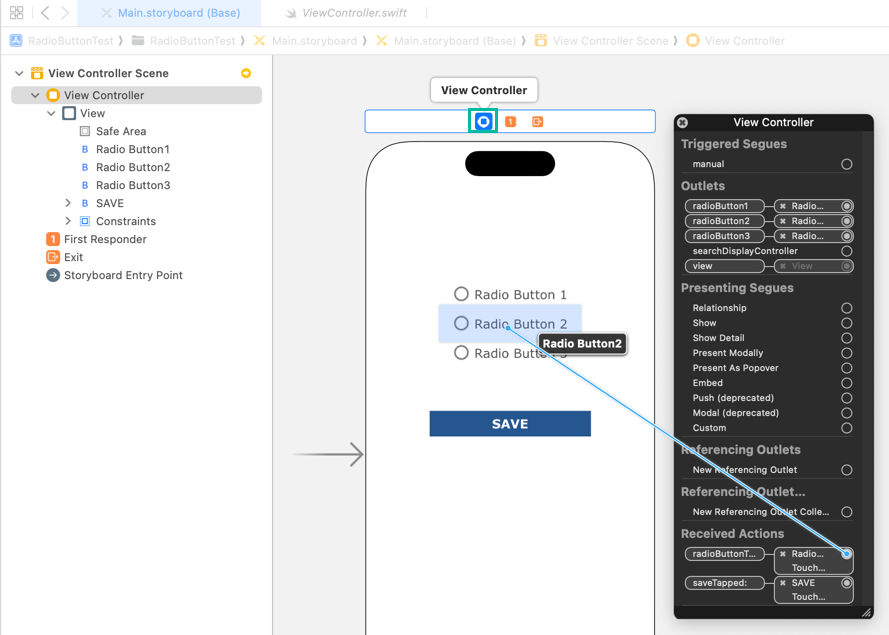
Now, radioButtonTapped will be called for all three buttons.
How to Create Radio Buttons in Swift
Let's now write the actual code for the radio buttons.
There are many ways to do this, but here we will subclass UIButton to create a custom RadioButton class.
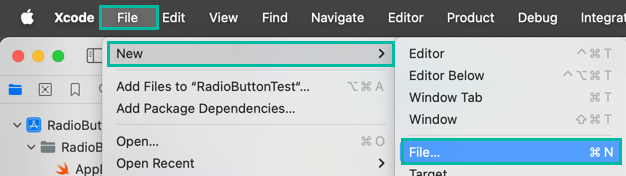
Go to File > New > File from Template... and create a new Swift file named RadioButton.swift.
Add the following code to RadioButton.swift.
import UIKit

@IBDesignable
final class RadioButton: UIButton {

    let checkedImage = UIImage(named: "radio_checked")! as UIImage
    let uncheckedImage = UIImage(named: "radio_unchecked")! as UIImage

    var isChecked: Bool = false {
        didSet{
            if isChecked {
                self.setImage(checkedImage, for: .normal)
            } else {
                self.setImage(uncheckedImage, for: .normal)
            }
        }
    }
}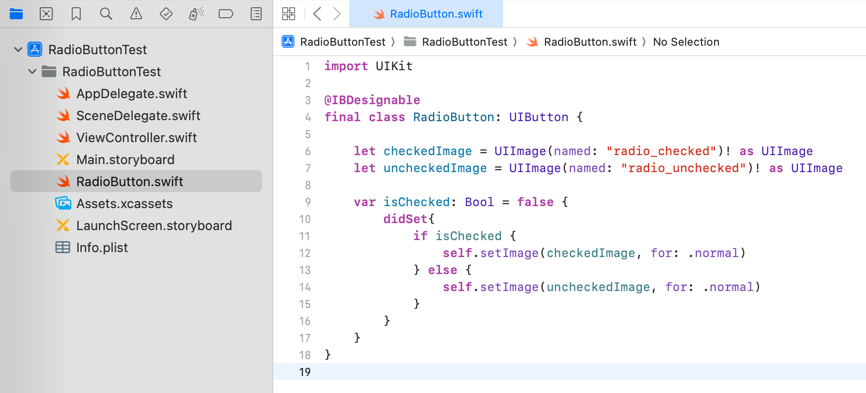
We define checkedImage and uncheckedImage using the images added to Assets.
We added an isChecked property that updates the image accordingly when set.
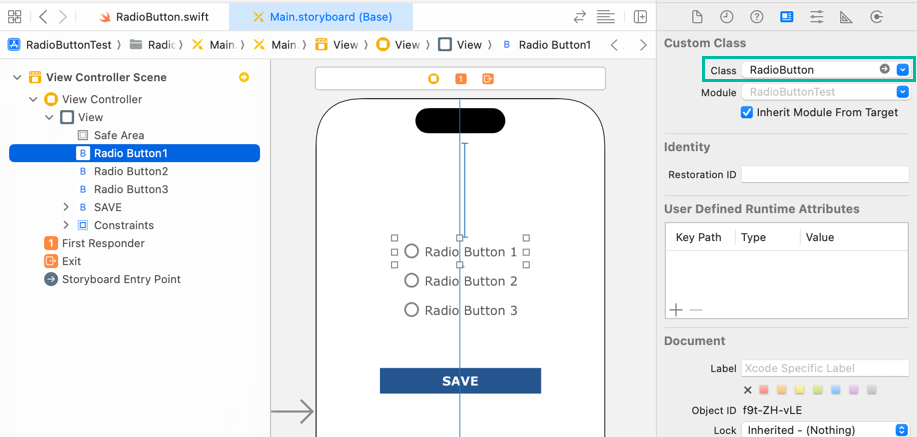
Go back to Main.storyboard, select the buttons, and change their class to RadioButton. Update the outlet types as well.
import UIKit

class ViewController: UIViewController {

    @IBOutlet weak var radioButton1: RadioButton!
    @IBOutlet weak var radioButton2: RadioButton!
    @IBOutlet weak var radioButton3: RadioButton!

    ...
}
Next, create another Swift file named RadioButtonGroup.swift.
Add the following code:
import UIKit

final class RadioButtonGroup: NSObject {
    var radioButtons: [RadioButton]!
    var selected: RadioButton?

    func changed(selected: RadioButton) {
        for rb in radioButtons {
            if rb == selected {
                self.selected = rb
                rb.isChecked = true
            } else {
                rb.isChecked = false
            }
        }
    }
}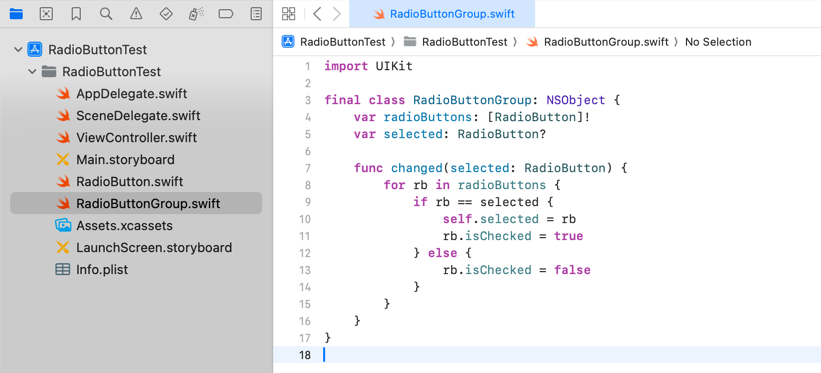
The RadioButtonGroup class holds the radio buttons to be grouped together in an array named radioButtons.
In the changed() method, the radio button passed as selected is set to isChecked = true, and all others are set to isChecked = false.
In the ViewController, create an instance of RadioButtonGroup and initialize it in viewDidLoad().
By default, radioButton1 is selected.
import UIKit

class ViewController: UIViewController {

    @IBOutlet weak var radioButton1: RadioButton!
    @IBOutlet weak var radioButton2: RadioButton!
    @IBOutlet weak var radioButton3: RadioButton!

    var radioButtonGroup: RadioButtonGroup = RadioButtonGroup()

    override func viewDidLoad() {
        super.viewDidLoad()
        radioButtonGroup.radioButtons = [radioButton1, radioButton2, radioButton3]
        radioButtonGroup.changed(selected: radioButton1)
    }

    @IBAction func radioButtonTapped(_ sender: Any) {
    }

    @IBAction func saveTapped(_ sender: Any) {
    }
}
Next, update radioButtonTapped() as shown below.
import UIKit

class ViewController: UIViewController {

    @IBOutlet weak var radioButton1: RadioButton!
    @IBOutlet weak var radioButton2: RadioButton!
    @IBOutlet weak var radioButton3: RadioButton!

    var radioButtonGroup: RadioButtonGroup = RadioButtonGroup()

    override func viewDidLoad() {
        super.viewDidLoad()
        radioButtonGroup.radioButtons = [radioButton1, radioButton2, radioButton3]
        radioButtonGroup.changed(selected: radioButton1)
    }

    @IBAction func radioButtonTapped(_ sender: Any) {
        guard let radioButton = sender as? RadioButton else { return }
        radioButtonGroup.changed(selected: radioButton)
    }

    @IBAction func saveTapped(_ sender: Any) {
    }
}
When either radioButton1, radioButton2, or radioButton3 is tapped, sender is cast to RadioButton and passed to radioButtonGroup.changed().
Finally, update the saveTapped() method so that it prints which radio button is selected when the SAVE button is tapped.
import UIKit

class ViewController: UIViewController {

    @IBOutlet weak var radioButton1: RadioButton!
    @IBOutlet weak var radioButton2: RadioButton!
    @IBOutlet weak var radioButton3: RadioButton!

    var radioButtonGroup: RadioButtonGroup = RadioButtonGroup()

    override func viewDidLoad() {
        super.viewDidLoad()
        radioButtonGroup.radioButtons = [radioButton1, radioButton2, radioButton3]
        radioButtonGroup.changed(selected: radioButton1)
    }

    @IBAction func radioButtonTapped(_ sender: Any) {
        guard let radioButton = sender as? RadioButton else { return }
        radioButtonGroup.changed(selected: radioButton)
    }

    @IBAction func saveTapped(_ sender: Any) {
        switch radioButtonGroup.selected {
        case radioButton1:
            print("Radio Button 1 is selected.")
        case radioButton2:
            print("Radio Button 2 is selected.")
        case radioButton3:
            print("Radio Button 3 is selected.")
        default:
            print("No radio button is selected.")
        }
    }
}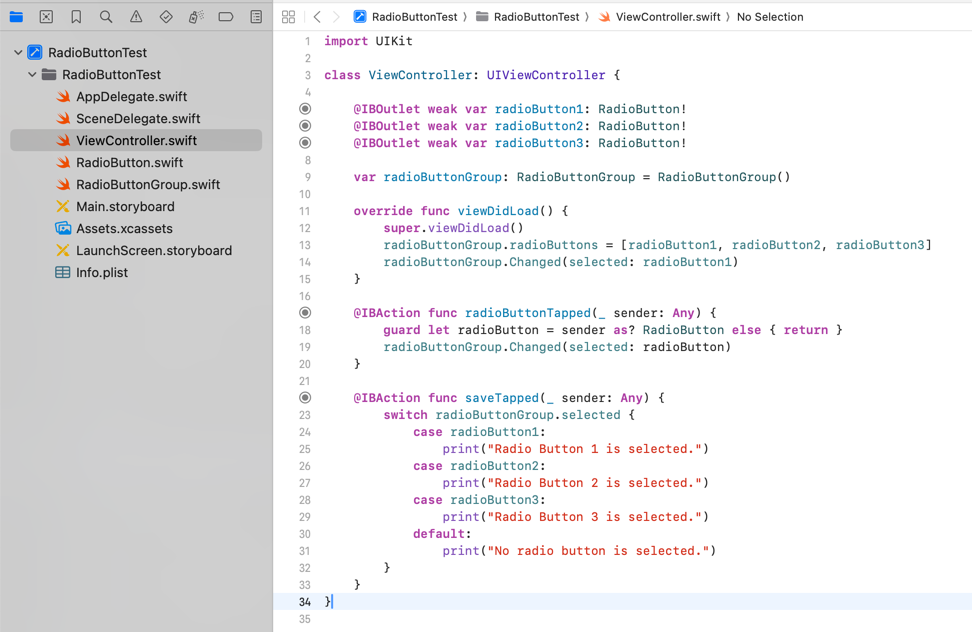
This completes the Swift code for creating radio buttons.
Test the iOS App in Simulator
Now let's build and run the iOS app we just created in the simulator.

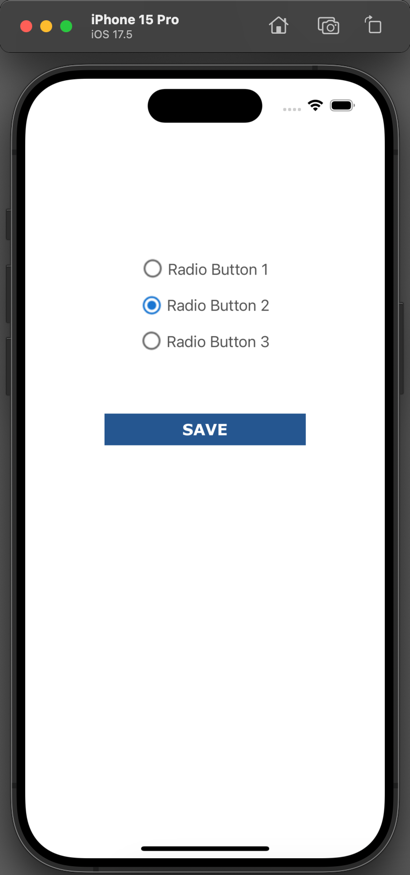
The simulator launches and the UI appears on the screen.
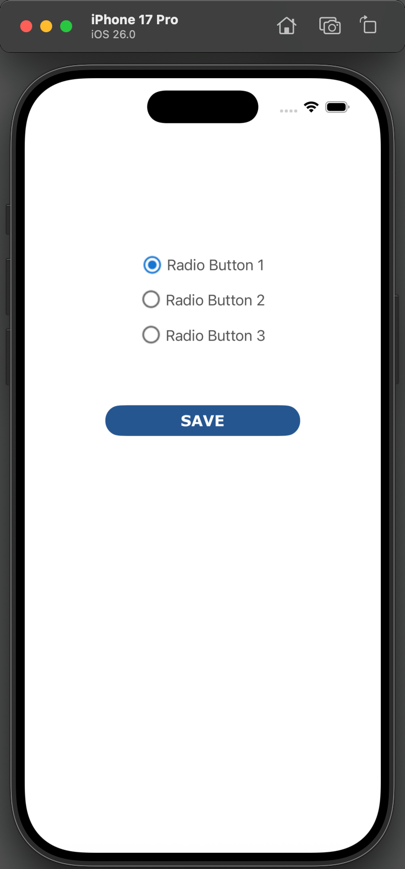
Select “Radio Button 2” and tap the SAVE button.
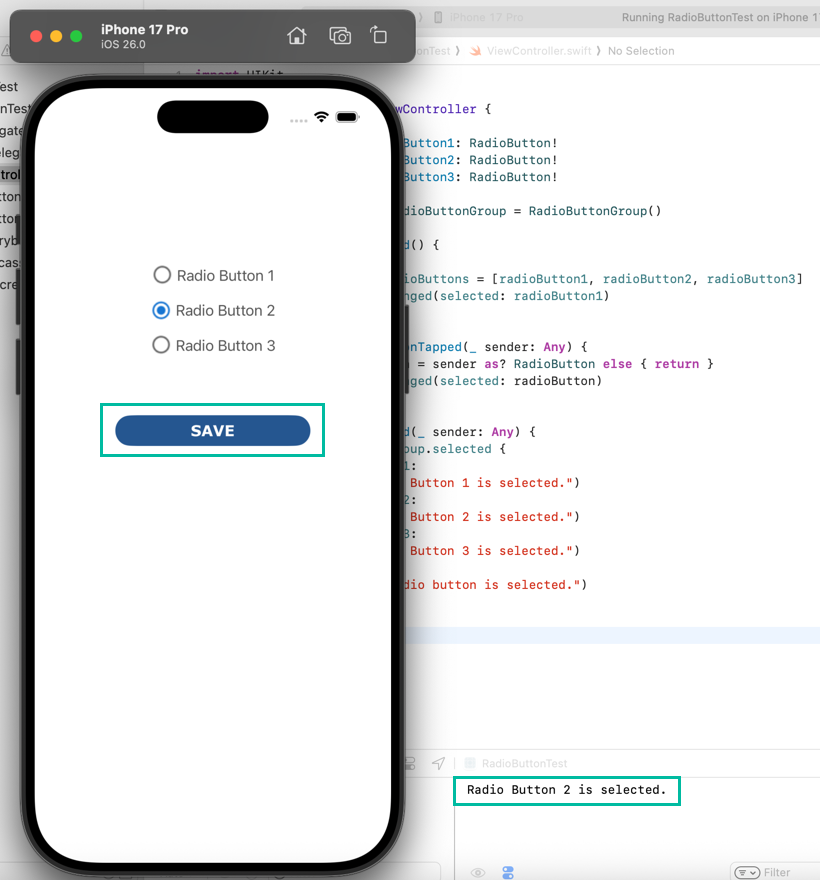
The output console displays: “Radio Button 2 is selected.”
That's all for how to create radio buttons in Swift!