How to Create a Checkbox in Swift
UIKit, which is commonly used when creating iOS apps with Swift, does not include a built-in checkbox component.
In this article, we will explain how to create a checkbox in Swift.
Create a Test iOS App
First, let's create a simple iOS app for testing, which will include checkboxes and retrieve their values.
In Xcode, create a new project under [iOS] > [App].
If you don't know how to create a new app, add buttons, or create actions, please see How to Create a Basic iOS App.
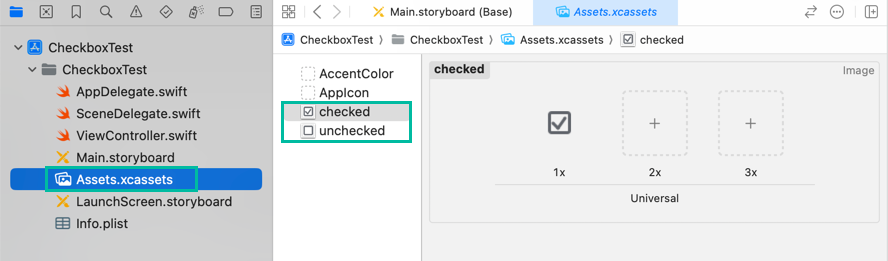
Prepare the following two images: one for the unchecked state and one for the checked state.


Drag and drop these two images into Assets.xcassets to add them.
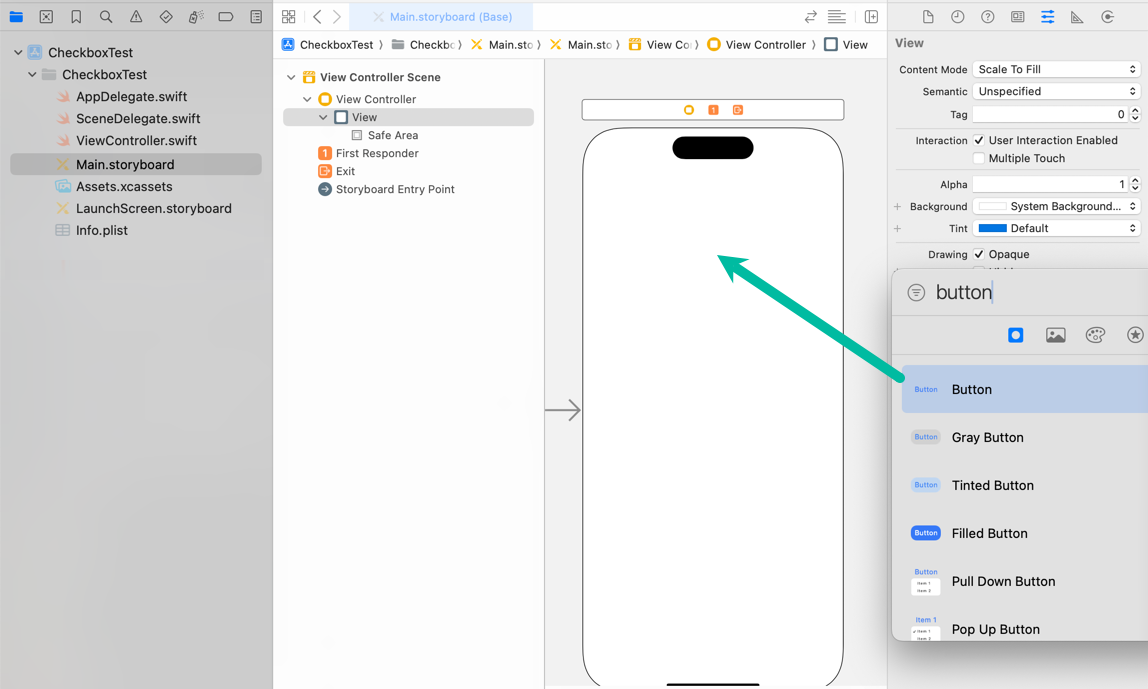
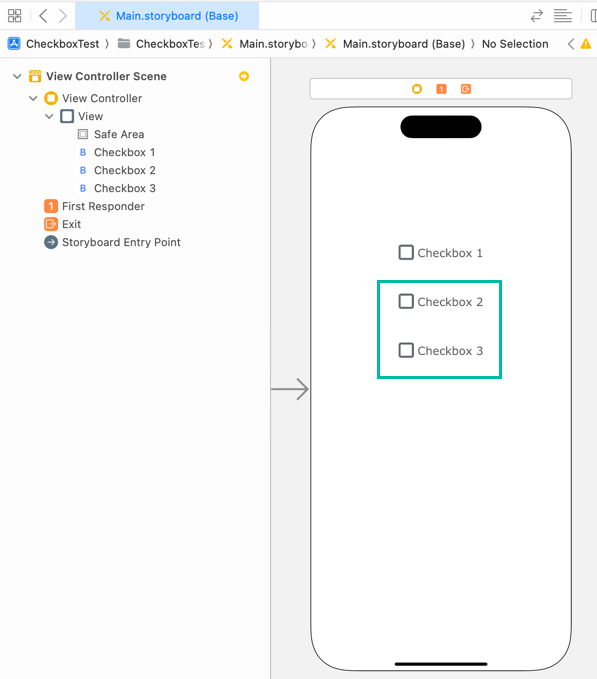
In the Main storyboard, add a button (UIButton) to the View Controller.
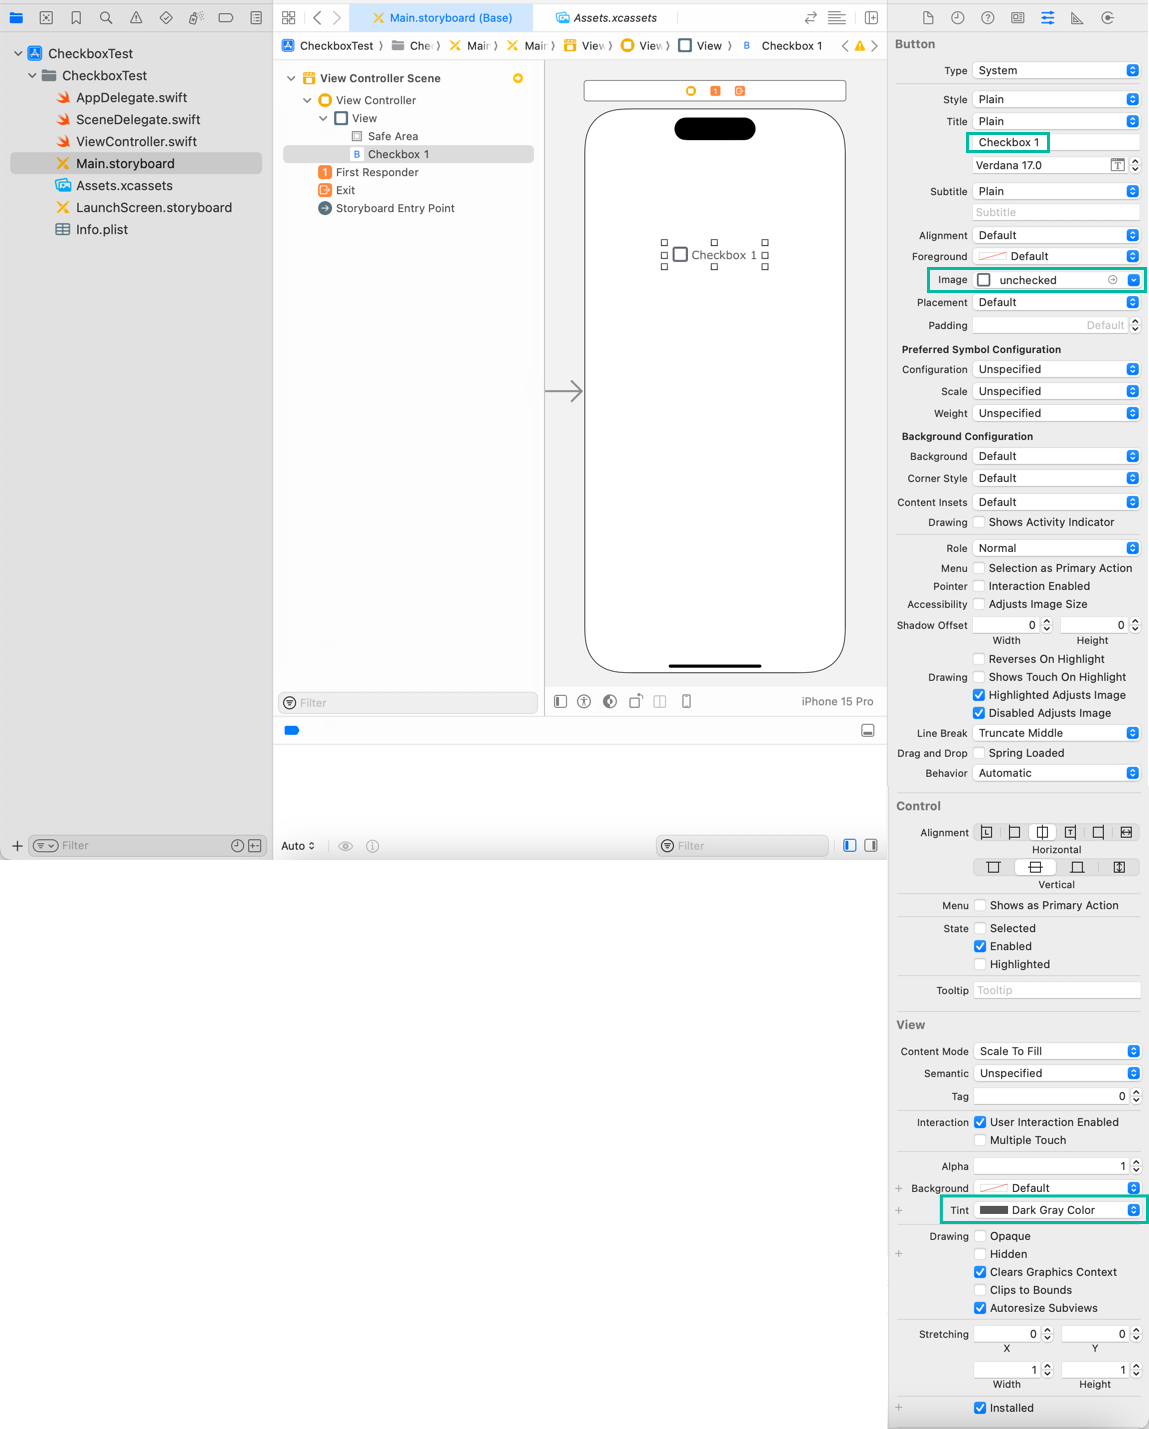
Set the button's Title to Checkbox 1, set the Image to the Unchecked image, change the text color to dark gray, and adjust the font as desired.
You can freely adjust the position, colors, and fonts as you like.
Copy and paste this button, change the Title, and create Checkbox 2 and Checkbox 3.
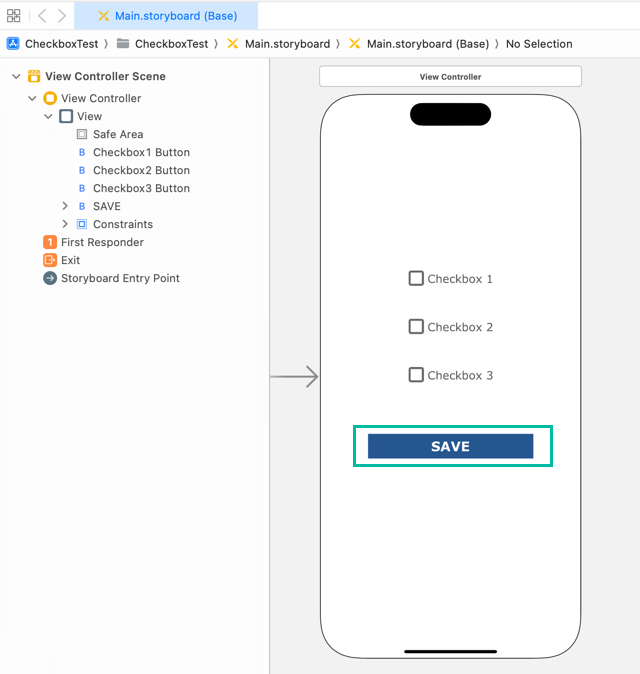
Add a Save button to display the values of the checkboxes.
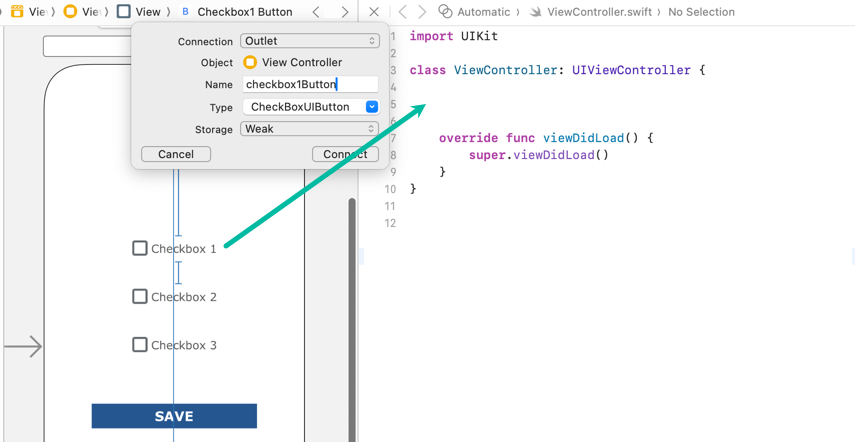
Create outlets for the buttons with the names checkbox1Button, checkbox2Button, and checkbox3Button.
import UIKit
class ViewController: UIViewController {
@IBOutlet weak var checkbox1Button: UIButton!
@IBOutlet weak var checkbox2Button: UIButton!
@IBOutlet weak var checkbox3Button: UIButton!
override func viewDidLoad() {
super.viewDidLoad()
}
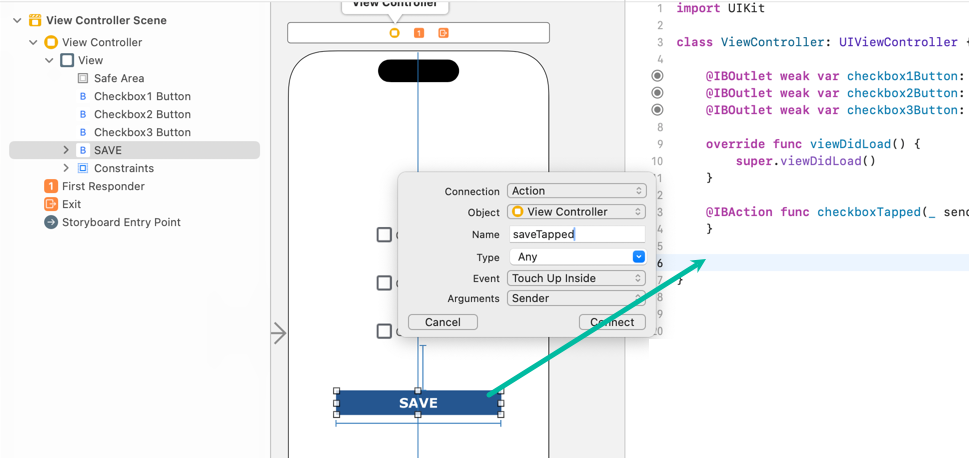
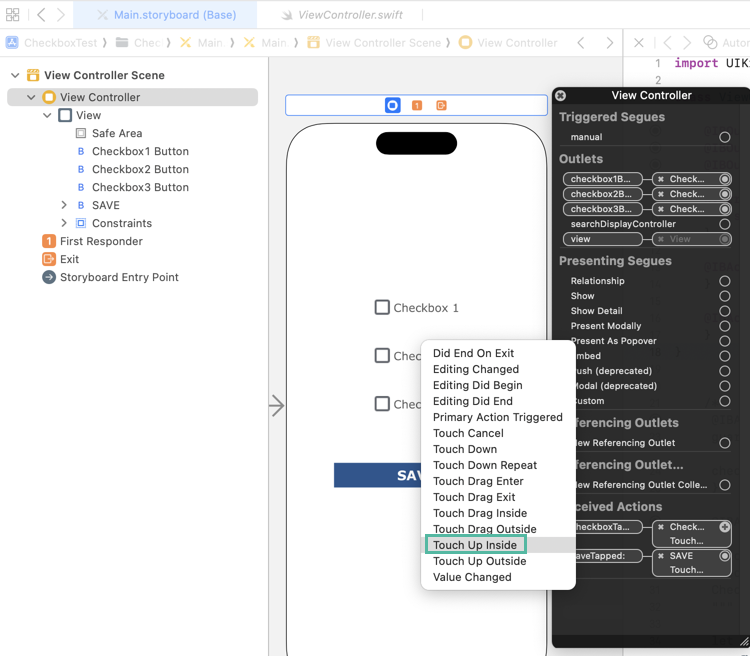
}Create a Touch Up Inside action from the Checkbox 1 button called checkboxTapped, and another from the Save button called saveTapped.
import UIKit
class ViewController: UIViewController {
@IBOutlet weak var checkbox1Button: UIButton!
@IBOutlet weak var checkbox2Button: UIButton!
@IBOutlet weak var checkbox3Button: UIButton!
override func viewDidLoad() {
super.viewDidLoad()
}
@IBAction func checkboxTapped(_ sender: Any) {
}
@IBAction func saveTapped(_ sender: Any) {
}
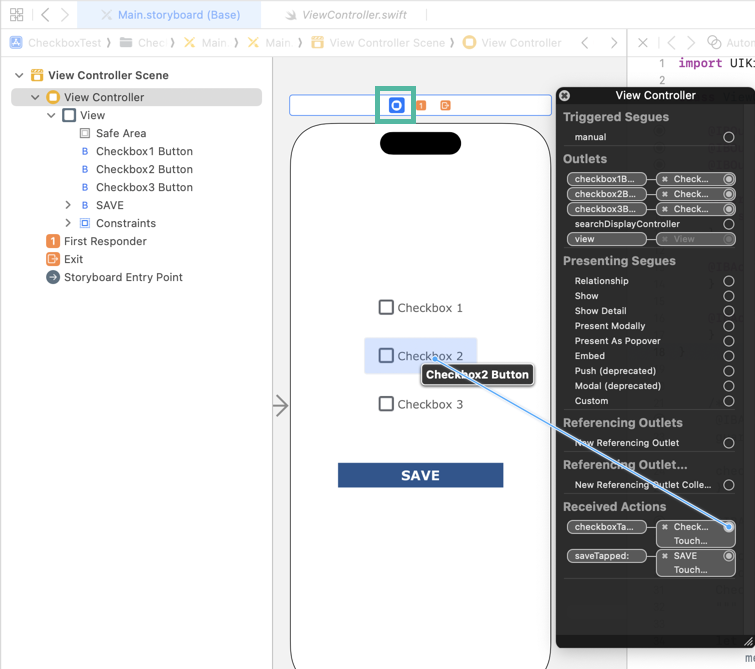
}Right-click the green icon of the View Controller, drag from checkboxTapped to checkbox2Button, and select TouchUpInside.
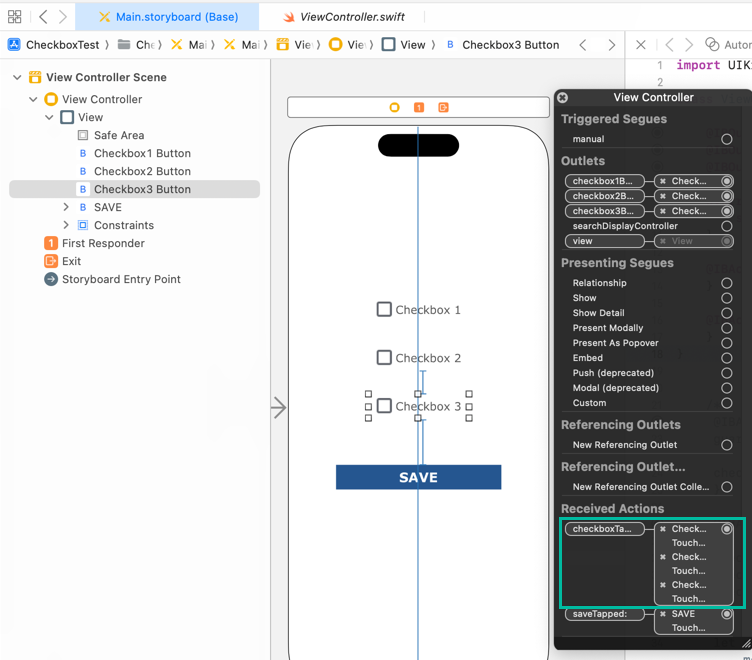
Do the same for checkbox3Button.
Now, tapping any of checkbox1Button, checkbox2Button, or checkbox3Button will trigger checkboxTapped.
How to Create a Checkbox in Swift
Next, let's write the Swift code to create a checkbox.
There are several ways to do this, but here we will create a CheckboxButton class based on UIButton.
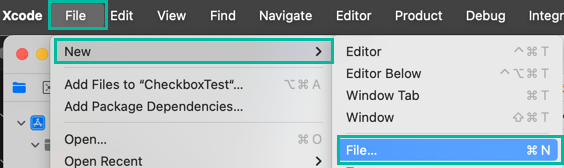
From the menu, go to File > New > File from Template... and create a new Swift file named CheckboxButton.swift.
Add the following code to CheckboxButton.swift:
import UIKit

@IBDesignable
final class CheckboxButton: UIButton {

    let checkedImage = UIImage(named: "checked")! as UIImage
    let uncheckedImage = UIImage(named: "unchecked")! as UIImage

    var isChecked: Bool = false {
        didSet{
            if isChecked {
                self.setImage(checkedImage, for: .normal)
            } else {
                self.setImage(uncheckedImage, for: .normal)
            }
        }
    }
}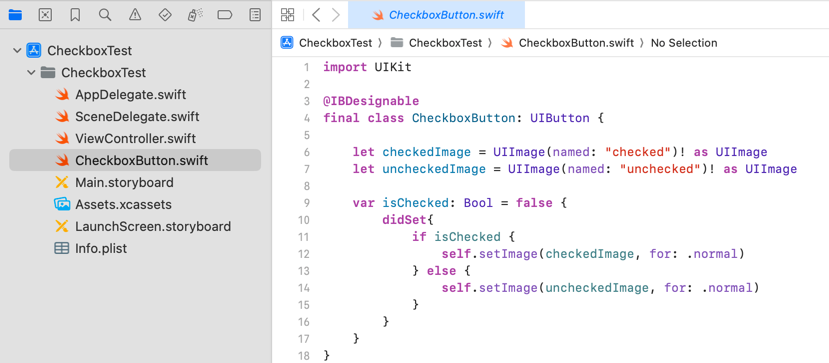
Here we defined UIImage instances from the checked and unchecked assets.
The isChecked property updates the image: if true, the checkedImage is shown; if false, the uncheckedImage is shown.
In Main.storyboard, select each Checkbox button, set its Class to CheckboxButton, and also change the outlet type to CheckboxButton.

import UIKit

class ViewController: UIViewController {

    @IBOutlet weak var checkbox1Button: CheckboxButton!
    @IBOutlet weak var checkbox2Button: CheckboxButton!
    @IBOutlet weak var checkbox3Button: CheckboxButton!

    override func viewDidLoad() {
        super.viewDidLoad()
    }

    @IBAction func checkboxTapped(_ sender: Any) {
    }

    @IBAction func saveTapped(_ sender: Any) {
    }
}
Now update checkboxTapped() as follows:
import UIKit

class ViewController: UIViewController {

    @IBOutlet weak var checkbox1Button: CheckboxButton!
    @IBOutlet weak var checkbox2Button: CheckboxButton!
    @IBOutlet weak var checkbox3Button: CheckboxButton!

    override func viewDidLoad() {
        super.viewDidLoad()
    }

    @IBAction func checkboxTapped(_ sender: Any) {
        guard let checkbox = sender as? CheckboxButton else { return }
        checkbox.isChecked = !checkbox.isChecked
    }

    @IBAction func saveTapped(_ sender: Any) {
    }
}
When any of the checkbox buttons are tapped, sender is cast to CheckboxButton and its isChecked value is toggled.
Finally, update saveTapped() to display the checkbox values when the Save button is tapped:
import UIKit

class ViewController: UIViewController {

    @IBOutlet weak var checkbox1Button: CheckboxButton!
    @IBOutlet weak var checkbox2Button: CheckboxButton!
    @IBOutlet weak var checkbox3Button: CheckboxButton!

    override func viewDidLoad() {
        super.viewDidLoad()
    }

    @IBAction func checkboxTapped(_ sender: Any) {
        guard let checkbox = sender as? CheckboxButton else { return }
        checkbox.isChecked = !checkbox.isChecked
    }

    @IBAction func saveTapped(_ sender: Any) {
        let message = """
                      Checkbox 1: \(checkbox1Button.isChecked)
                      Checkbox 2: \(checkbox2Button.isChecked)
                      Checkbox 3: \(checkbox3Button.isChecked)
                      """

        let alert = UIAlertController(title: title, message: message, preferredStyle: UIAlertController.Style.alert)

        alert.addAction(UIAlertAction(title: "OK", style: .default))
        present(alert, animated: true, completion: nil)
    }
}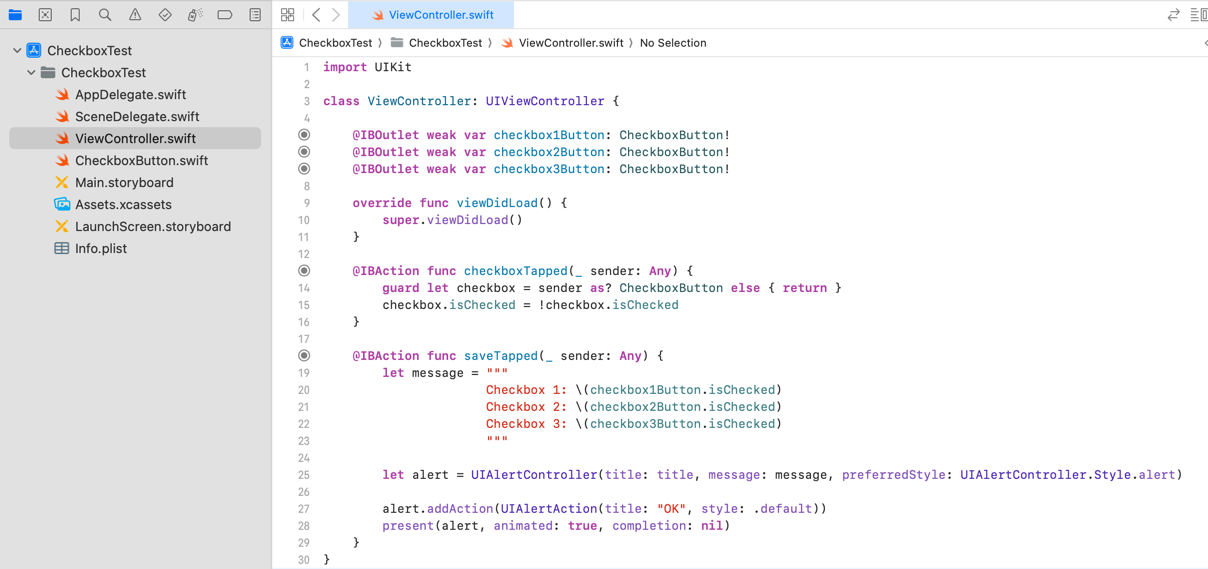
This creates a string showing the isChecked values of the checkboxes and displays them in an alert using UIAlertController.
This is the complete code for creating checkboxes in Swift.
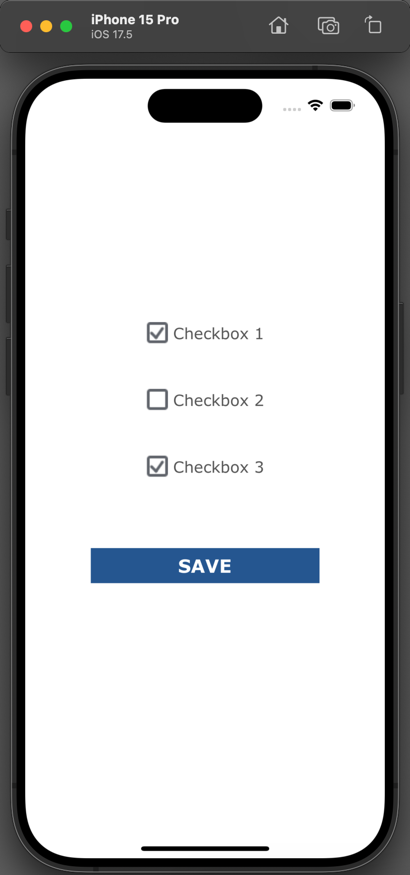
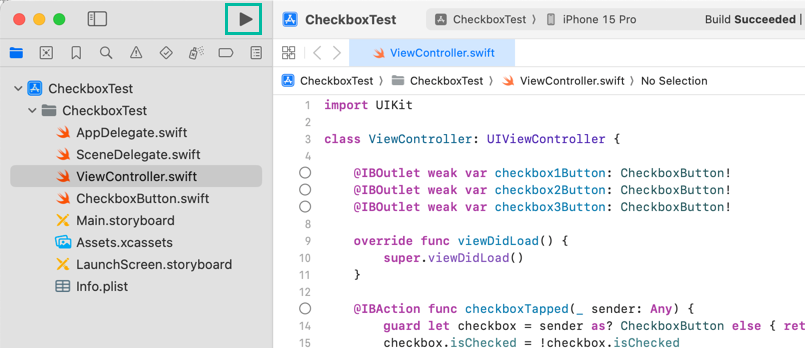
Test the iOS App in the Simulator
Now build and run the app in the simulator to test it.
When the screen appears, check some boxes and tap the Save button.
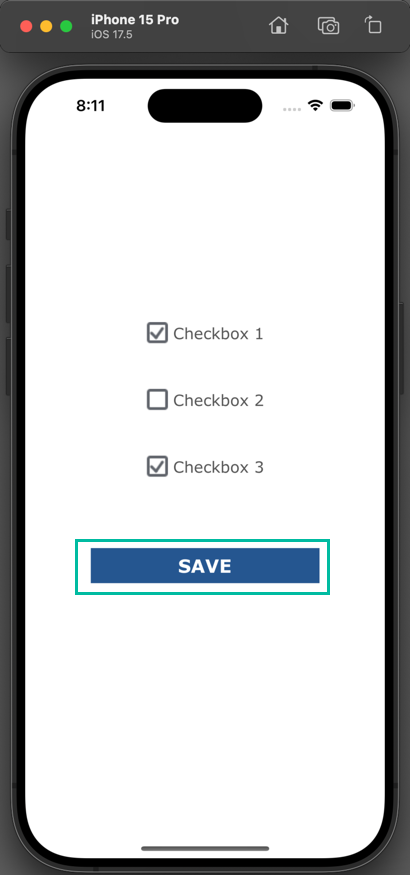
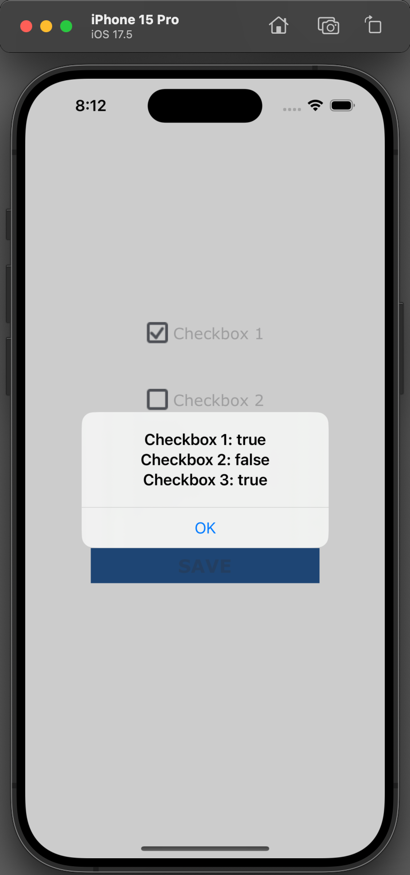
You can see that the values of the checkboxes were successfully retrieved.
That's how to create checkboxes in Swift.