How to Create and Configure xcconfig Files for Environment Settings in Xcode
When developing a system, you may want to use different settings depending on the environment when deploying your app to QA or production.
This article explains how to create and configure xcconfig files in Xcode to manage environment-specific settings.
We'll proceed assuming that Build Configurations and Schemes have already been created. If not, please return to the index of How to Manage Environment Settings in Xcode and add/configure them first.
Creating an xcconfig File in Xcode
Let's create Configuration Settings files (xcconfig) and set environment-specific values.
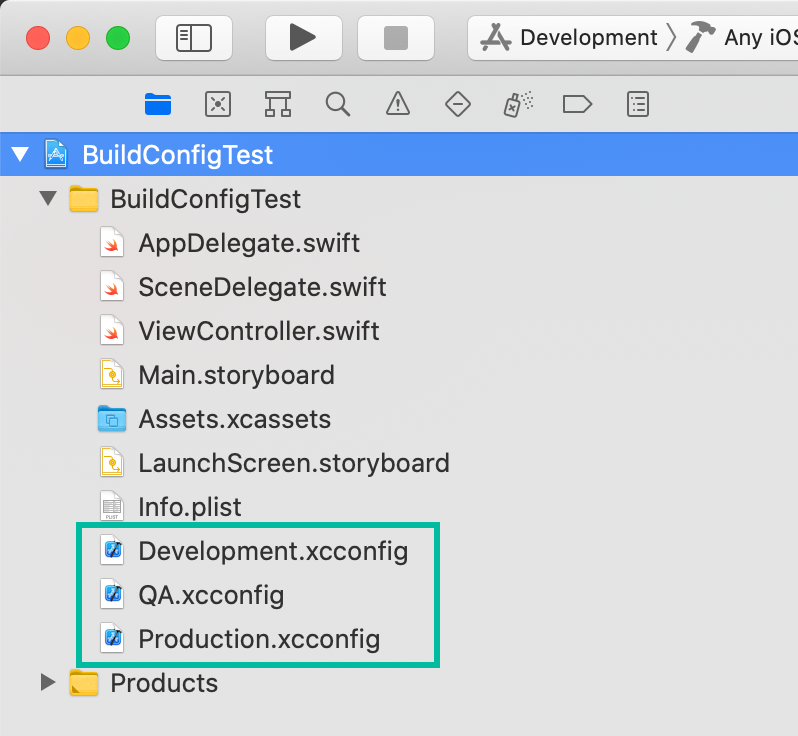
We'll generate separate xcconfig files for Development, QA, and Production.
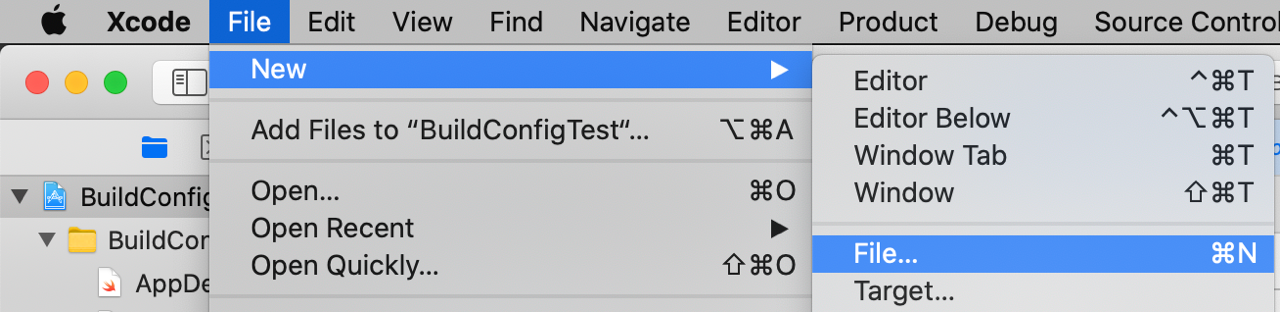
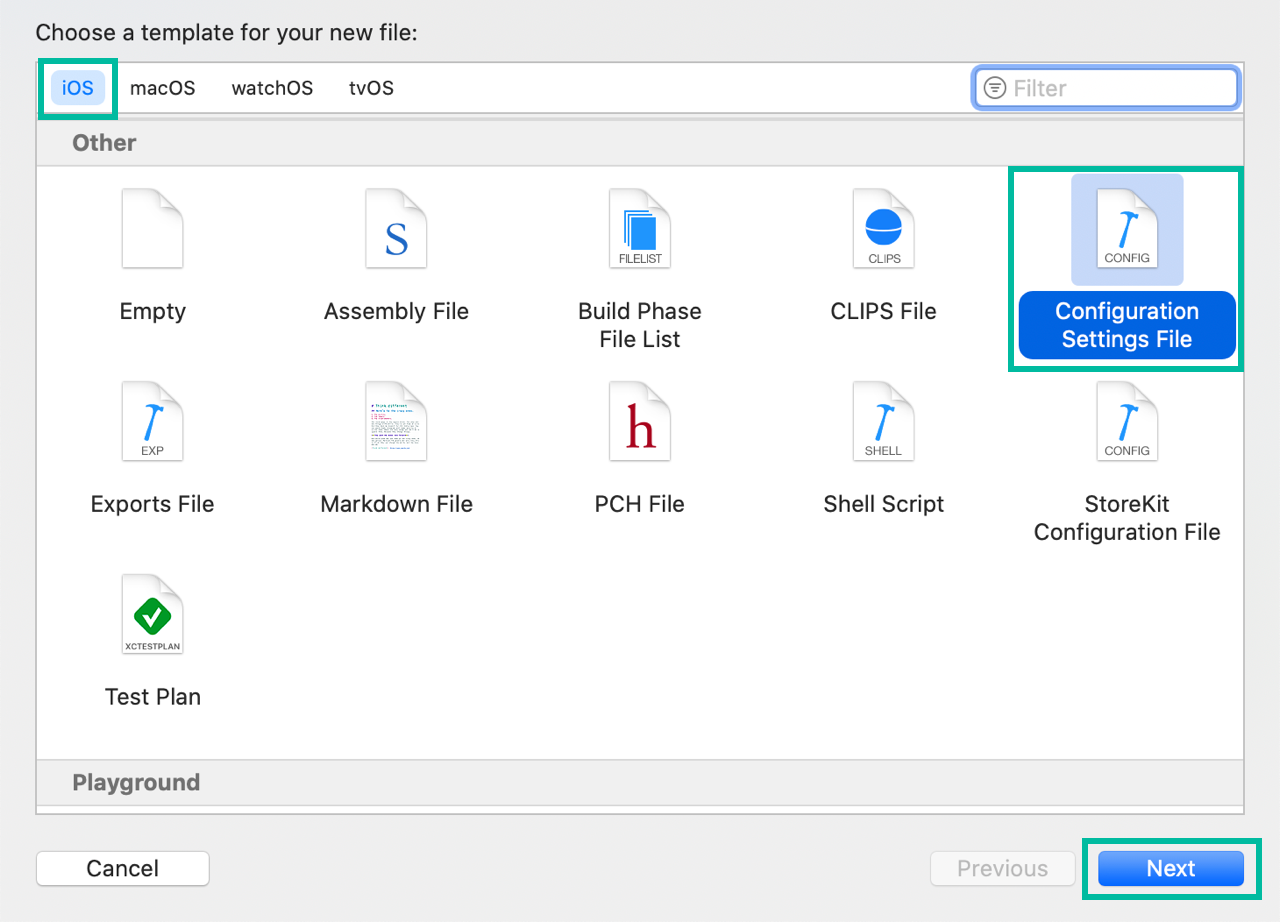
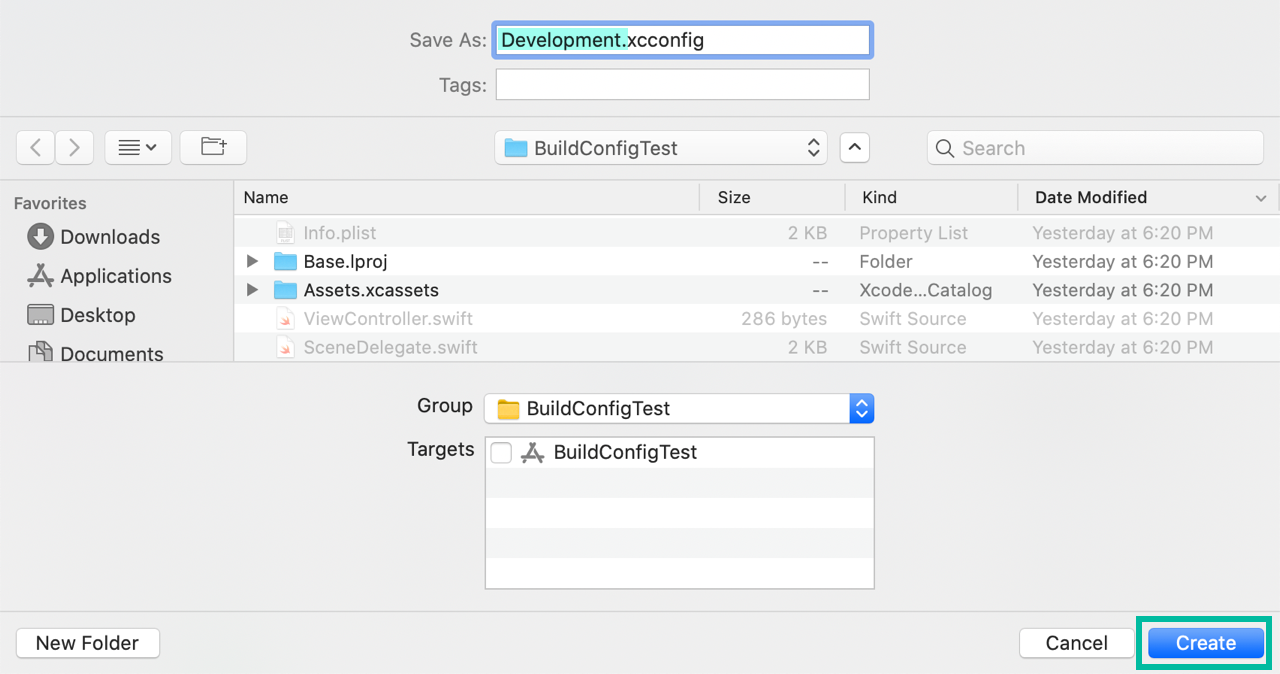
From the menu bar, choose File > New > File from Template..., select iOS Configuration Settings File, click Next, and create Development.xcconfig.
Similarly, create QA.xcconfig and Production.xcconfig.
Assigning xcconfig Files to Configurations
Next, link each generated xcconfig file to a Build Configuration.
Click the project name under PROJECT, open the Info tab, expand each item under Configurations, and set the target's Based on Configuration File as shown below.
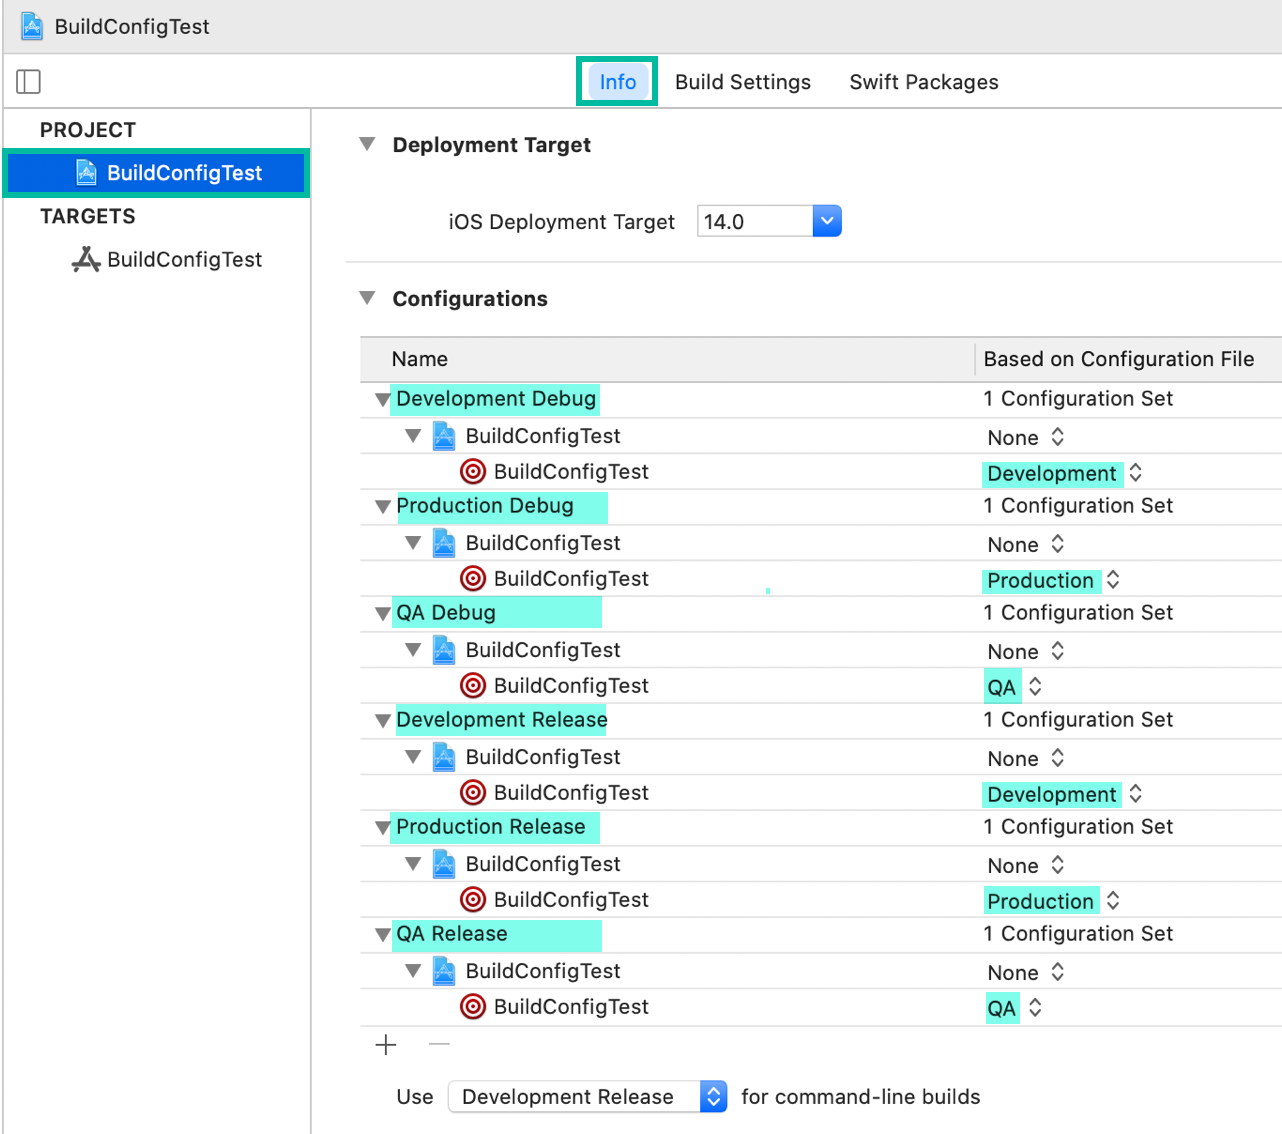
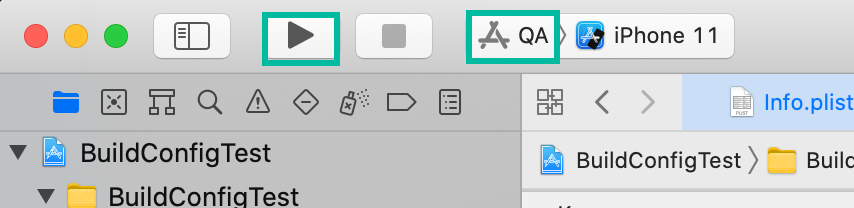
Now, when you change the scheme and run, the xcconfig file for the scheme's selected build configuration will be used.
However, because build settings have a priority order, values in an xcconfig file won't always win just by declaring them there.
For details, see Priority of Build Settings in Xcode.
Adding and Managing Values in xcconfig Files
In Configuring Environment-Specific Build Settings in the Xcode Project Editor, we set environment-specific Bundle IDs at the Target Build Settings.
Here, we'll use xcconfig files to set a different app name for Development, QA, and Production.
When writing to an xcconfig file, use the following format:
BUILD_SETTING_KEY = BUILD_SETTING_VALUEYou can override existing build settings or define new build setting keys with values.
Note: Target-level Build Settings have higher priority. If a value is set at the Target level, it will override the value from the xcconfig file.
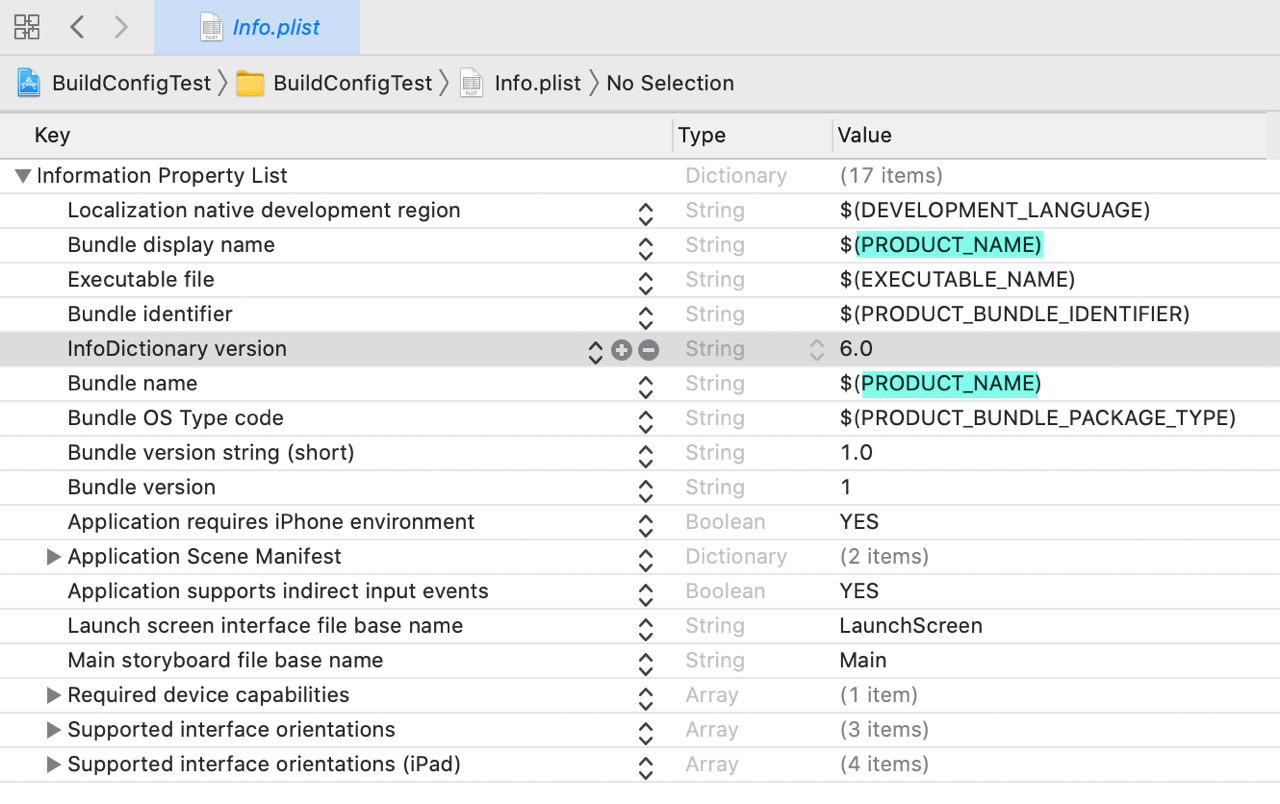
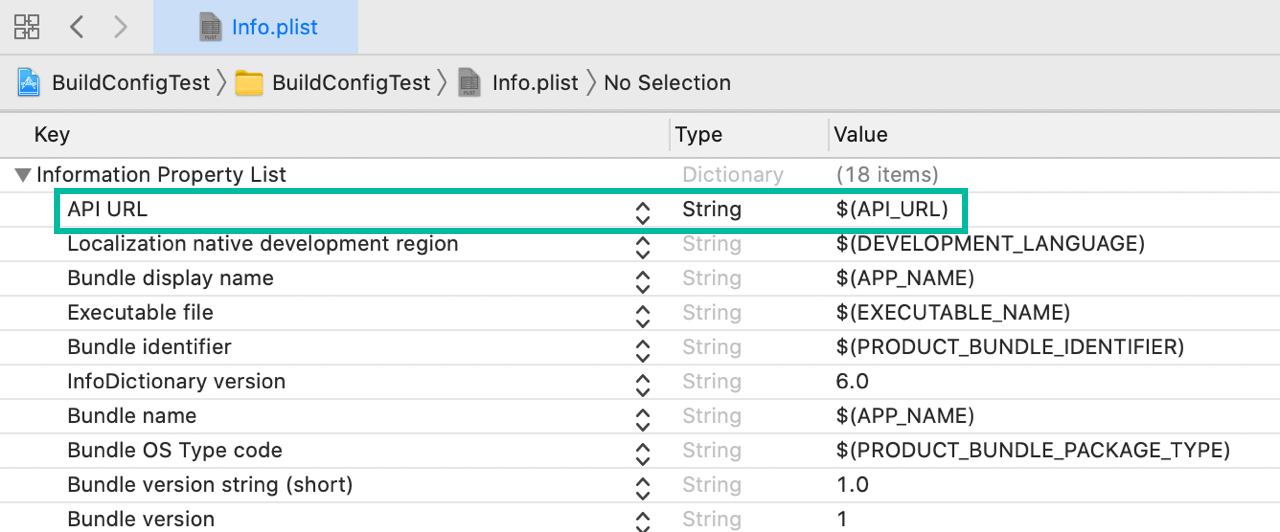
Keys enclosed in $( ) in Info.plist and the Project Editor are build setting keys.
For example, both Bundle display name and Bundle name often use $(PRODUCT_NAME), so the key is PRODUCT_NAME.
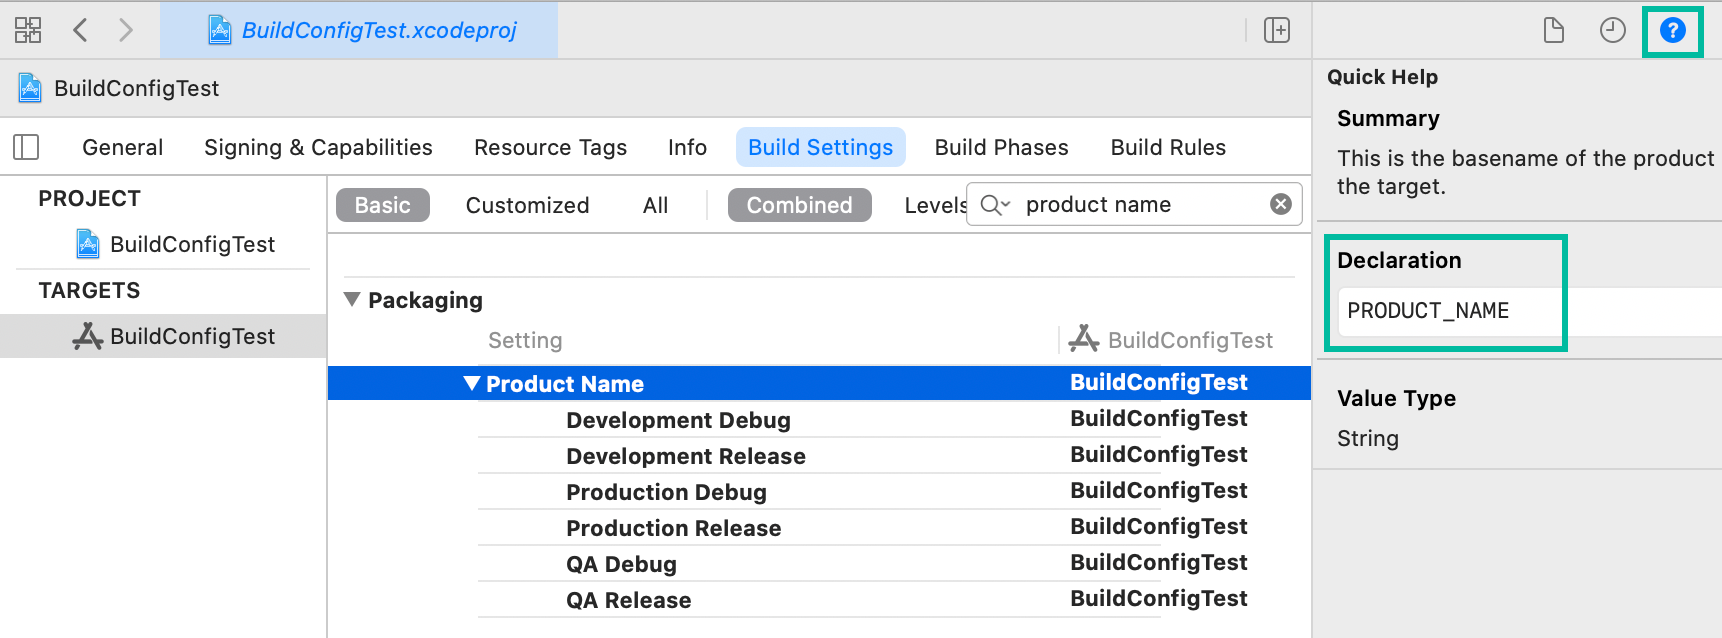
If you're unsure of a build setting key, you can check it in the Quick Help Inspector.
You can also drag a setting from Build Settings into an xcconfig file in the Assistant Editor to insert the correct key.
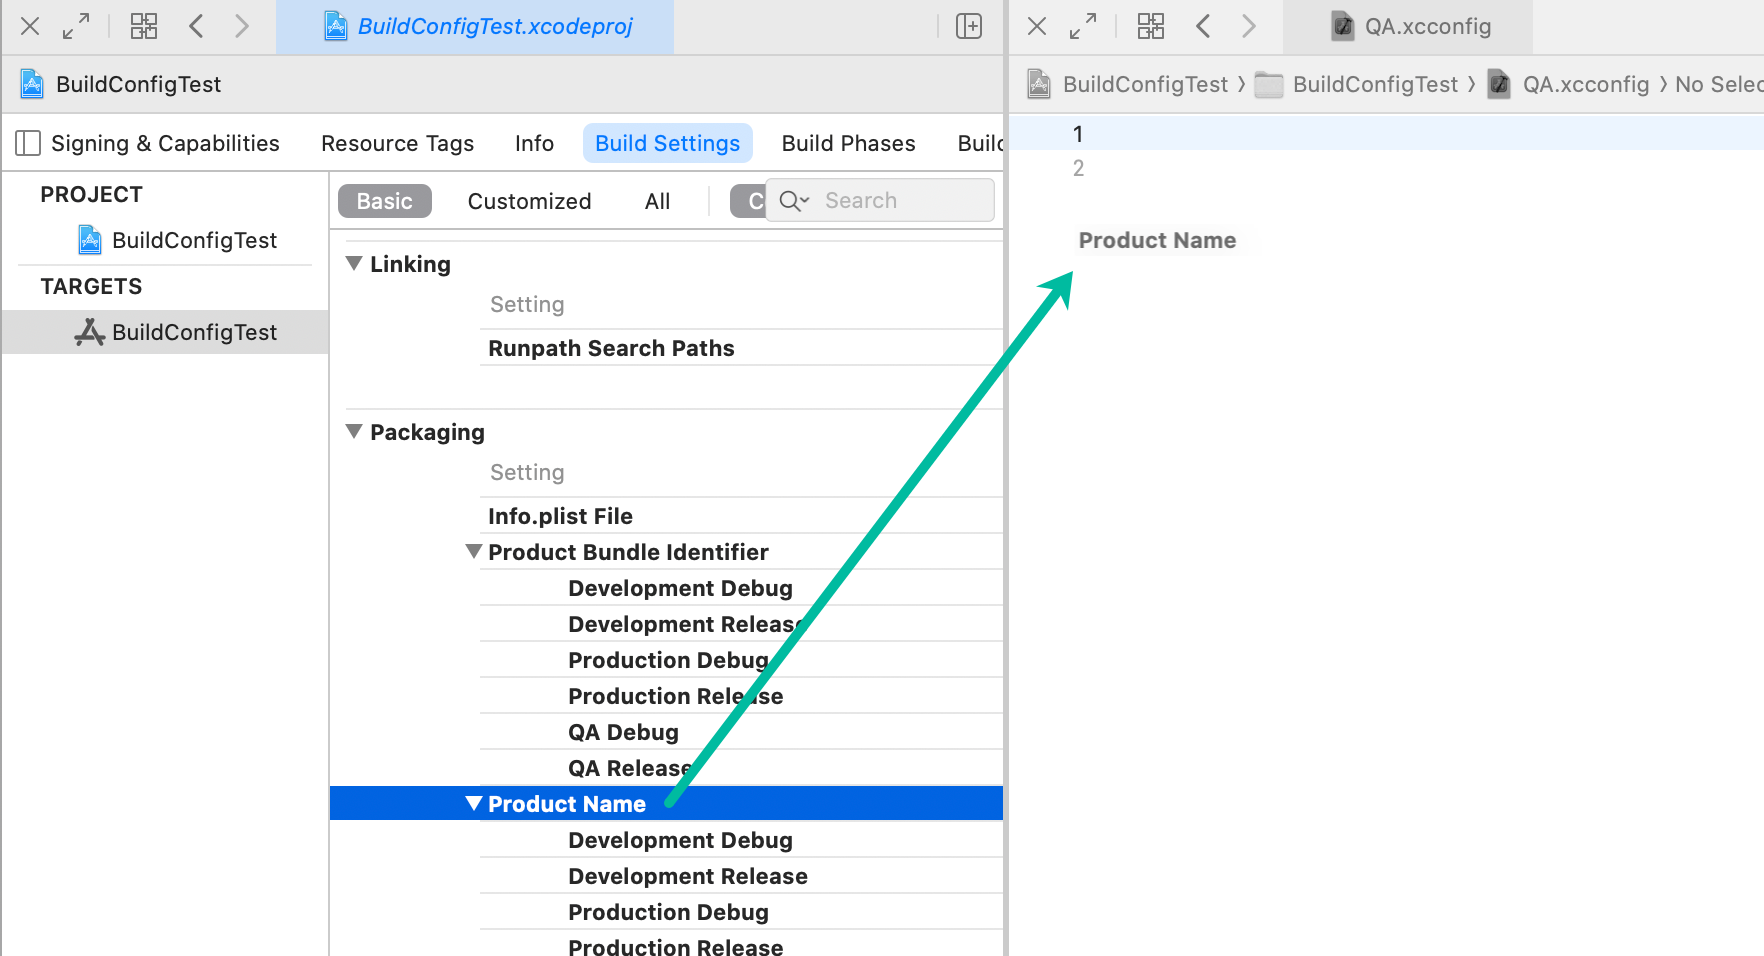
If you try to set PRODUCT_NAME directly in an xcconfig like this, it won't take effect because the Target Build Settings usually set PRODUCT_NAME = $(TARGET_NAME) with higher priority:
PRODUCT_NAME = TestApp Dev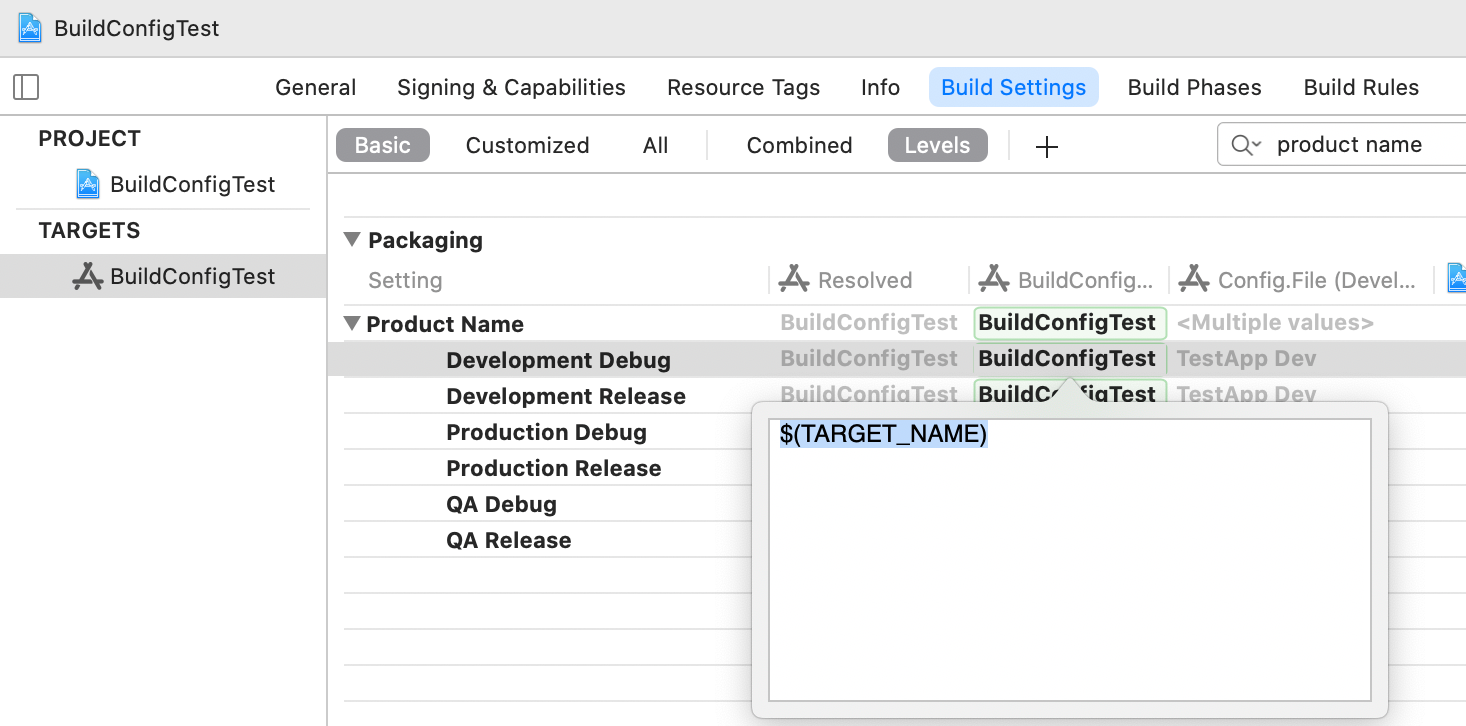
Instead, we'll create a new key APP_NAME and replace Bundle display name and Bundle name in Info.plist to use it.
Add the following values to each xcconfig file:
APP_NAME = TestApp DevAPP_NAME = TestApp QAAPP_NAME = TestApp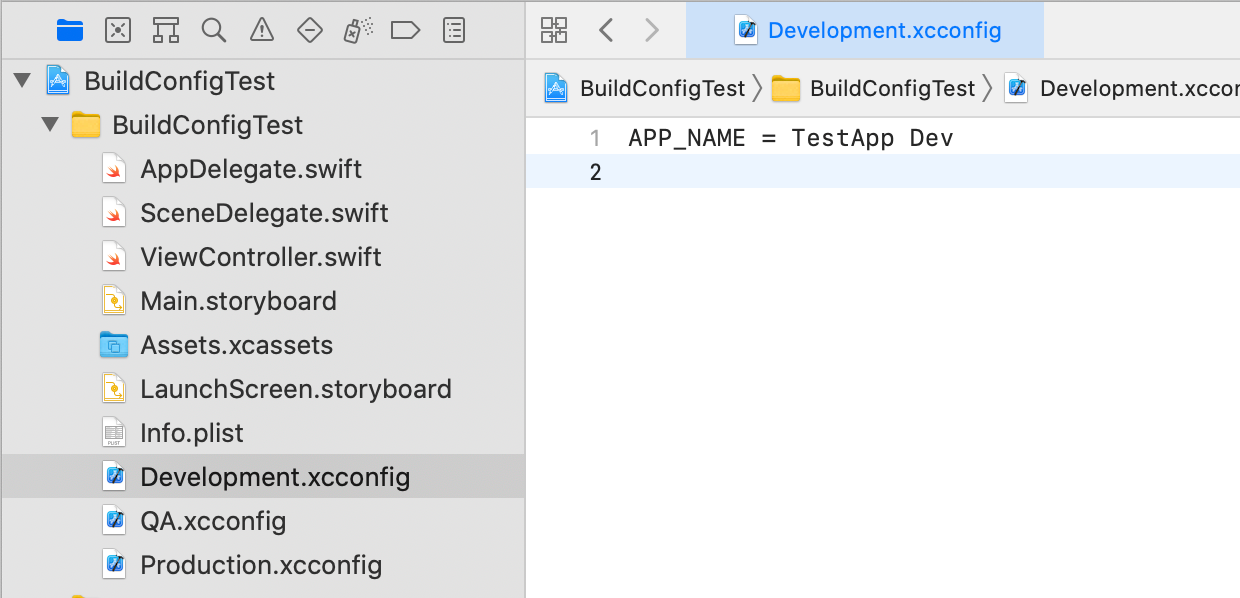
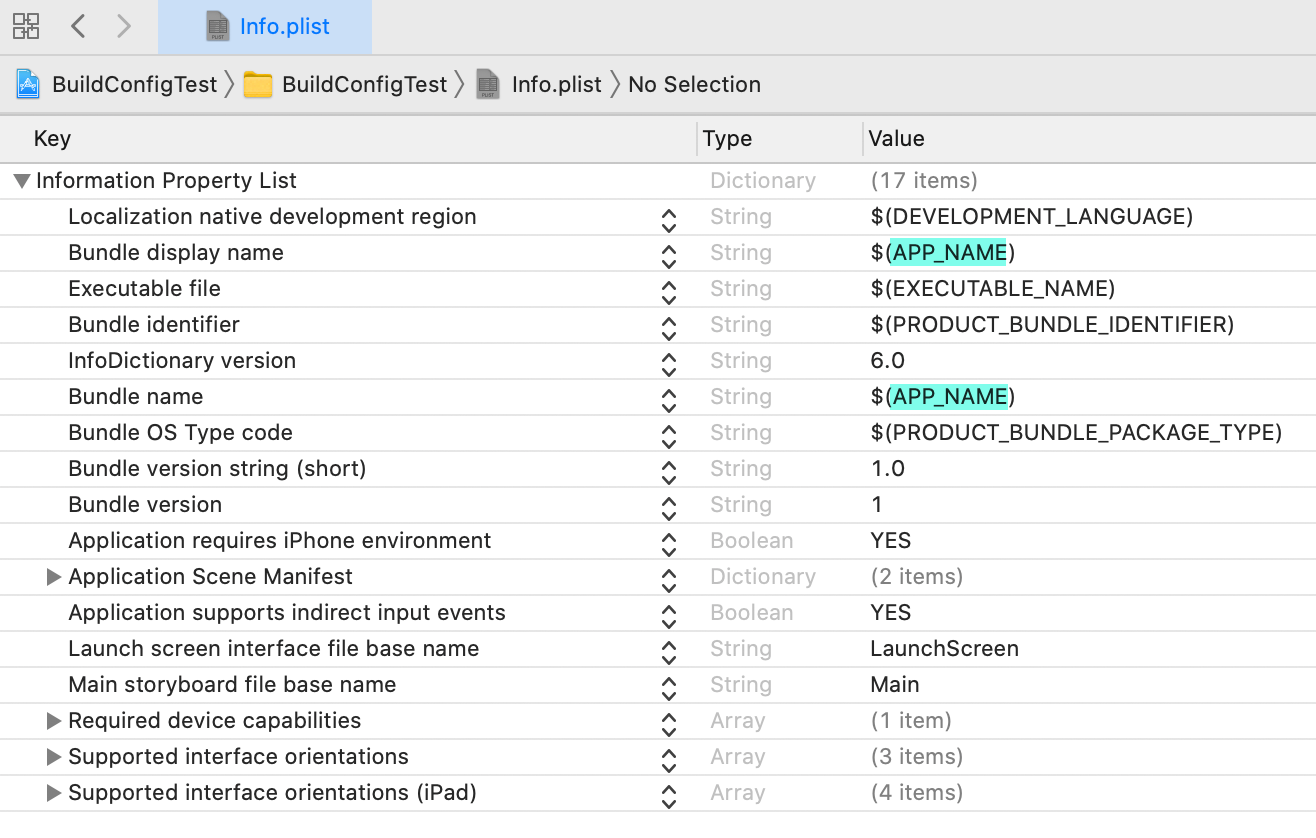
Then change Bundle display name and Bundle name in Info.plist to $(APP_NAME).
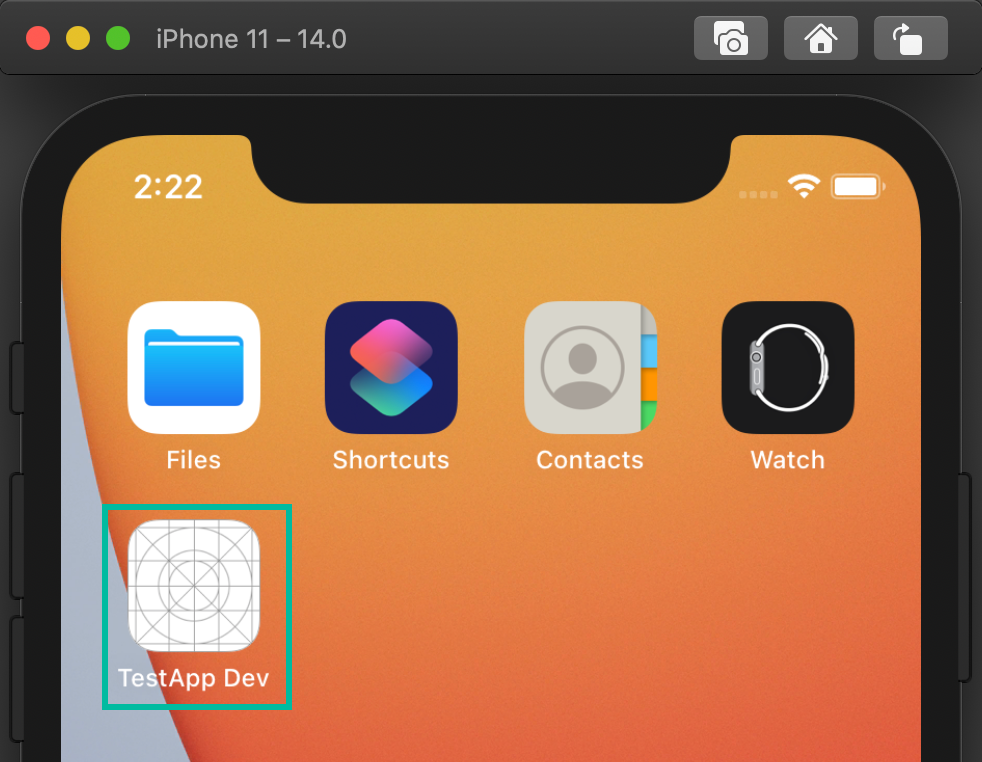
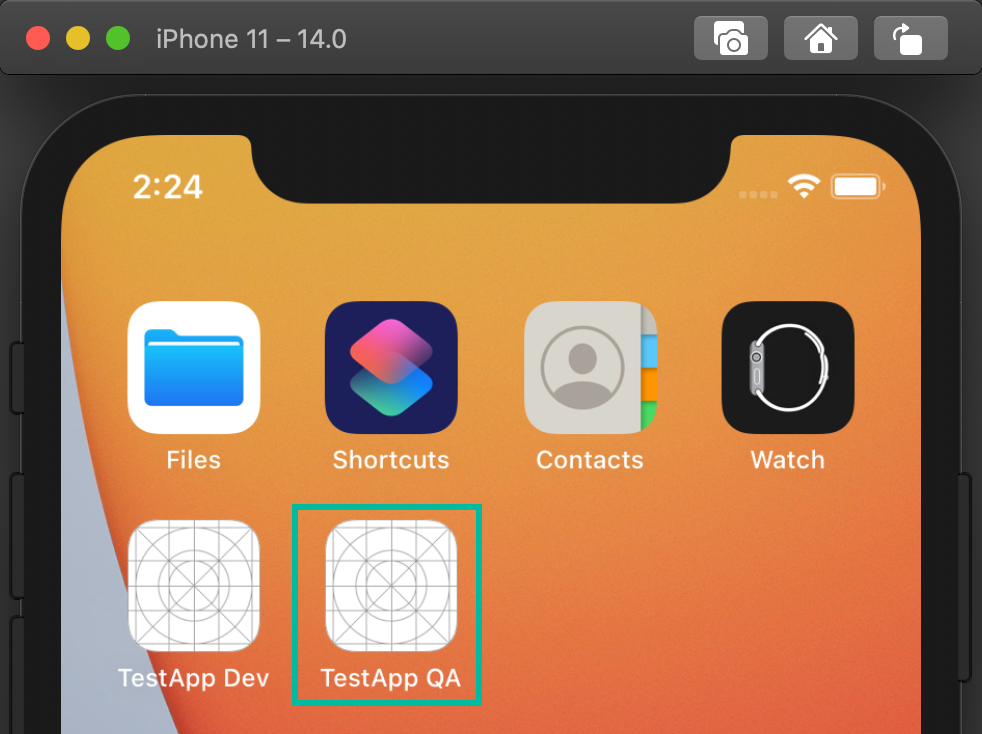
With this setup, when you switch schemes and run in the simulator, apps will install with environment-specific names (and, from the previous step, different Bundle IDs), allowing multiple environments on the same device.

Warning: include(../_adsense_ia-2.php): failed to open stream: No such file or directory in /hermes/walnacweb06/walnacweb06ae/b527/pow.itomoko/htdocs/ios/en/devenv/how-to-create-and-setup-xcconfig-file.php on line 159
Warning: include(): Failed opening '../_adsense_ia-2.php' for inclusion (include_path='.:/opt/alt/php74/usr/share/pear') in /hermes/walnacweb06/walnacweb06ae/b527/pow.itomoko/htdocs/ios/en/devenv/how-to-create-and-setup-xcconfig-file.php on line 159
Accessing xcconfig Values in Swift Code
Sometimes you'll want to read values from an xcconfig in Swift—for example, an API URL.
You can do this by adding the build setting key you created in the xcconfig file to Info.plist.
For example, define a build setting called API_URL.
Add the following values to Development.xcconfig, QA.xcconfig, and Production.xcconfig respectively:
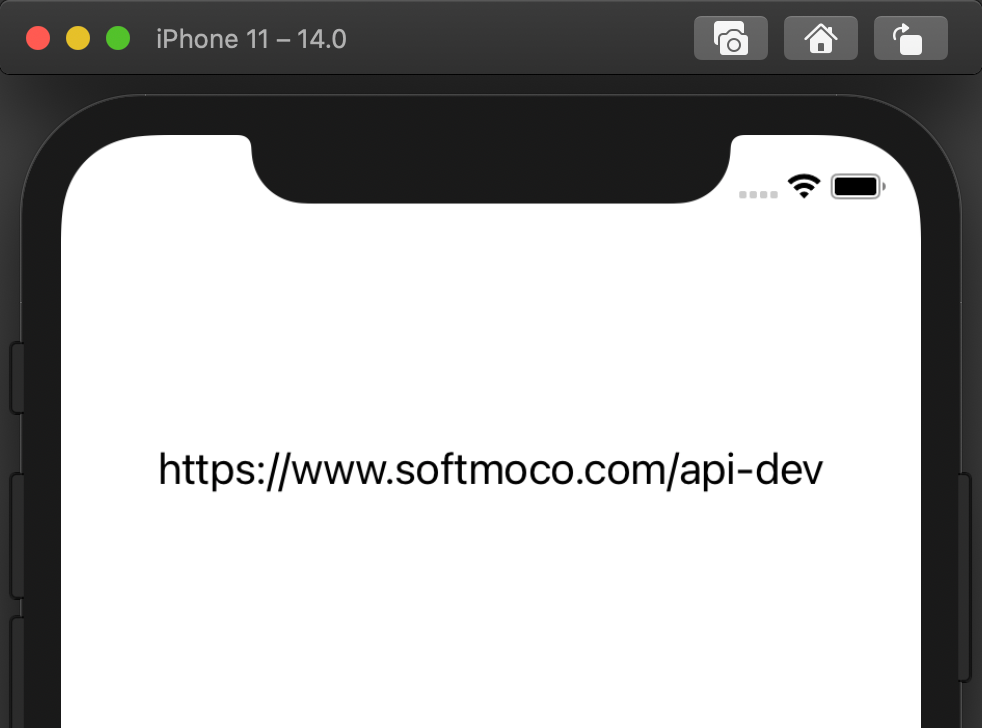
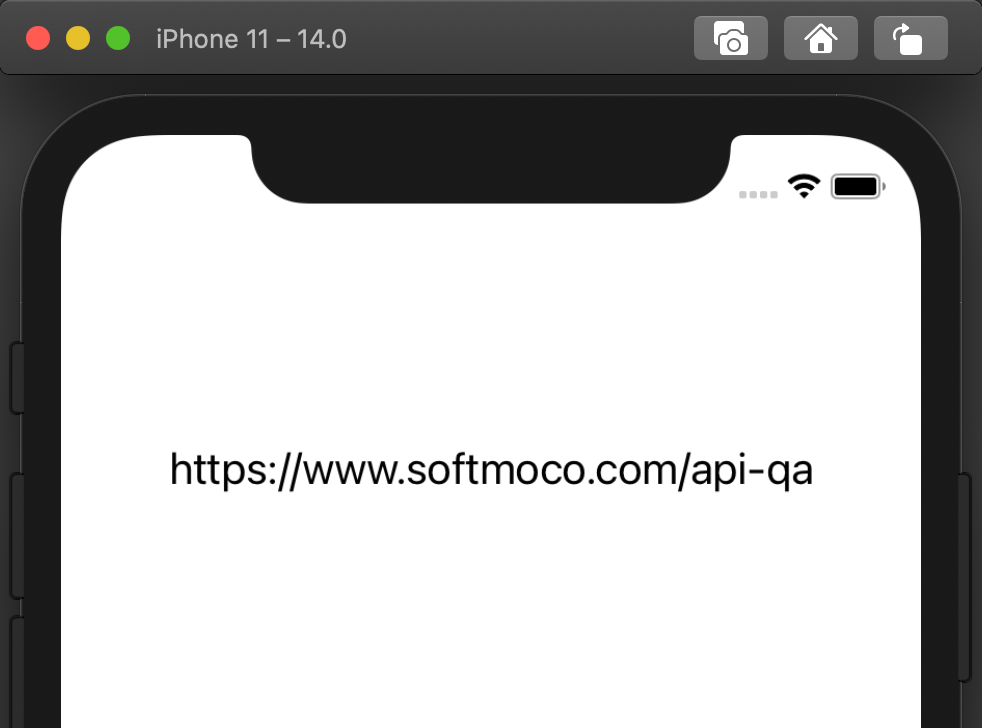
API_URL = www.softmoco.com/api-devAPI_URL = www.softmoco.com/api-qaAPI_URL = www.softmoco.com/api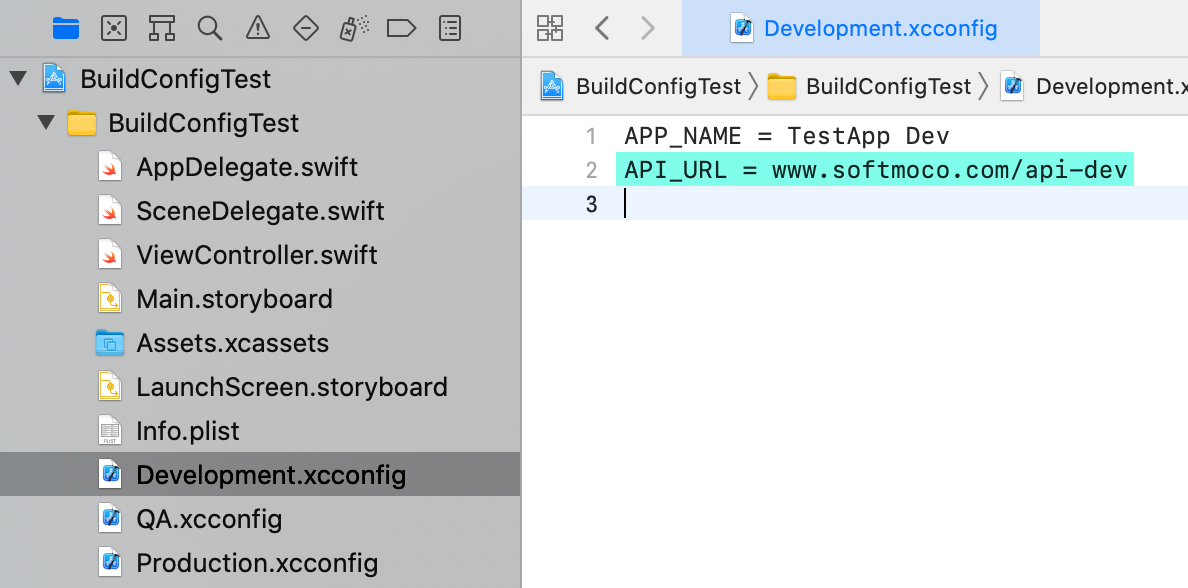
If you also want to include https://, note that everything after // is treated as a comment in xcconfig files. Work around this by inserting $(), e.g., https:/$()/www.softmoco.com.
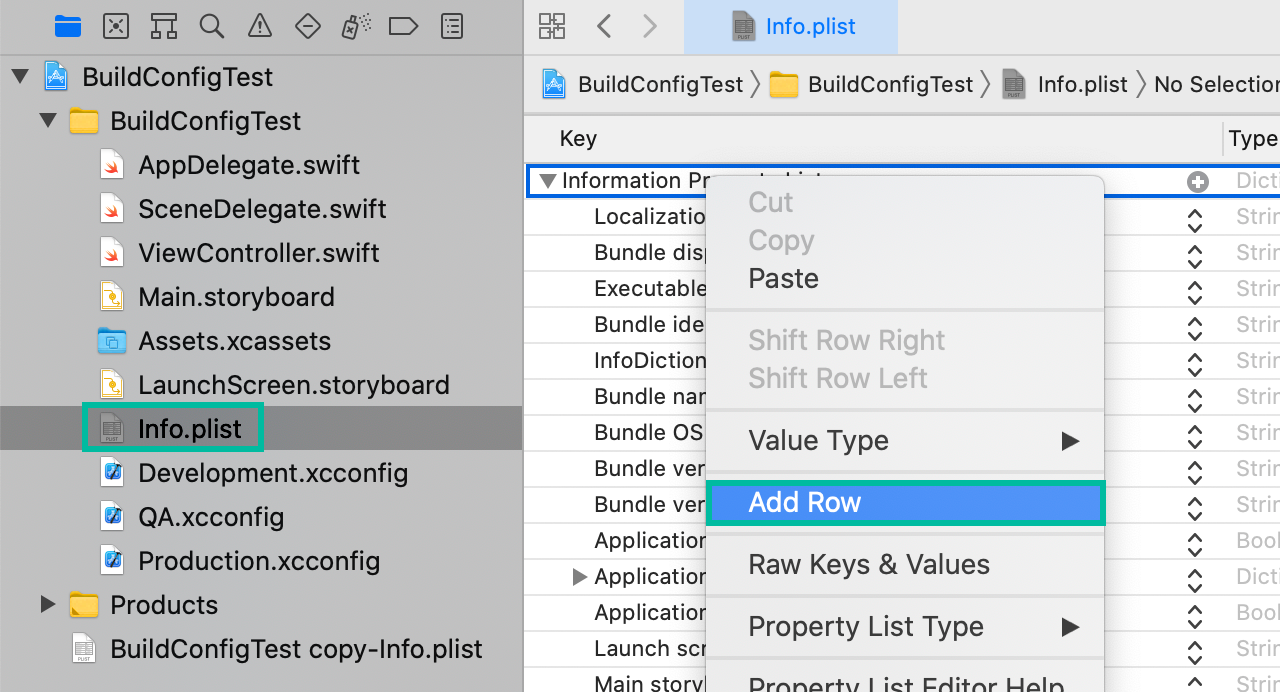
Add a new row named API URL to Info.plist and set its value to $(API_URL).
Then read it in Swift like any other Info.plist value:
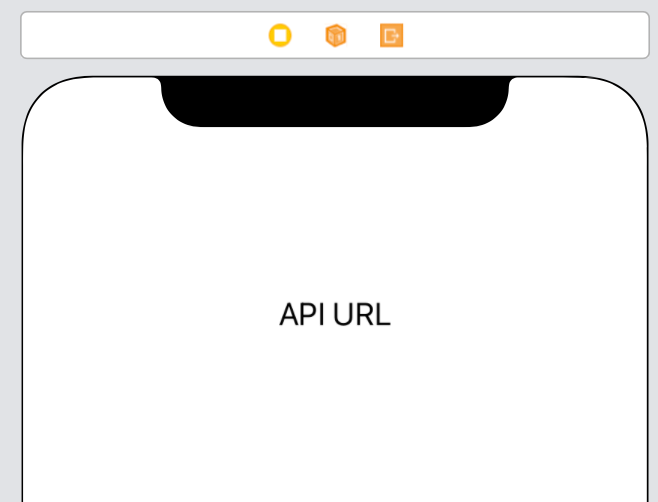
let apiURL = Bundle.main.object(forInfoDictionaryKey: "API URL") as? StringFor testing, place a UILabel and display apiURL as follows:
class ViewController: UIViewController {

    @IBOutlet weak var apiURLLabel: UILabel!

    override func viewDidLoad() {
        super.viewDidLoad()

        if let apiURL = Bundle.main.object(forInfoDictionaryKey: "API URL") as? String {
            apiURLLabel.text = "https://\(apiURL)"
        }
    }
}
Now, when you switch schemes and run in the simulator, you'll see that the URL changes according to the environment.
That's how to create and configure xcconfig files in Xcode for environment-specific settings.