How to Host an .ipa File for Ad Hoc Distribution (Over-the-Air)
This time, we'll use over-the-air distribution (downloading and installing the app via the internet) for Ad Hoc distribution.
This page explains how to host the necessary files such as the .ipa file (iOS app binary file) for Ad Hoc distribution.
This assumes that you have already generated and exported the .ipa file for Ad Hoc distribution using Xcode.
If not, please go back to the Ad Hoc Distribution menu and complete the previous steps first.
Prepare the Manifest File (.plist) for Ad Hoc Distribution
First, prepare the manifest file (.plist) for Ad Hoc distribution.
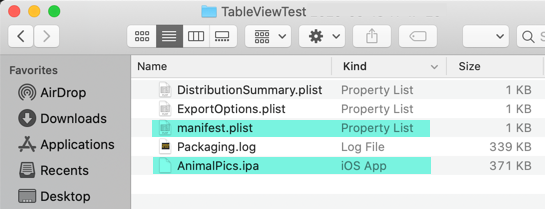
When you generated and exported the .ipa file from Xcode, you should have obtained a set of files like this:

For Ad Hoc distribution, you'll need to host the .plist file (manifest file) and the .ipa file (app binary file).
It's fine to rename these files. For example, I renamed TableViewTest.ipa to AnimalPics.ipa.
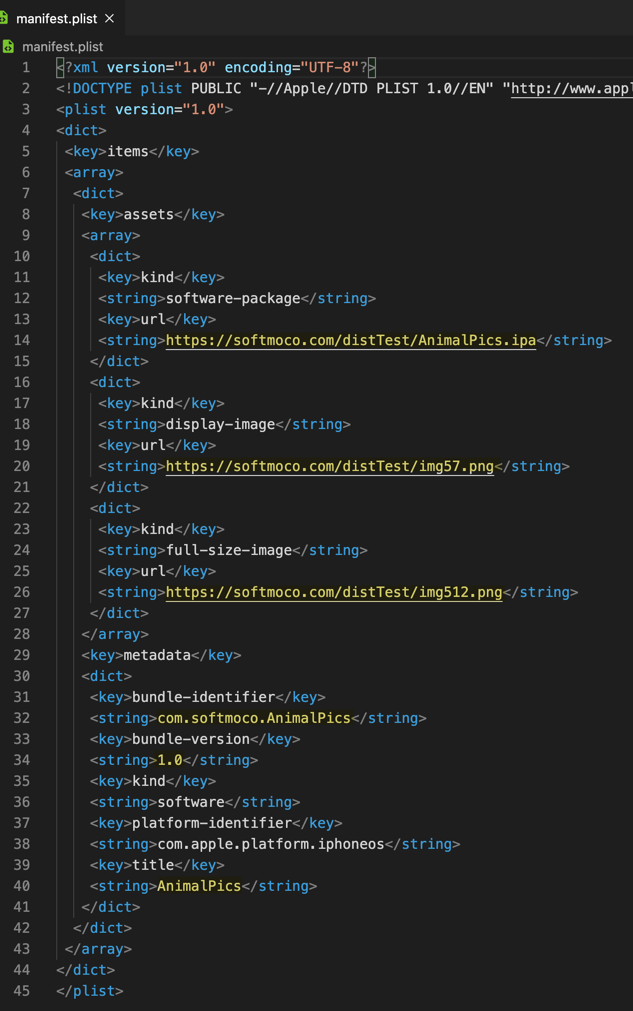
Open manifest.plist in a text editor. It should look like this:
Edit the highlighted parts on lines 14, 20, 26, 32, 34, and 40 as needed.
<?xml version="1.0" encoding="UTF-8"?>
<!DOCTYPE plist PUBLIC "-//Apple//DTD PLIST 1.0//EN" "http://www.apple.com/DTDs/PropertyList-1.0.dtd">
<plist version="1.0">
<dict>
 <key>items</key>
 <array>
  <dict>
   <key>assets</key>
   <array>
    <dict>
     <key>kind</key>
     <string>software-package</string>
     <key>url</key>
     <string>[https URL to ipa file]</string>
    </dict>
    <dict>
     <key>kind</key>
     <string>display-image</string>
     <key>url</key>
     <string>[https URL to 57x57 app icon]</string>
    </dict>
    <dict>
     <key>kind</key>
     <string>full-size-image</string>
     <key>url</key>
     <string>[https URL to 512x512 app icon]</string>
    </dict>
   </array>
   <key>metadata</key>
   <dict>
    <key>bundle-identifier</key>
    <string>[App Bundle ID]</string>
    <key>bundle-version</key>
    <string>[App Bundle Version]</string>
    <key>kind</key>
    <string>software</string>
    <key>platform-identifier</key>
    <string>com.apple.platform.iphoneos</string>
    <key>title</key>
    <string>[App Name]</string>
   </dict>
  </dict>
 </array>
</dict>
</plist>
All URLs must use https and must be accessible without errors or warnings.
The display-image and full-size-image sections are optional, but recommended.
For the AnimalPics app, I set it up like this:
- [ipa file URL]
https://softmoco.com/distTest/AnimalPics.ipa - [57x57 app icon URL]
https://softmoco.com/distTest/img57.png - [512x512 app icon URL]
https://softmoco.com/distTest/img512.png - [App Bundle ID]
com.softmoco.AnimalPics - [App Bundle Version]
1.0 - [App Name]
AnimalPics
Create and Host an HTML File with the Install Link
Next, create an HTML file with the install link.
Save the following file as index.html:
<!DOCTYPE html>
<html lang="en">
<head>
  <meta charset="UTF-8">
  <title>AnimalPics</title>
</head>
<body>
  <h1>
   <a href="itms-services://?action=download-manifest&url=https://softmoco.com/distTest/manifest.plist">AnimalPics アプリをインストールする</a>
  </h1>
</body>
</html>
The key part is line 9, where you add a link with itms-services to download and install the app.
<a href="itms-services://?action=download-manifest&url=[https URL to plist file]">Install App</a>
Again, the URL must be https and accessible without errors.
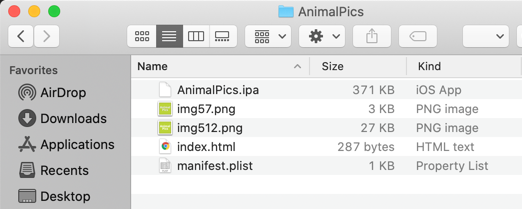
Also prepare the app icon images (57x57 and 512x512) in PNG format.
Upload all these files to your hosting server so they can be accessed at the specified URLs. In this example, everything was uploaded under https://softmoco.com/distTest/.
Install the iOS App on a Device via Ad Hoc Distribution
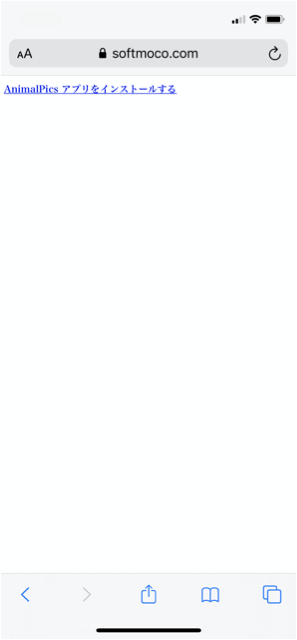
Now, let's install the app on an iPhone using Ad Hoc distribution.
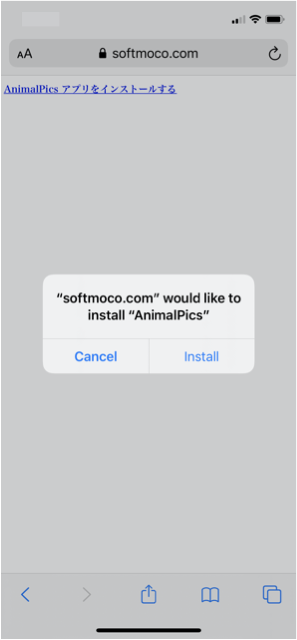
On a registered device, open the HTML file containing the install link in Safari and tap [Install AnimalPics (AnimalPics アプリをインストールする)].
A confirmation dialog will appear: "softmoco.com" would like to install "AnimalPics". Tap [Install].
The dialog will close, and you'll see the app installing on the Home screen.
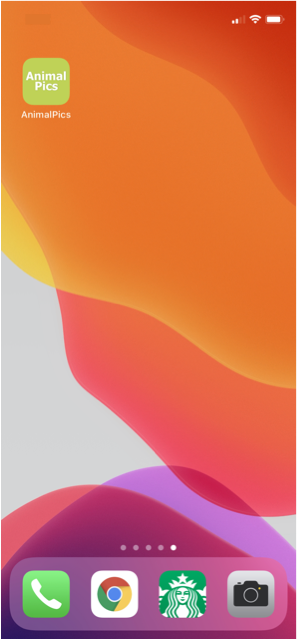
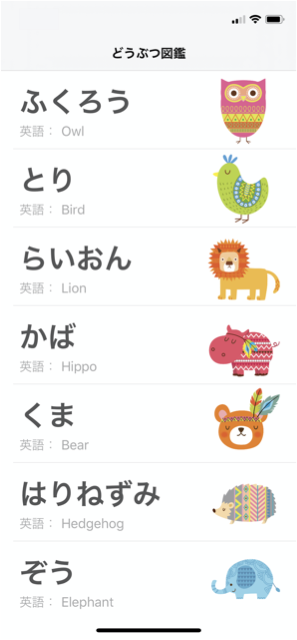
Once the installation completes, you can launch the AnimalPics app. The Ad Hoc installation is now successful.
Troubleshooting Over-the-Air Distribution Issues
If you're having trouble with over-the-air Ad Hoc distribution, here are some notes based on what I tested and confirmed.
If installation is working for you, you can skip this section.
Links to the .plist file, .ipa file, and image files must use https. If they don't, or if there are any errors or warnings, installation will fail.
If you are using a self-signed certificate, make sure to install both the root CA certificate and the intermediate CA certificate on each device.
When the .plist and related files are retrieved from the installation URL, information such as session IDs does not appear to be sent, unlike when accessing them through a browser.
If those files are located in a place that requires login, installation will not start.
If I added a query string after “.plist” in the installation link URL, the installation did not start.
Similarly, even if the installation link URL returned XML with the exact same content and content type as the manifest file—for example, https://www.test.com/GetManifestFile—installation still failed.
Based on my testing, the manifest file URL must end with “.plist” or installation will not start.
However, it was fine to append a query string after the .ipa URL (or other file URLs) inside the manifest file, and installation also worked with URLs such as https://www.test.com/GetBinaryFile.
If you are hosting files directly on a web server such as IIS and cannot access them in a browser, check the server's MIME type settings. Make sure .ipa is set to application/octet-stream and .plist is set to application/xml or text/html. Add them if they are missing.
If your program reads binary files or dynamically generates the manifest file for download, also ensure that the response content type is set as described above.
That wraps up our explanation of how to host .ipa files and related assets for Ad Hoc distribution.