How to Configure a Provisioning Profile in Xcode
To distribute an iOS app via Ad Hoc distribution, you need to generate an Ad Hoc Provisioning Profile and configure it in Xcode under Signing.
This page explains how to set up an Ad Hoc Provisioning Profile in Xcode.
If you haven't generated a Provisioning Profile yet, please go back to the Ad Hoc Distribution menu and create one first.
Set the Ad Hoc Provisioning Profile in Xcode
Let's start by configuring the Ad Hoc Provisioning Profile in Xcode.
This guide assumes that the account used to create the Provisioning Profile is already added to Xcode. If it is not registered yet, go to Xcode > Preferences > Accounts and add it first.
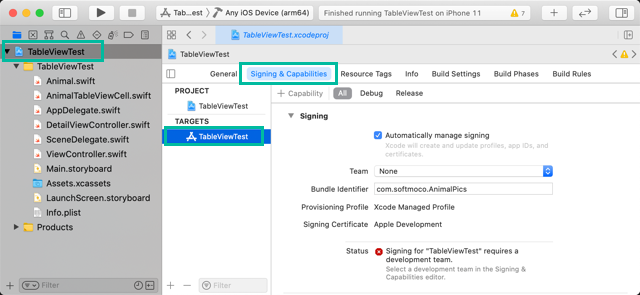
Open the iOS app project you want to distribute in Xcode—the same one associated with the App ID you selected when generating the Provisioning Profile.
In the left navigator area, click the project name at the top, then under TARGETS select your app target, and open the Signing & Capabilities tab.
Uncheck Automatically manage signing, then click [Download Profile...] under Provisioning Profile.
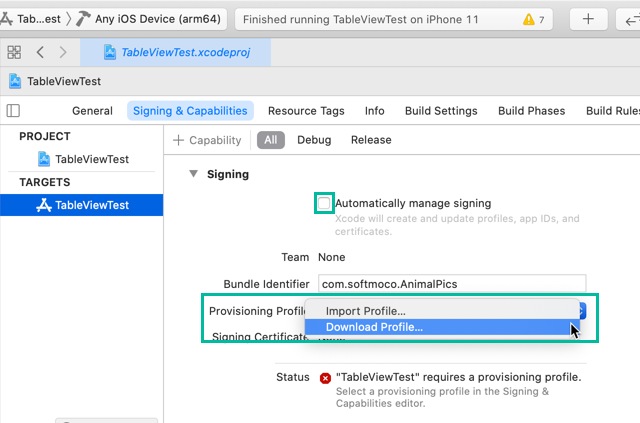
A selection window will appear. Choose the Ad Hoc Provisioning Profile you generated and click [Select Profile].
You might see an X mark at this point, but don't worry—it will be resolved shortly.

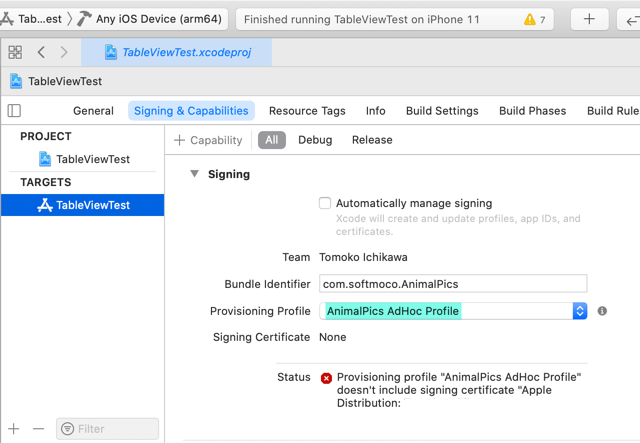
The Ad Hoc Provisioning Profile is now downloaded and configured.
Configure the Ad Hoc Distribution Certificate in Xcode
You may see an error message indicating that the Provisioning Profile does not include a distribution certificate. Let's configure the certificate to resolve this.
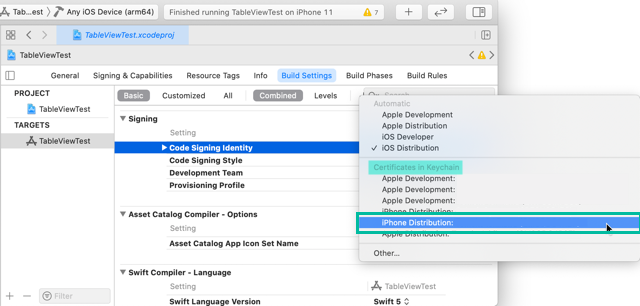
With your app target still selected, go to the Build Settings tab.
Under the Signing section, click Code Signing Identity.
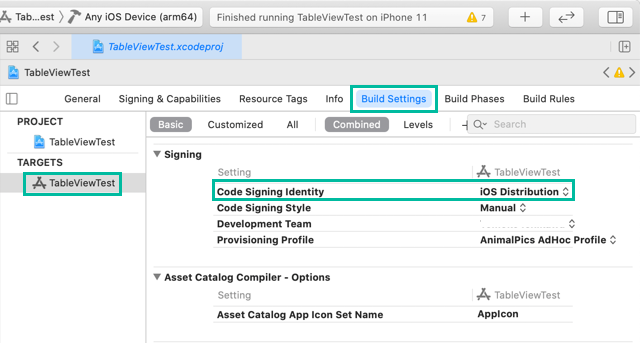
You will see a list of available certificates. Select the Ad Hoc distribution certificate that you installed on your Mac earlier.
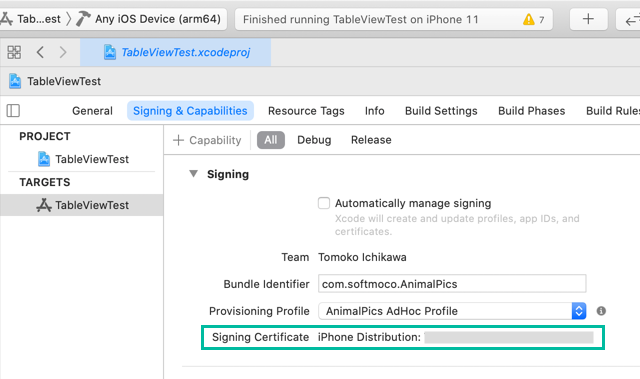
Go back to the Signing & Capabilities tab. The Signing Certificate error should now be gone.
If the error still remains, check Keychain Access to make sure the same certificate isn't installed multiple times. If duplicates exist, remove them so that only one copy remains.
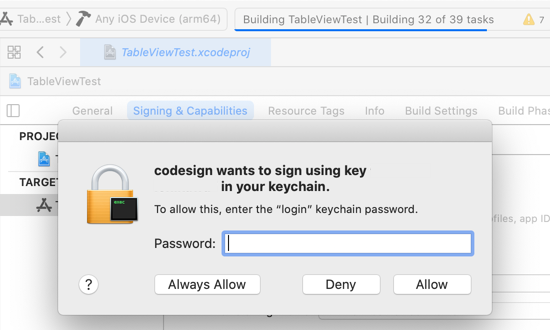
Try building the project once to confirm there are no errors. You may be asked for Keychain access—allow it.
That's it! You have successfully set up the Ad Hoc Provisioning Profile and certificate in Xcode.