How to Send Push Notifications Using Node.js (JWT Authentication)
To send Push Notifications, you need to connect to the Apple Push Notification service (APNs) using HTTP/2 and TLS 1.2 or later, and send a POST request.
In this article, we'll show you a sample code for sending Push Notifications with Node.js using jsonwebtoken.
If you haven't generated an APNs Key or created an iOS app to receive Push Notifications yet, please refer to How to Implement Push Notifications (Swift) - JWT Token Method first.
How to Send Push Notifications Using Node.js - JWT Token Method
First, create a new folder, move into it in the terminal, initialize a new npm package, and install jsonwebtoken with the following commands:
mkdir apns-test
cd apns-test
npm init -y
npm install jsonwebtoken
Next, create a file named send.js in the same folder, and copy the following code into it:
const fs = require('fs');
const http2 = require('http2');
const jwt = require('jsonwebtoken');

const authKeyPath = './AuthKey_XXXXXXXXXX.p8'; // Path to .p8 file
const keyId = 'XXXXXXXXXX';                    // Key ID
const teamId = 'XXXXXXXXXX';                   // Team ID
const bundleId = 'com.softmoco.PushTest';      // App Bundle ID
const deviceToken = 'xxxxxxxxxxxxxxxxxxxxxxxxxxxxxxxxxxxxxxxxxxxxxxxxxxxxxxxxxxxxxxx';

const privateKey = fs.readFileSync(authKeyPath);

const jwtToken = jwt.sign(
  { iss: teamId, iat: Math.floor(Date.now() / 1000) },
  privateKey,
  {
    algorithm: 'ES256',
    header: { alg: 'ES256', kid: keyId }
  }
);

const client = http2.connect('https://api.sandbox.push.apple.com');

const request = client.request({
  ':method': 'POST',
  ':path': `/3/device/${deviceToken}`,
  'authorization': `bearer ${jwtToken}`,
  'apns-topic': bundleId,
  'content-type': 'application/json'
});

request.setEncoding('utf8');

let response = '';
request.on('data', chunk => { response += chunk; });
request.on('end', () => {
  console.log('Response:', response);
  client.close();
});

const payload = {
  aps: {
    alert: {
      title: 'Hello',
      body: 'Softmoco Push Notification Test 123!!'
    },
    sound: 'default',
    badge: 1
  }
};

request.write(JSON.stringify(payload));
request.end();
In line 5, set authKeyPath to the path of the .p8 file you generated and downloaded in How to Generate an APNs Key.
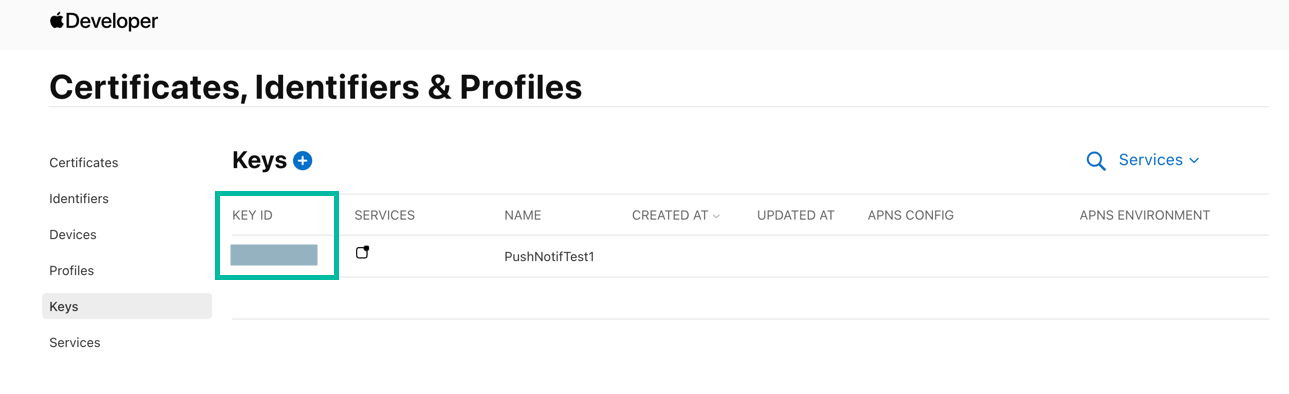
In line 6, set the Key ID, which you can find in the Keys section of your Apple Developer account.
In line 7, set the Team ID, which is displayed in multiple places in your Apple Developer account, including under Membership details.


In line 8, set the App Bundle ID to match the one specified in your App ID and in the iOS app that receives Push Notifications.
In line 9, set deviceToken to the one obtained in Creating an iOS App to Receive Push Notifications.
In line 11, the private key is read from the .p8 file.
Lines 13–20 generate a signed JWT.
Lines 22–39 establish an HTTP/2 connection, set the headers and encoding, handle the response, and close the client.
Lines 41–50 define the payload for the notification, including the title, body, sound, and badge.
Finally, lines 52–53 send the payload and end the request.
Run the file in your terminal with:
node send.js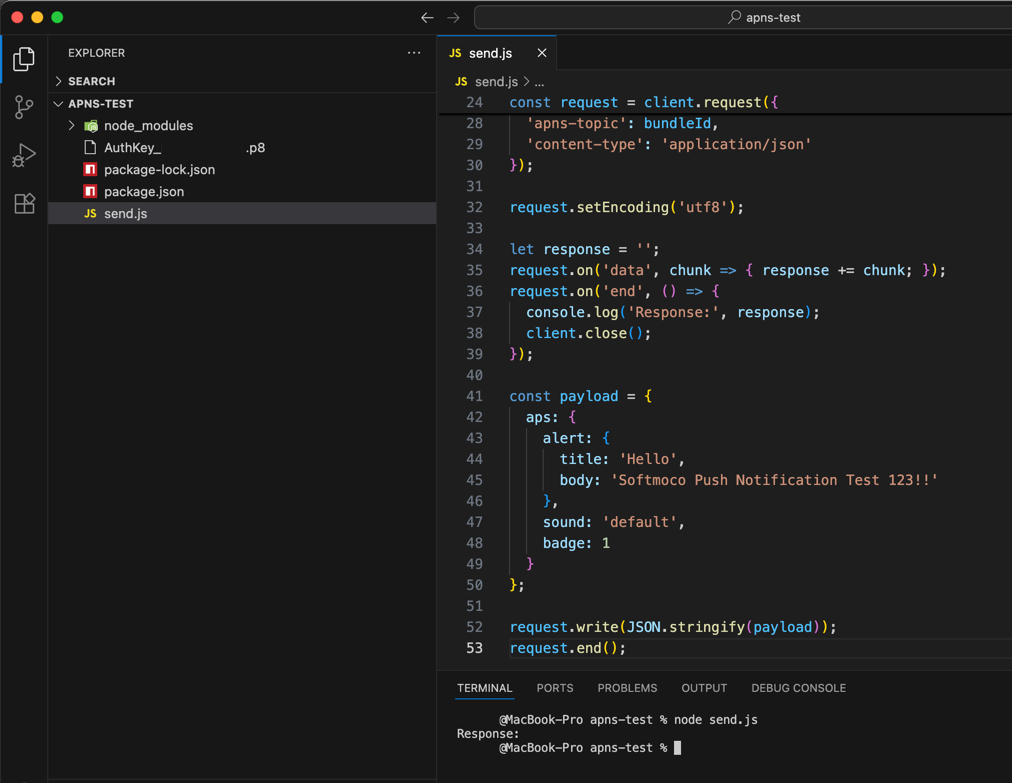
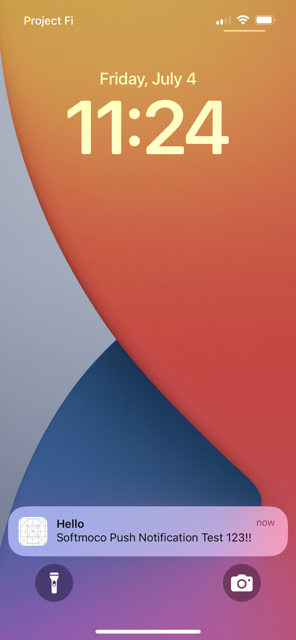
You should now receive the Push Notification in the PushTest (com.softmoco.PushTest) iOS app you created earlier here.
That's it! You've learned how to send Push Notifications using Node.js with JWT token authentication.