How to Send Push Notifications Using curl
To send Push Notifications, you need to connect to the Apple Push Notification service (APNs) using HTTP/2 and TLS 1.2 or later, and send a POST request.
You can use any method to implement the POST request, but here we will demonstrate how to send a Push Notification from the command line on a development Mac using curl for testing purposes.
If you have not yet generated and installed an Apple Push Notification service certificate or created an iOS app to receive Push Notifications, please complete those steps first by referring to How to Implement Push Notifications.
Export a p12 File from the Certificate and Convert It to a pem File
To send Push Notifications, you must use either certificate-based or token-based authentication.
In this example, we will use certificate-based authentication.
When using curl to send Push Notifications, a certificate in pem format is required.
First, export a p12 file from the Apple Push Notification service certificate that you generated in How to Generate an APNs Certificate and installed on your Mac.
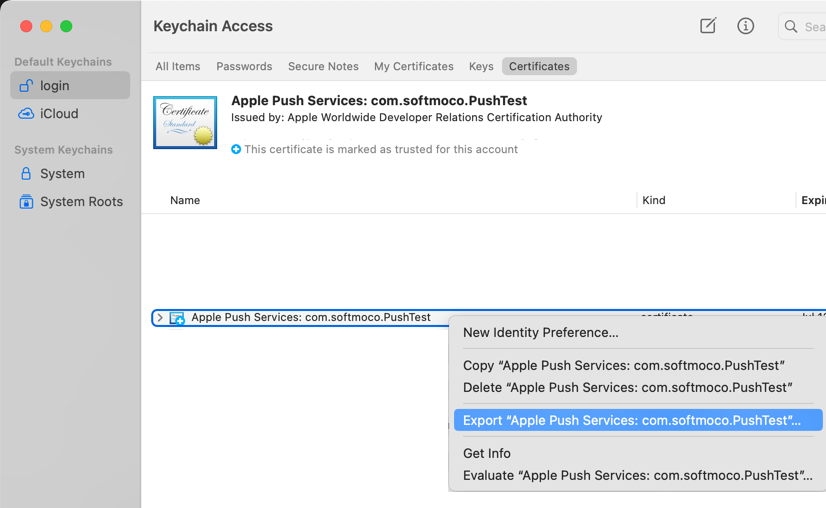
In Keychain Access, select the installed Apple Push Notification service certificate, right-click it, and choose Export…
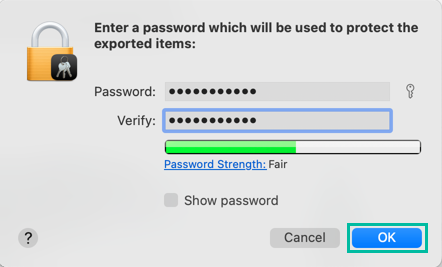
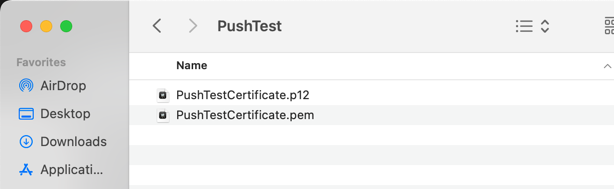
Save the file in p12 format. Here we named it PushTestCertificate.p12.

Enter a password and click OK.
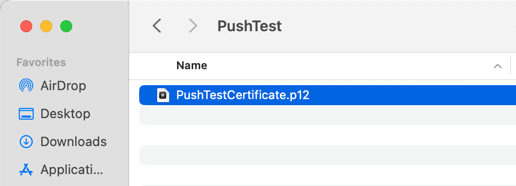
The Apple Push Notification service certificate has now been exported as a p12 file.
Next, use OpenSSL in the Mac terminal to convert the saved p12 file into a pem file with the following command:
openssl pkcs12 -in PushTestCertificate.p12 -out PushTestCertificate.pem -nodes -clcertsYou will be prompted for the Import Password. Enter the password you set when exporting the p12 file.
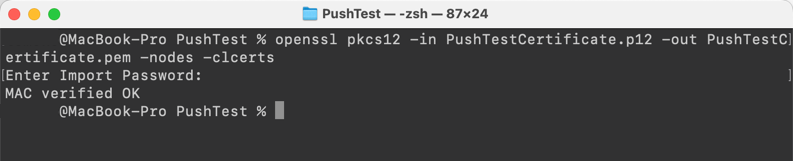
The pem file has now been successfully generated from the p12 file.
Send Push Notifications to APNs Using curl
curl is a command-line tool for transferring data.
You can send a Push Notification using curl as follows:
curl -E "[path to pem file]" -H "apns-topic: [Bundle Identifier]" -d '[push notification payload]' --http2 https://api.sandbox.push.apple.com:443/3/device/[device token]The -E option specifies the certificate, -H adds a header, and -d specifies the POST data.
The --http2 option ensures that HTTP/2 is used.
The URL is the APNs server URL plus /3/device/[device token].
The current APNs servers are:
- Development server: api.sandbox.push.apple.com:443
- Production server: api.push.apple.com:443
Use the device token obtained in How to Build an iOS App that Receives Push Notifications.
Specify the pem file path generated earlier (e.g., PushTestCertificate.pem).
In the header, set the value of apns-topic to the Bundle Identifier you configured in Set the Bundle Identifier in Xcode (e.g., com.softmoco.PushTest).
For this example, we will send the following payload:
{
  "aps": {
    "alert": "Softmoco Push Notification Test 123!!",
    "sound": "default",
    "badge": 1
  }
}
Now, run the following command in the Mac terminal to actually send the Push Notification:
curl -E "/Users/user1/Desktop/PushTest/PushTestCertificate.pem" -H "apns-topic: com.softmoco.PushTest" -d '{"aps":{"alert":"Softmoco Push Notification Test 123!!","sound":"default","badge":1}}' --http2 https://api.sandbox.push.apple.com:443/3/device/xxxxxxxxxxxxxxxxxxxxxxxxxxxxxxxxxxxxxxxxxxxxxxxxxxxxxxxxxxxxxxx
The Push Notification was successfully received on the PushTest (com.softmoco.PushTest) iOS app created earlier.

That's all for how to send Push Notifications using curl.