How to Send Push Notifications Using Node.js
To send Push Notifications, you need to connect to the Apple Push Notification service (APNs) using HTTP/2 and TLS 1.2 or later, and send a POST request.
In Sending Push Notifications with curl, we tested sending notifications from the command line using curl. Here, we'll demonstrate how to send Push Notifications with Node.js using the Apple Push Notification module for Node.js (node-apn).
If you haven't generated and installed an APNs certificate or created an iOS app to receive Push Notifications yet, please complete those steps first by following How to Implement Push Notifications.
With curl, we had to convert the certificate from p12 to pem format. However, when sending with node-apn, you can use the p12 file directly.
If you haven't exported a p12 file yet, please refer to Export a p12 File from the Certificate and Convert It to a pem File.
How to Send Push Notifications Using Node.js
First, create a new folder, move into it in the terminal, and install the Apple Push Notification module for Node.js with the following command:
npm install apn --saveNext, create a file named send.js in the same folder, and copy the following code:
var apn = require('apn');

var deviceToken = 'xxxxxxxxxxxxxxxxxxxxxxxxxxxxxxxxxxxxxxxxxxxxxxxxxxxxxxxxxxxxxxx';

var options = {
 pfx: '/Users/user1/Desktop/PushTestCertificate.p12',
 passphrase: 'password',
 production: false,
};

var provider = new apn.Provider(options);

let notif = new apn.Notification();
notif.alert = 'Softmoco Push Notification Test 123!!';
notif.topic = 'com.softmoco.PushTest';
notif.badge = 1;
notif.sound = 'default';

provider.send(notif, [deviceToken]).then((result) => {
 console.log('sent:', result.sent.length);
 console.log('failed:', result.failed.length);
 console.log(result.failed);
});

provider.shutdown();
For deviceToken, use the one you obtained in Creating an iOS App to Receive Push Notifications.
In options, specify the path to the exported PushTestCertificate.p12 in pfx, and the password you entered during export in passphrase.
On line 11, the options object is passed to create a new apn.Provider instance.
On lines 13–17, a new apn.Notification object named notif is defined, where you configure the payload of the push notification, such as alert, topic, badge, and sound.
For notif.topic, specify the Bundle Identifier you set earlier in Setting the Bundle Identifier in Xcode, e.g., com.softmoco.PushTest.
On line 19, provider.send() sends the notification to APNs.
Run the file in the terminal with:
node send.js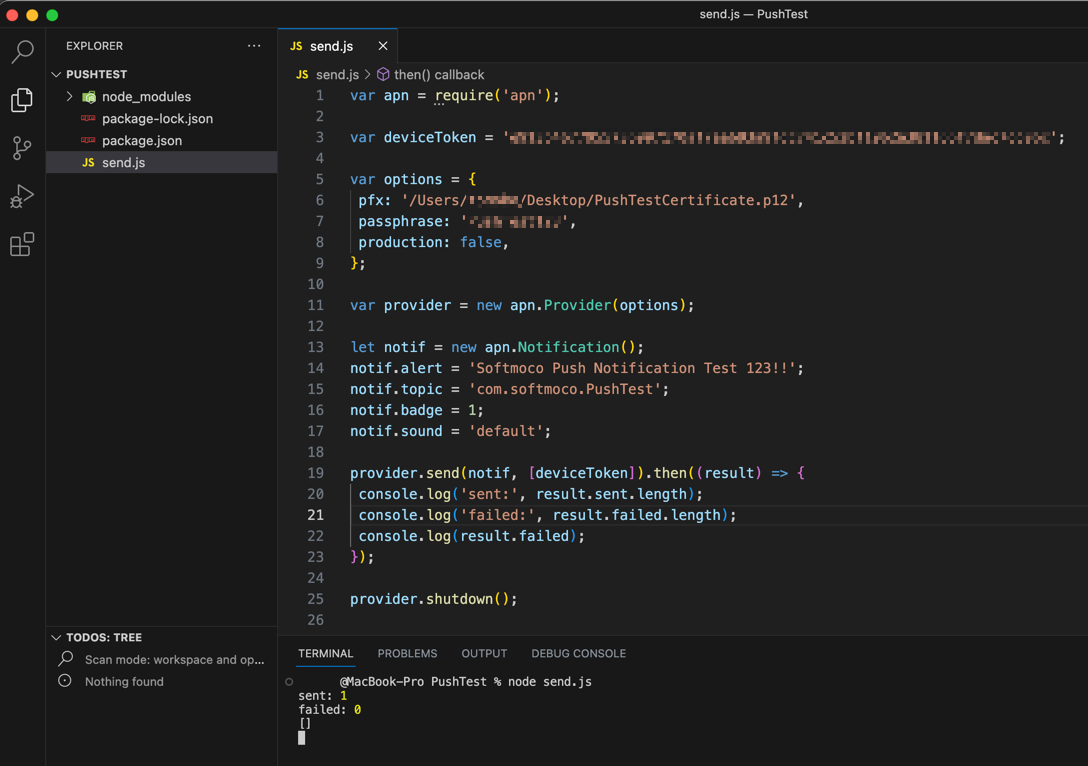
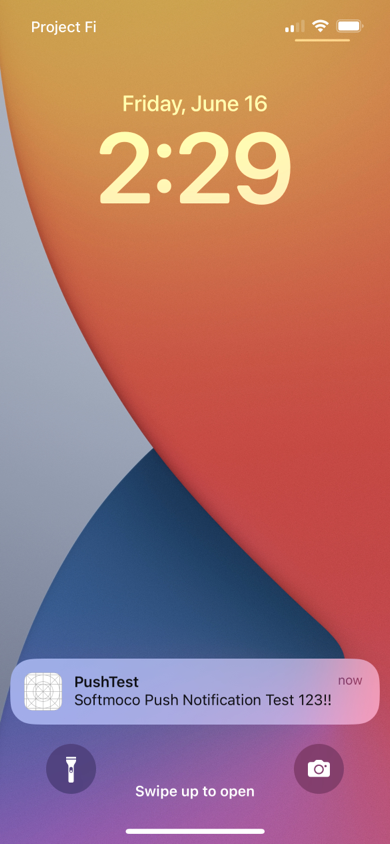
You should now receive the Push Notification in the PushTest (com.softmoco.PushTest) iOS app you created earlier here.
That's it! You've learned how to send Push Notifications using Node.js with certificate-based authentication.