Xcode で App Store 配布用 Provisioning Profile を設定する方法
iOS アプリを TestFlight で 配布するには、App Store 配布用の Provisioning Profile を生成して Xcode の Signing に設定する必要があります。
ここでは、Xcode で App Store 配布用の Provisioning Profile を設定する方法をご説明します。
まだ Provisioning Profile を生成していない方は TestFlight 配布 のメニューに戻って生成してください。
Xcode で App Store 配布用の Provisioning Profile を設定する
App Store 配布用の Provisioning Profile を Xcode で設定します。
Xcode に Provisioning Profile を作った Account が既に設定されている前提ですすめます。登録されていない方はメニューから Xcode > Preferences > Accounts で登録してください。
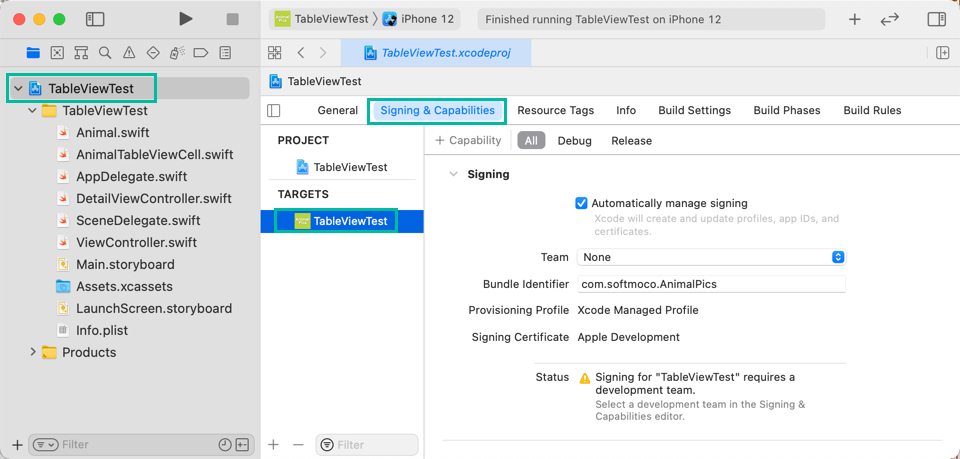
Provisioning Profile を生成する際に App ID を選択した、配布したい iOS アプリのプロジェクトを Xcode で開きます。
左側のナビゲーターエリアの上のプロジェクト名をクリックし、TARGETS のプロジェクト名をクリックし、Signing & Capabilities タブをクリックします。
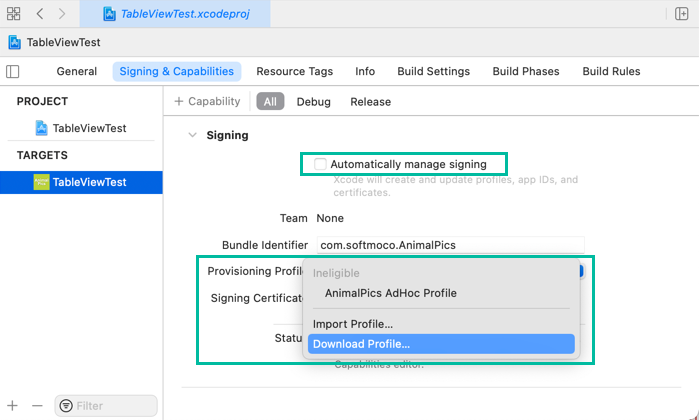
Automatically manage signing のチェックをはずし、Provisioning Profile で [Download Profile...] を選択します。
Provisioning Profile を選択する画面が出てきますので、生成した App Store 配布用の Provisioning Profile を選択して [Select Profile] をクリックします。
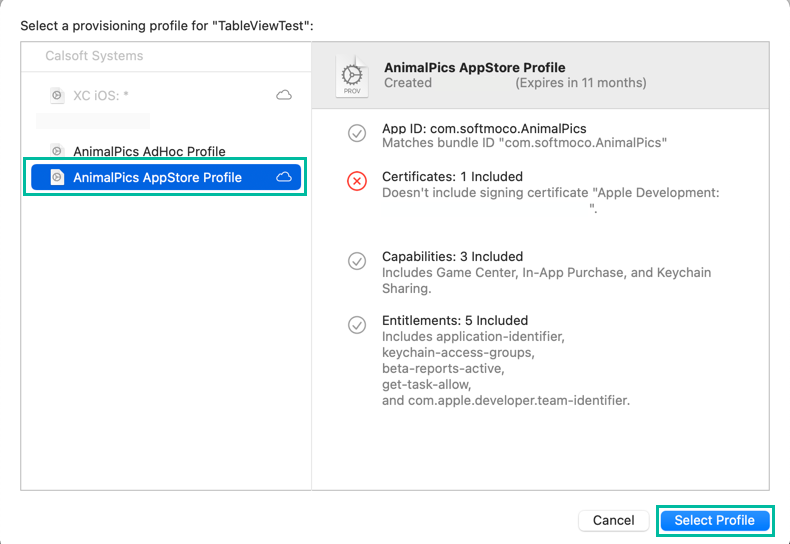
App Store 配布用の Provisioning Profile がダウンロードされ、設定されました。

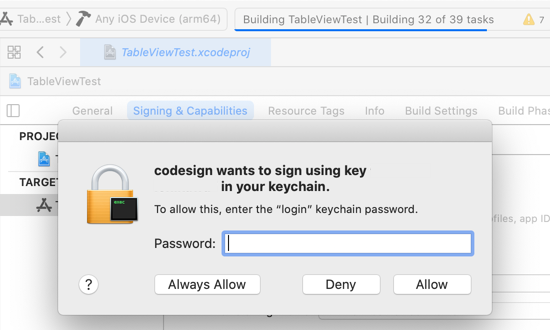
試しに一度 Build して、エラーが出ないか確認しておきます。 Keychain のアクセスを求められたら許可してください。
以上、Xcode で App Store 配布用の Provisioning Profile を設定する方法をご説明しました。